适用于:Azure Local 2311.2 及更高版本
本文介绍如何使用 Azure CLI 准备 Red Hat Enterprise Linux 映像并创建 Azure 本地虚拟机(VM)。
Prerequisites
- 有权访问 Azure 本地实例。 此系统已部署、注册并连接到 Azure Arc。请转到 Azure 本地资源中的“概述”页。 在右侧窗格的“服务器”选项卡上,Azure Arc 应显示为“已连接”。
- 在 Azure 本地实例上下载最新的受支持的 Red Hat Enterprise 服务器映像。 我们支持所有 Red Hat Enterprise Linux 7.x、8.x 和 9.x 版本。 在这里,我们下载了 rhel-9.4-x86_64-boot.iso 文件。
工作流程
若要准备 Red Hat Enterprise Linux 映像并从中创建 Azure 本地虚拟机映像,请执行以下操作:
以下部分提供了工作流中每个步骤的详细说明。
从 Red Hat Enterprise 映像创建 VM 映像
重要说明
- 不要使用 Azure VM 中的虚拟硬盘来准备 Azure 本地 VM 映像。
- 如果要在 VM 上启用来宾管理,建议准备 Red Hat Enterprise 映像。
按照 Azure 本地系统上的步骤,使用 Azure CLI 创建 VM 映像。
步骤 1:创建 Red Hat Enterprise VM
按照以下步骤使用下载的 Red Hat Enterprise 映像预配 VM。
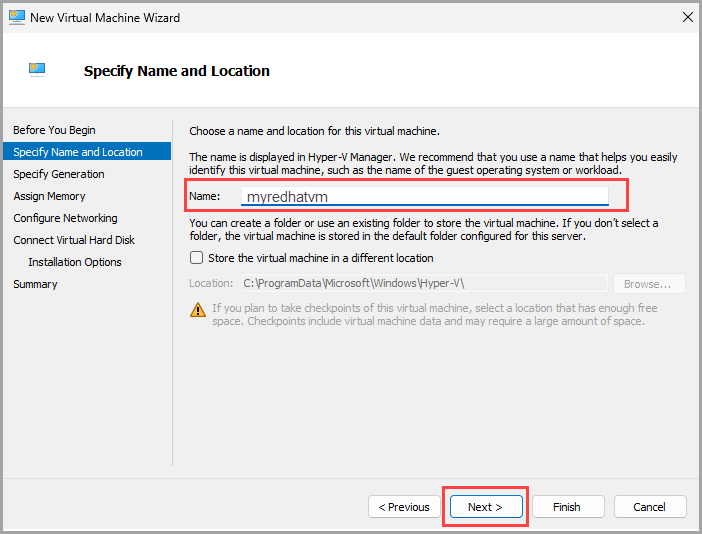
使用以下规范设置 VM:
为 VM 提供一个易记名称。
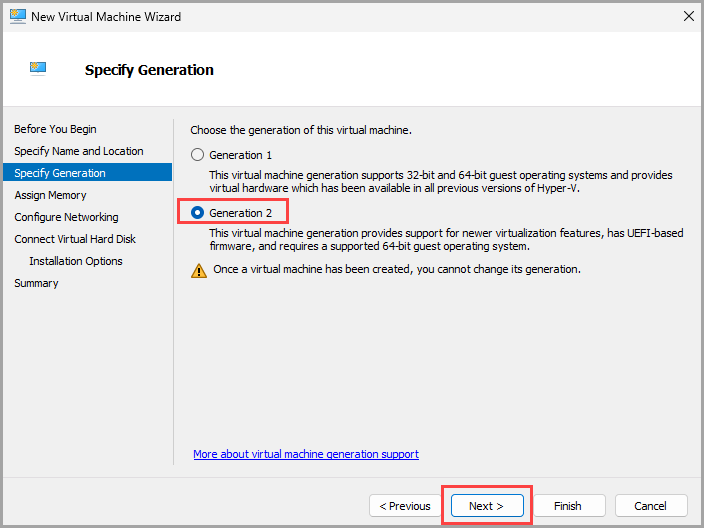
在此处使用虚拟硬盘 v2 (VHDX) 映像时,请为 VM 指定 Generation 2。
选择“分配内存”,然后输入 4096 用于“启动内存”。

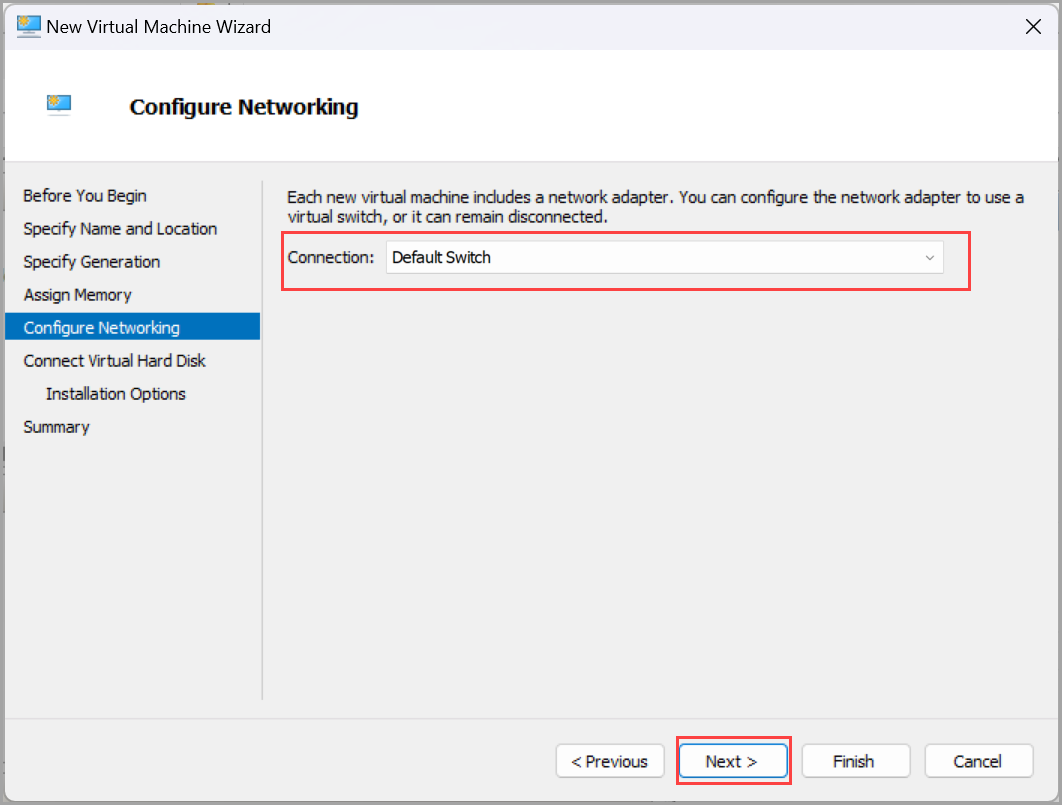
选择“配置网络”。 从下拉列表中选择 VM 用于连接的虚拟交换机。
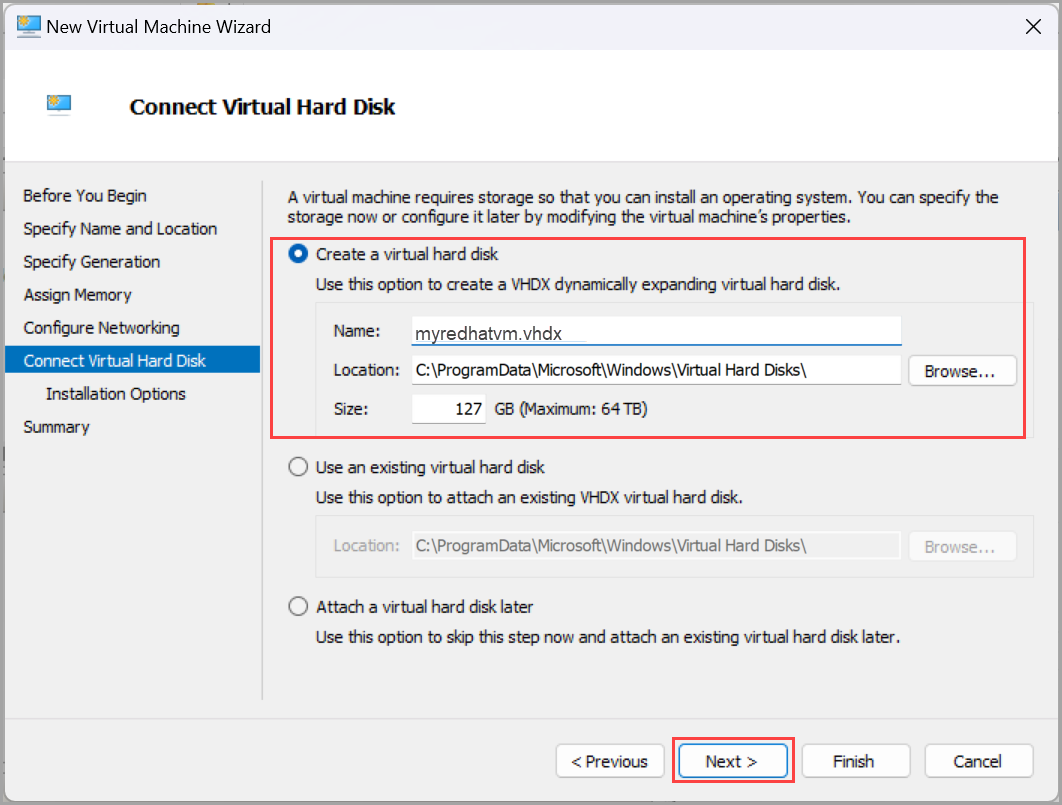
接受“连接虚拟硬盘”页上的默认值。
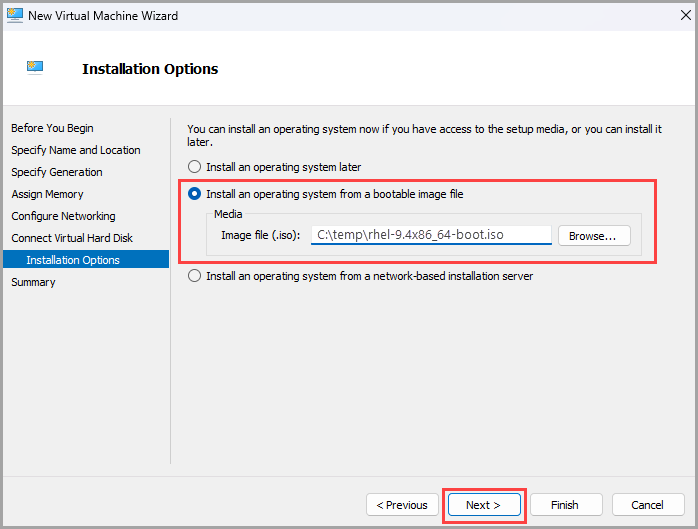
选择“安装选项”,然后选择“从可启动映像文件安装操作系统”。 指向之前下载的 ISO。
有关分步说明,请参阅使用 Hyper-V 管理器预配 VM。
使用 UEFI 证书安全启动 VM。
创建 VM 后,它将显示在 Hyper-V 管理器中。 选择 VM,右键单击它,然后选择“设置”。
在左窗格中,选择“安全”选项卡。然后,在“安全启动”下,在模板下拉列表中选择“Microsoft UEFI 证书颁发机构”。
选择“确定”以保存更改。

从“Hyper-V 管理器”中选择 VM,然后启动 VM。 从提供的 ISO 映像启动该 VM。


步骤 2:连接到 VM 并安装 Red Hat 操作系统
运行 VM 后,请执行以下步骤:
从 Hyper-V 管理器中选择 VM,右键单击它以打开菜单,然后选择“连接”。
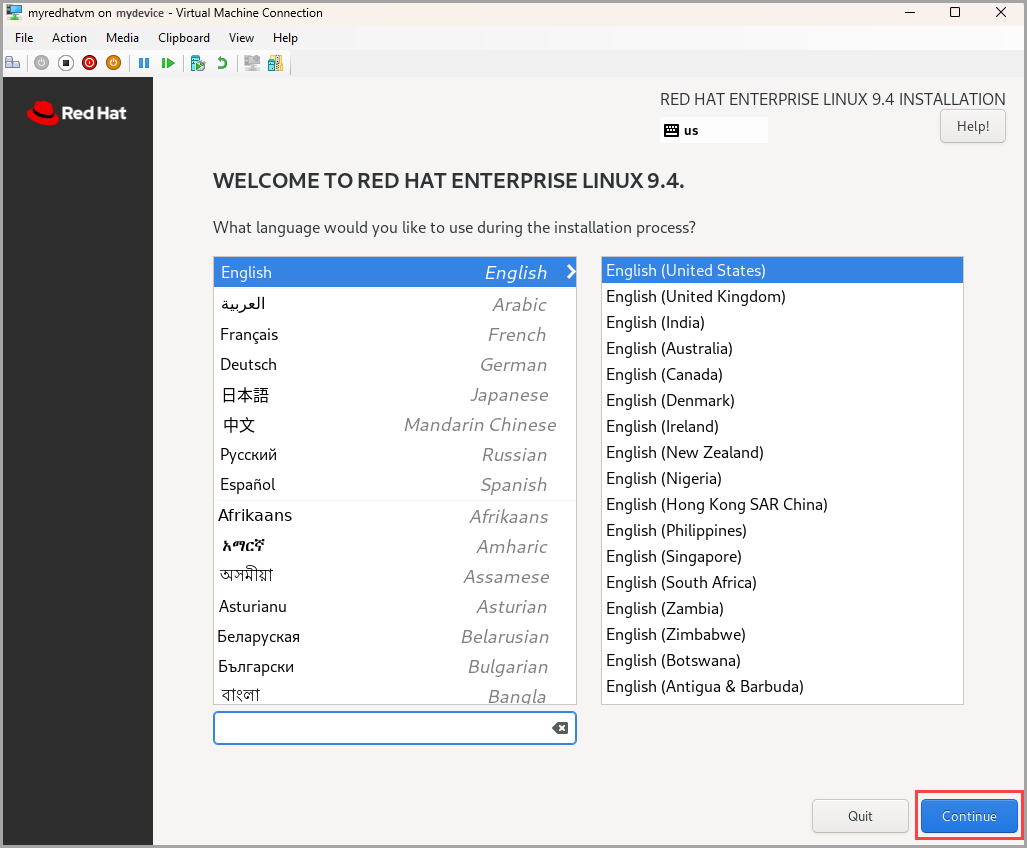
从启动菜单中选择“安装 Red Hat Enterprise Linux 9.4”。
选择语言,然后选择“继续”。
在“安装摘要”页上,你可能会看到其他可操作的项目。
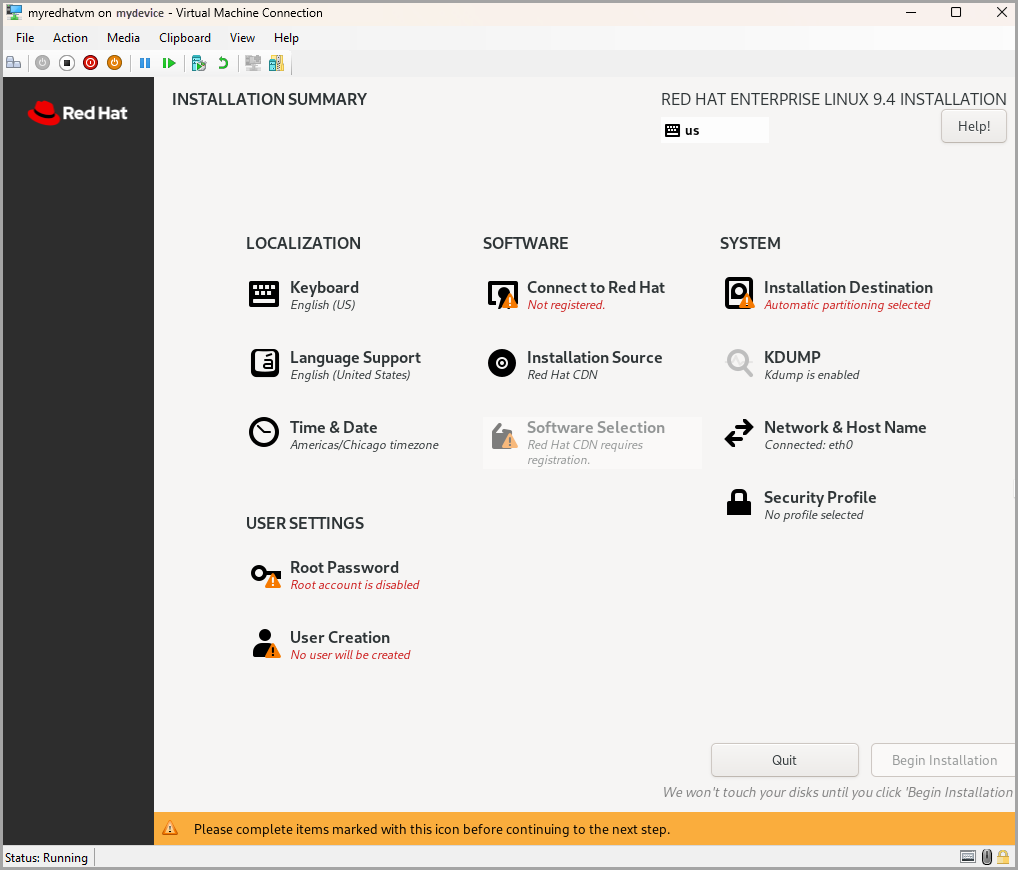
选择“连接到 Red Hat”并创建凭据。 选择“注册”,然后选择“完成”。

选择“软件选择”,保留默认值,然后选择“已完成”。

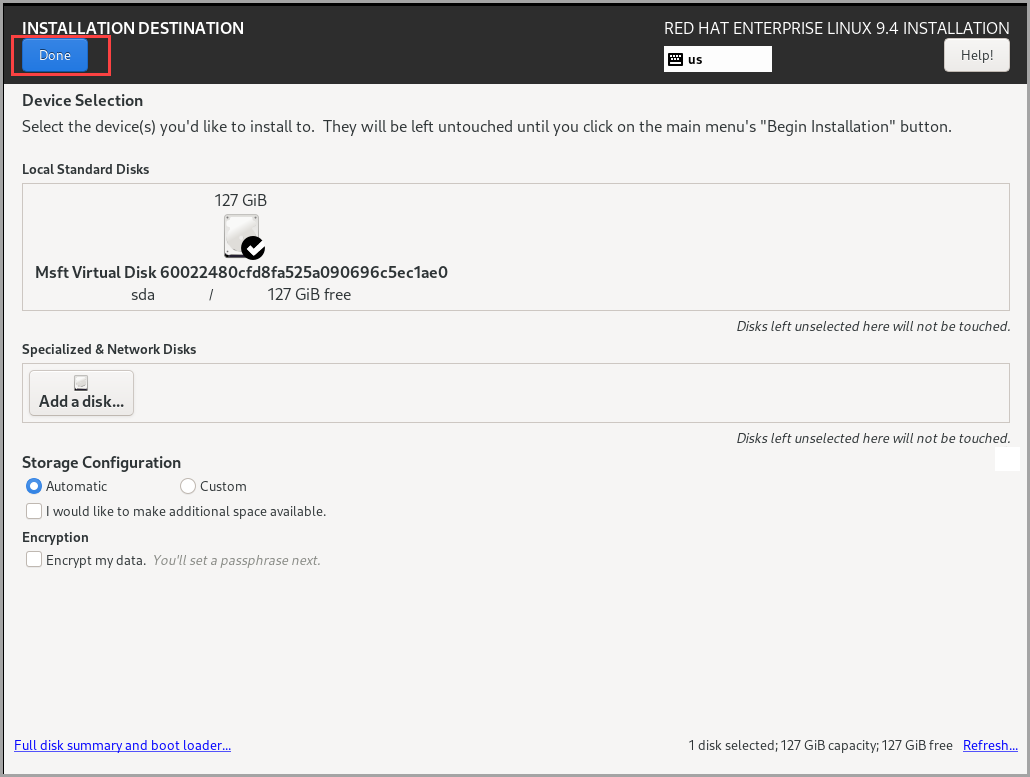
选择“安装目标”,然后选择“完成”。
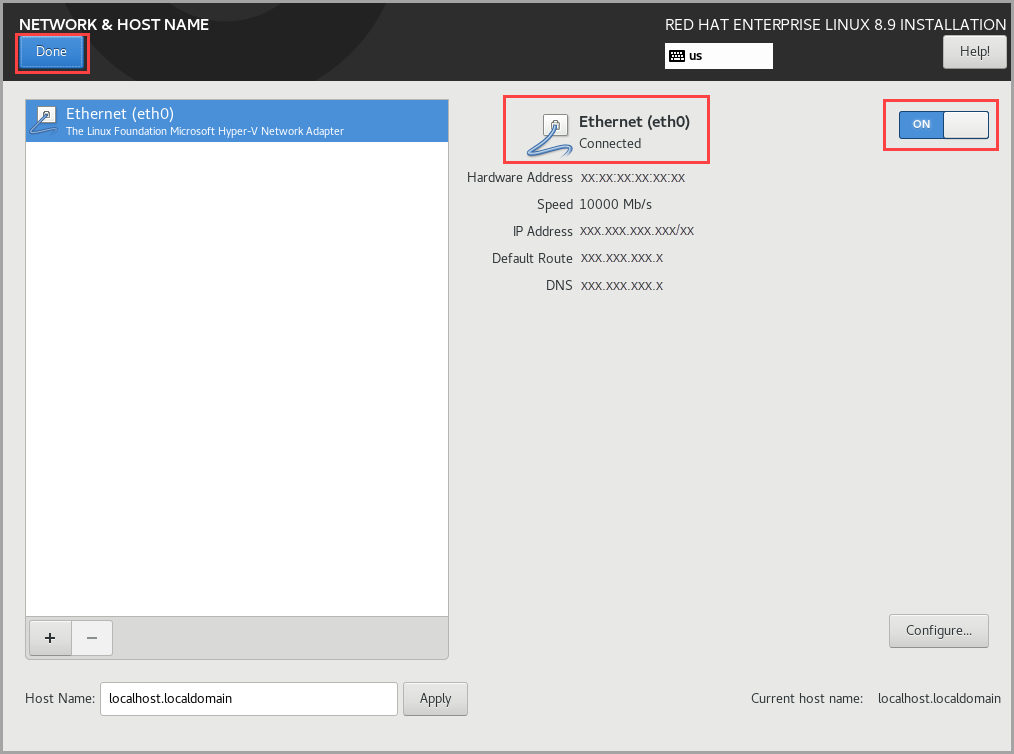
选择“网络和主机名”。
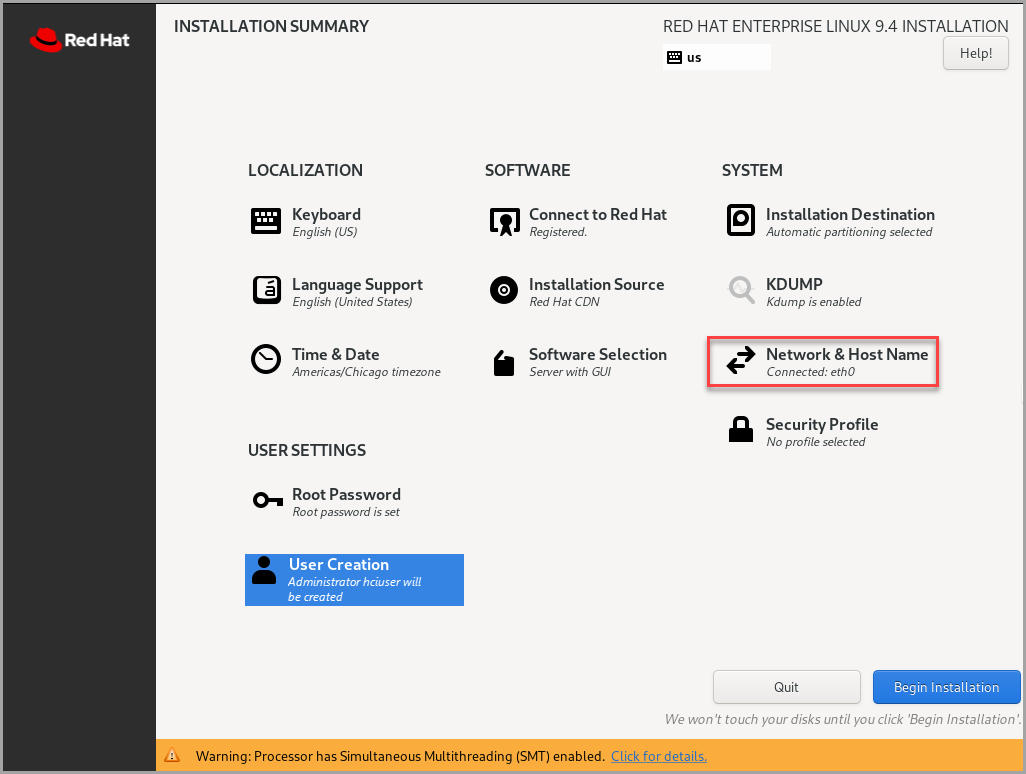
为网络接口启用“启用”开关,然后选择“已完成”。
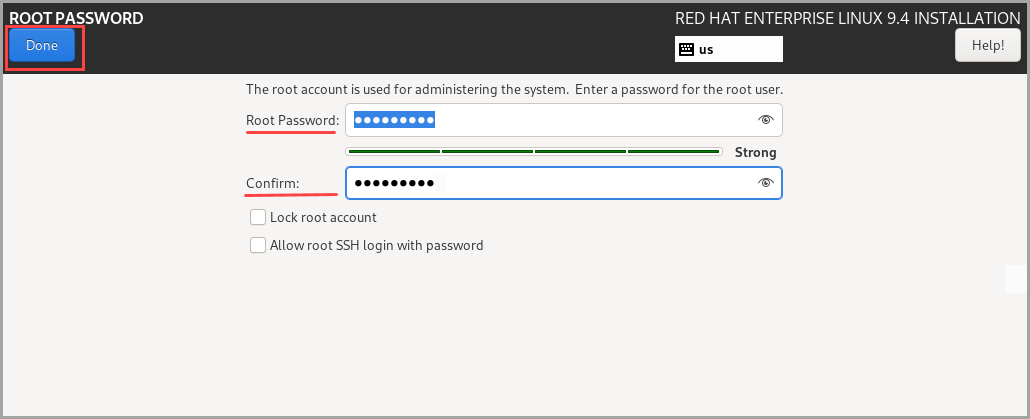
选择“用户设置”并设置根密码。 输入密码,确认密码,然后选择“已完成”。
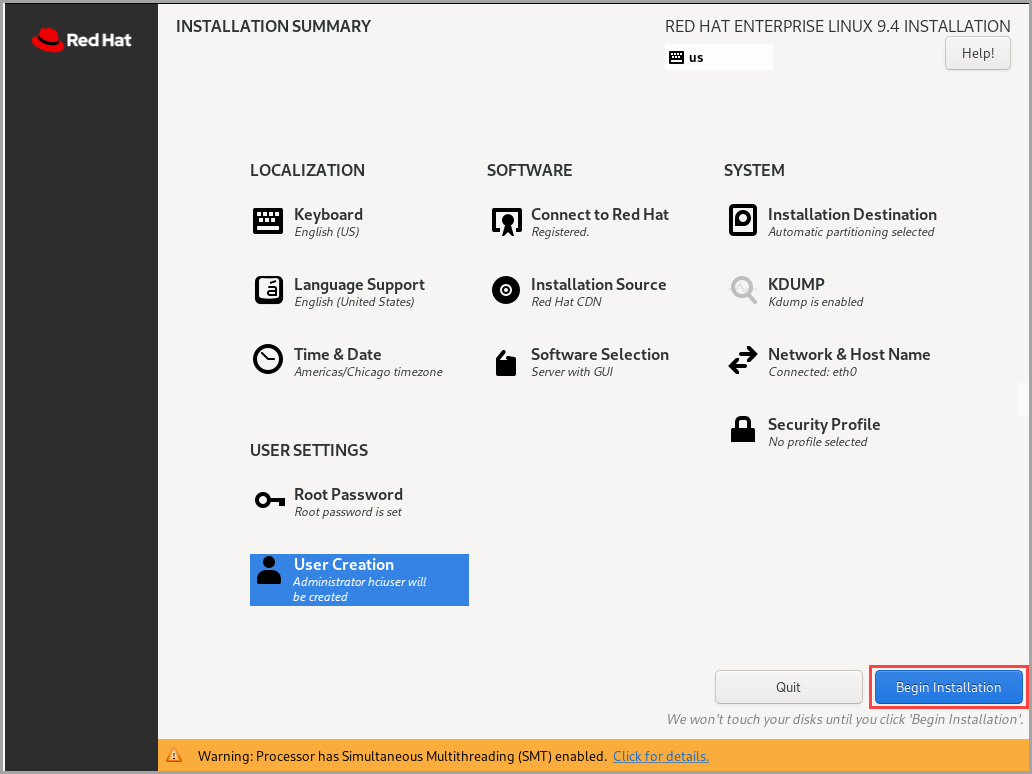
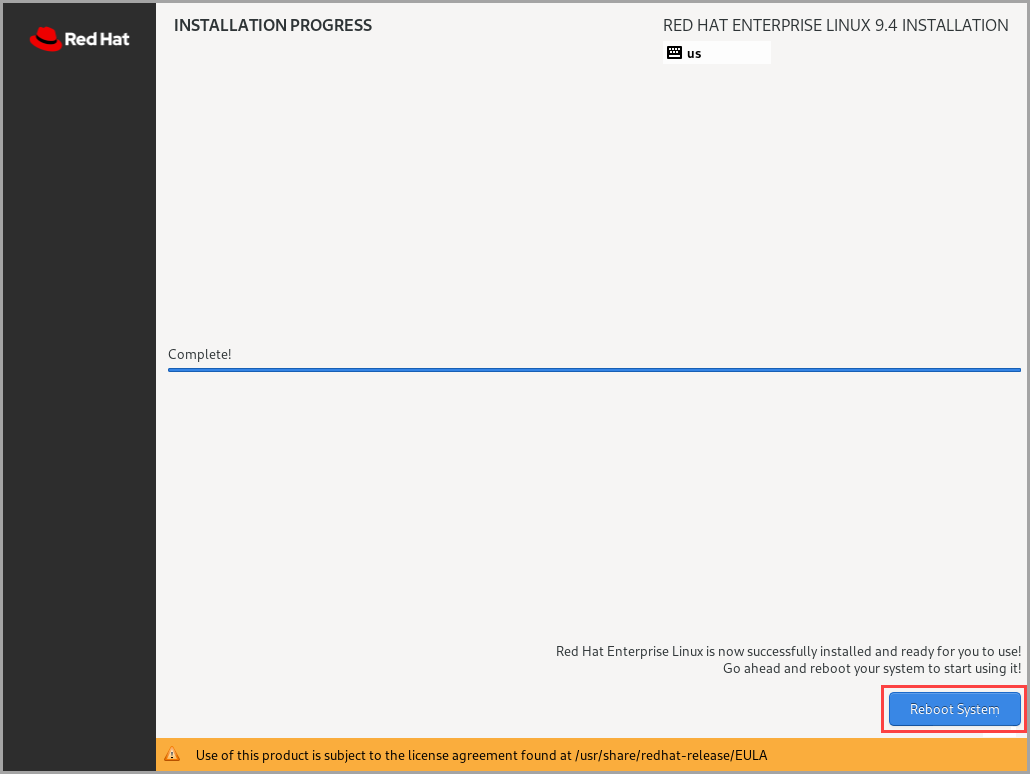
选择“开始安装”。
安装完成后,选择“重新启动系统”以重新启动 VM。


有关分步说明,请参阅使用 Hyper-V 管理器预配 VM。
步骤 3:配置 VM
配置 VM:
使用在 Red Hat Enterprise 安装过程中创建的根密码连接并登录到 VM。
确保未安装
cloud-init。sudo yum list installed | grep cloud-init安装
cloud-init工具并验证已安装的版本cloud-init。sudo yum install -y cloud-init cloud-init --version下面是示例输出:
[hcitest@localhost ~]$ sudo yum install -y cloud-init
Installed:
cloud-init-23.4-7.el9_4.noarch
dhcp-client-12:4.4.2-19.bl.el9.x86_64
dhcp-common-12:4.4.2-19.bl.el9.noarch
geolite2-city-20191217-6.el9.noarch
geolite2-country-20191217-6.el9.noarch
ipcalc-l.0.0-5.el9.x86_64
python3-attrs-20.3.0-7.el9.noarch
python3-babel-2.9.1-2.el9.noarch
python3-configob j-5.0.6-25.el9.noarch
python3-jinja2-2.11.3-5.el9.noarch
python3-j sonpatch-1.21-16.el9.noarch
python3-j sonpointer-2.0-4.el9.noarch
python3-j sonschema-3.2.0-13.el9.noarch
python3-markupsafe-l.1.1-12.el9.x86_64
python3-netifaces-0.10.6-15.el9.x86_64
python3-oauthlib-3.1.1-5.el9.noarch
python3-prettytable-0.7.2-27.el9.noarch
python3-pyrsistent-0.17.3-8.el9.x86_64
python3-pyserial-3.4-12.el9.noarch
python3-pytz-2021.1-5.el9.noarch

Complete!
[hcitest@localhost ~]$ cloud-init —version
/usr/bin/cloud-init 23.4-7.el9_4
步骤 4:清理残留配置
从 VM 中删除特定于计算机的文件和数据,以便创建干净的 VM 映像,而无需任何历史记录或默认配置。 按照 Azure Local 中的这些步骤清理残留配置。
清理
cloud-init默认配置。sudo yum clean all sudo cloud-init clean下面是示例输出:
[hcitest@localhost ~]$ sudo yum clean all
Updating Subscription Management repositories.
17 files removed
[hcitest@localhost ~]$ sudo cloud-init clean
清理日志和缓存。
sudo rm -rf /var/lib/cloud/ /var/log/* /tmp/*取消注册 VM。
sudo subscription-manager unregister
sudo Subscription-manager clean
下面是示例输出:
[hcitest@localhost ~]$ sudo subscription-manager unregister
Unregistering from: subscription.rhsm.redhat.com:443/subscription
System has been unregistered.
[hcitest@localhost ~]$ sudo subscription-manager clean
All local data removed
清除任何特定于主机的详细信息。
sudo rm -f /etc/sysconfig/network-scripts/*
sudo rm -f /etc/ssh/ssh_host*
sudo rm /etc/lvm/devices/system.devices
删除 bash 历史记录。
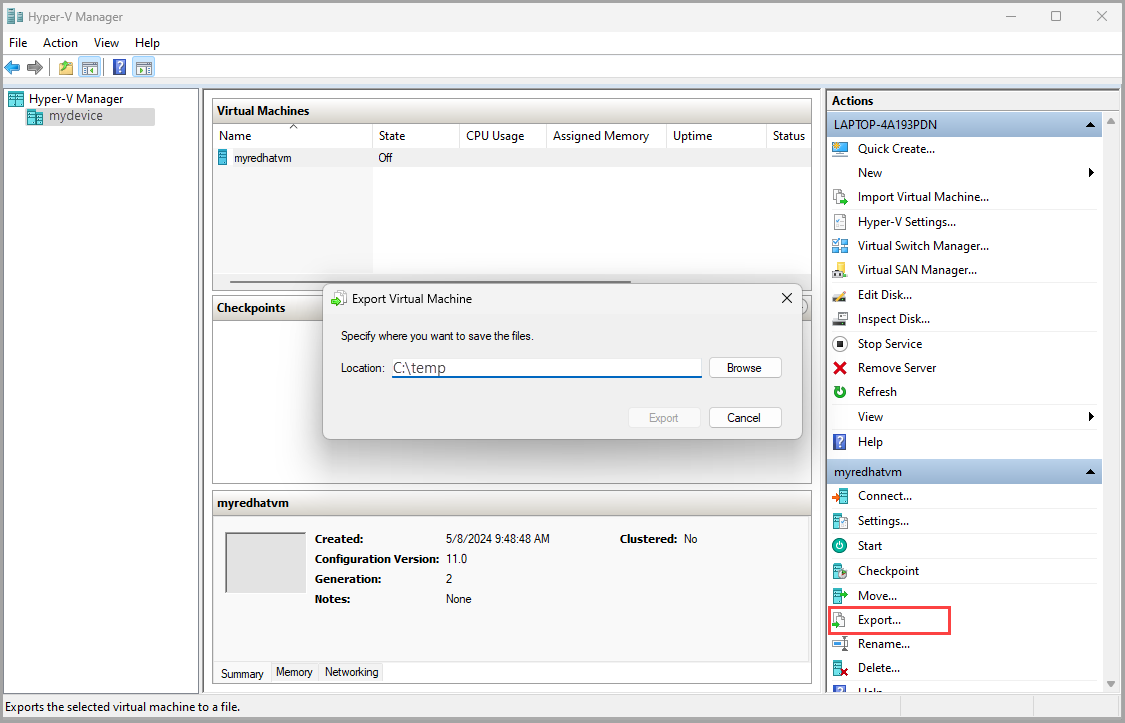
sudo rm -f ~/.bash_history
export HISTSIZE=0
exit
关闭 VM。 在 Hyper-V 管理器中,转到“操作”>“关闭”。
导出 VHDX 或从 VM 复制 VHDX。 你可以使用以下方法:
- 将 VHDX 复制到 Azure Local 群集共享卷上的用户存储。
- 或者,将 VHDX 作为页 blob 复制到 Azure 存储帐户的容器中。

步骤 5:创建 VM 映像
使用 Azure 本地上的 Azure CLI 执行以下步骤,从之前创建的 VHDX 创建 VM 映像。
以管理员身份运行 PowerShell。
登录。 运行以下 cmdlet:
az login设置订阅。 运行以下 cmdlet:
az account set --subscription <Subscription ID>为订阅、资源组、自定义位置、位置、映像的操作系统类型、映像的名称以及映像所在的路径设置参数。 请将
< >中的参数替换为适当的值。$subscription = "<Subscription ID>" $resource_group = "<Resource group>" $customLocation = "<Custom location>" $location = "<Location for your Azure Local>" $osType = "<OS of source image>"下表介绍了参数。
参数 说明 subscription与 Azure Local 实例关联的订阅。 resource_group与此映像关联的 Azure Local 实例的资源组。 locationAzure Local 实例的位置。 例如,位置可以是 eastus或westreurope。os-type与源映像关联的操作系统。 此系统可以是 Windows 或 Linux。 使用 VM 的 VHDX 创建库映像。 使用此 VM 映像创建 Azure 本地 VM。
确保将用户存储中的 VHDX 复制到 Azure Local 的群集共享卷中。 例如,路径可能如下所示
C:\ClusterStorage\UserStorage_1\linuxvhdx。$imagePath = "Path to user storage in CSV" $imageName = "mylinuxvmimg" $osType = "Linux" az stack-hci-vm image create --subscription $subscription -g $resource_group --custom-location $customLocation --location $location --image-path $imagePath --name $imageName --debug --os-type $osType验证映像是否已创建。