Note
Access to this page requires authorization. You can try signing in or changing directories.
Access to this page requires authorization. You can try changing directories.
In this article, you lean how to register or add a schema in Fabric Real-Time hub.
Navigate to Real-Time hub
Sign in to Microsoft Fabric.
If you see Power BI at the bottom-left of the page, switch to the Fabric workload by selecting Power BI and then by selecting Fabric.
Select Real-Time on the left navigation bar.


Event schema registry page
On the left navigation bar, select Event schema registry. On the Event schema registry page, you see all the schemas that are registered using Fabric Real-Time hub or Fabric schema sets user interface (UI). To learn how to add schema using schema sets, see Create and manage event schemas in schema sets.

Columns
This page mainly has the list of schemas with the following columns.
| Column | Description |
|---|---|
| Name | Name of the schema. |
| Event schema set | The schema set that contains the schema. |
| Updated | The date and time at which the schema was updated last. |
| Owner | Owner of the schema. |
| Workspace | The workspace that contains the schema set. |
| Endorsement | The endorsement status of the schema. |
Search
It also has a search box at the top where you can enter text to search for your schema.
Filters
Using the filter drop-down lists, you can filter schemas by using the following filters.
- Schema set owner
- Schema set name
- Fabric workspace
Now, let's see how to add an event schema using the + New event schema button.
Add a new event schema
On the Event schema registry page, select +New event schema button.
On the New event schema page, follow these instructions:
- Specify a name for the event schema set.
- Optionally, enter a description for the event schema set.
Use one of the following options to create a schema.
If you have a schema JSON file, select Upload to upload the file. For a sample file, see the Sample schema file section.

Start building a schema manually by selecting Add row. For each row, select the field type, field name, and optionally enter a description.

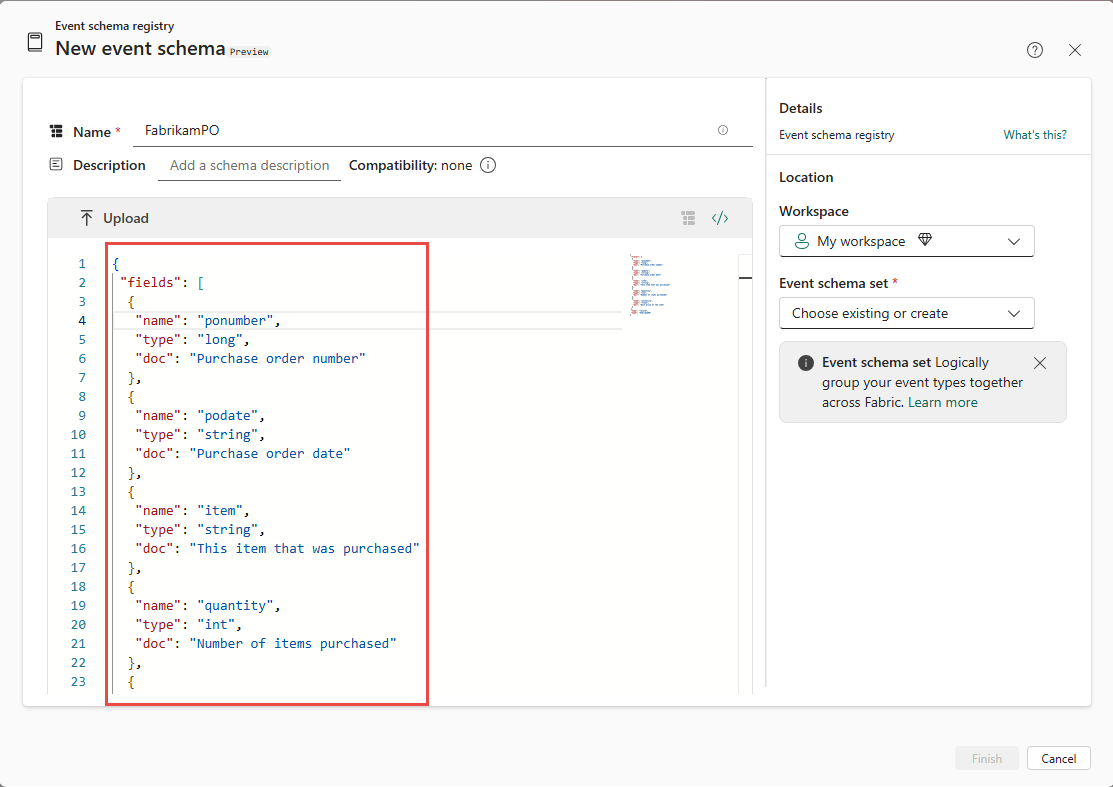
To build a schema by entering JSON code, select Code editor option as shown in the following image. If you see the message: If you choose to use the code editor to create your schema, note that you won’t be able to switch back to the UI builder, select Edit.
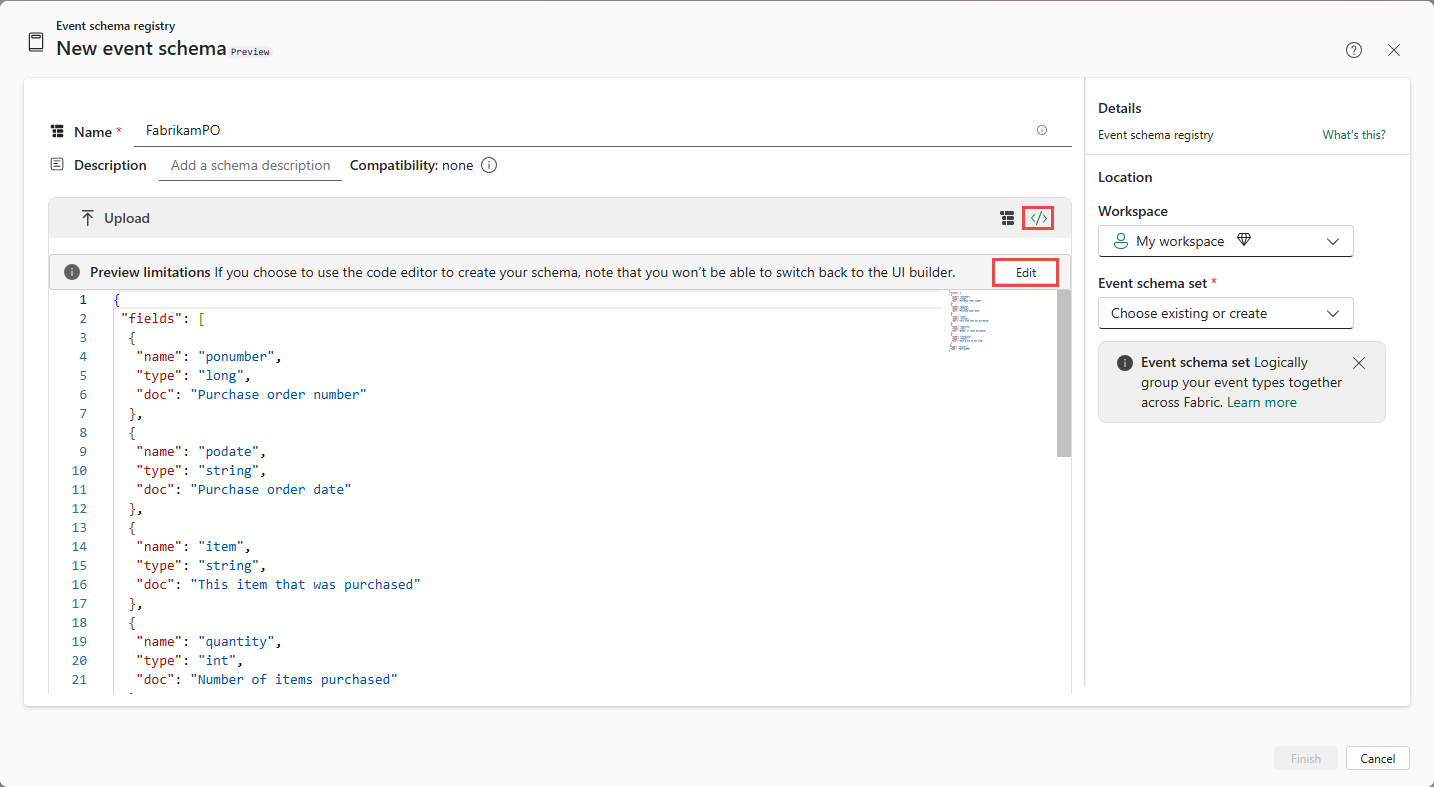
Enter the JSON code into the editor.
Now, in the right pane, follow these steps:
To use an existing schema set:
Select the Fabric workspace that has the schema set.
Select the schema set where you want to save the schema.

To create a new schema set:
Select the Fabric workspace where you want to create the schema set.
In the drop-down list for Event schema set, select Create.

Enter a name for the schema set.

Select Finish to start creating the schema.

On the Event schema registry page, you should see the schema you created in the list of schemas. If you don't see it, refresh the page.

To add more schemas to the schema set, select + New event schema at the top of the page.


View or endorse schema set
Hover the mouse over a schema in the list, and select ... (ellipsis). You see two actions: Open event schema set and Endorse.

If you select Open event schema set, you see the event schema opened in the schema set user interface where you can also add schemas, update schemas, or delete schemas. For more information, see Create and manage event schemas in schema sets.

If you select Endorse, you see a window that lets you set the endorsement level for the schema. Organizations often have large numbers of Microsoft Fabric items available for sharing and reuse by their Fabric users. It can be difficult to identify trustworthy and authoritative items. Endorsement is a way to make it easier for users to find the high-quality items they need. For more information, see Endorsement in Fabric.

Related content
To learn how to use schemas in Fabric eventstreams, see Use schemas in eventstreams.