Note
Access to this page requires authorization. You can try signing in or changing directories.
Access to this page requires authorization. You can try changing directories.
In this article, you lean how to add a schema to a schema set in Fabric.
Prerequisites
If you don't have an event schema set, create one by following instructions from Create an event schema set.
Add an event schema
If you aren't on the schema set page already, navigate to the Fabric workspace, and select the event schema set.

Select + New event schema.
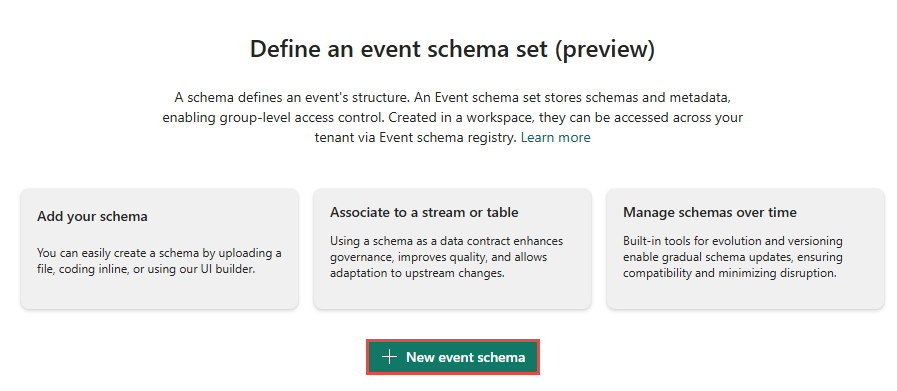
If you're trying to add the first schema to the schema set, you see the following screen:
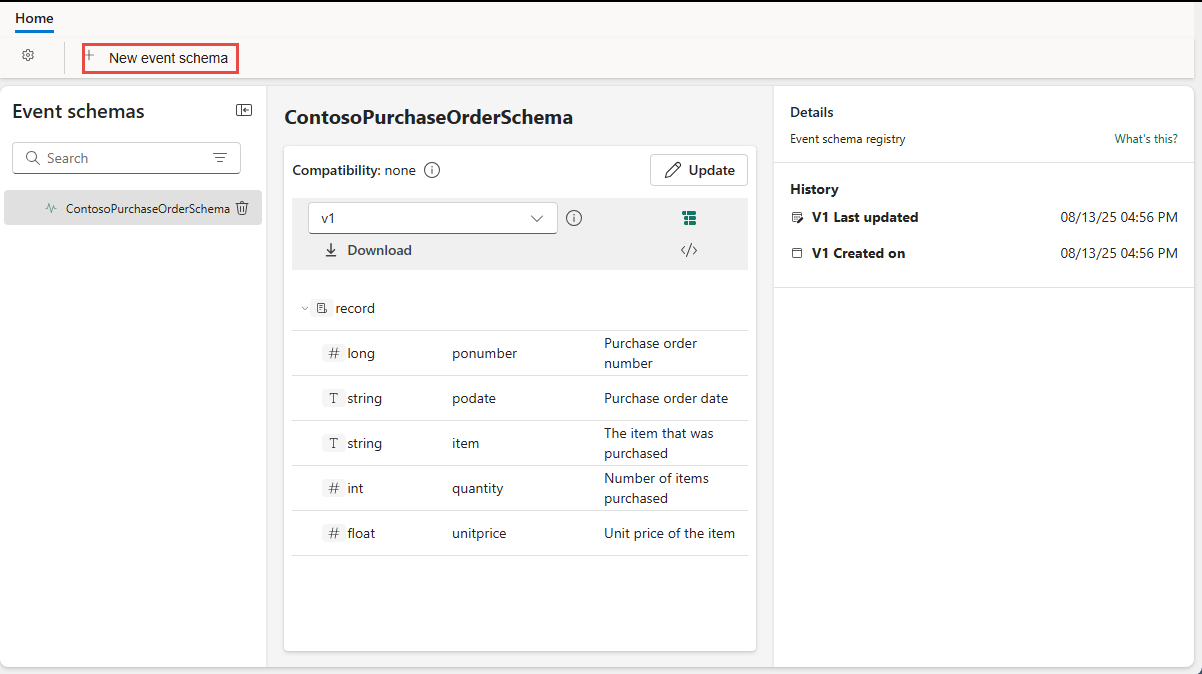
If you're trying to add a schema to a schema set that has at least one schema in it, you see the following screen:
On the New event schema page, follow these instructions:
- Specify a name for the event schema set. The name must contain fewer than 256 UTF-8 characters
- Optionally, enter a description for the event schema set.
Use one of the following options to create a schema.
If you have a schema JSON file, select Upload to upload the file. For a sample file, see the Sample schema file section.

Start building a schema manually by selecting Add row. For each row, select the field type, field name, and optionally enter a description.

To build a schema by entering JSON code, select Code editor option as shown in the following image. If you see the message: If you choose to use the code editor to create your schema, note that you won’t be able to switch back to the UI builder, select Edit.

Enter the JSON code into the editor.
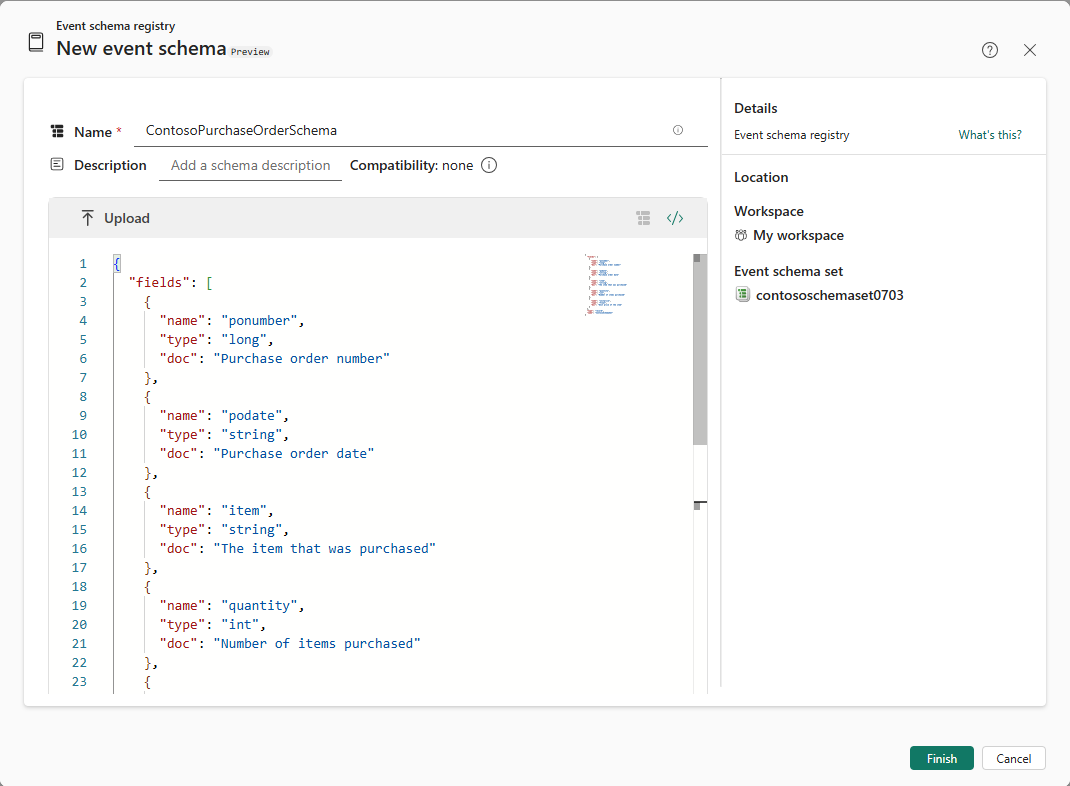
Select Finish to start creating the schema.
You see the editor for the event schema set. To add more schemas to the schema set, select + New event schema at the top of the page.


Download an event schema
You can download a schema file of an existing schema in the schema set to your computer by using the Download button on the ribbon.

Here's a sample file that you can upload to add an event schema to a schema set.
{
    "fields": [
        {
            "name": "ponumber",
            "type": "long",
            "doc": "Purchase order number"
        },
        {
            "name": "podate",
            "type": "string",
            "doc": "Purchase order date"
        },
        {
            "name": "item",
            "type": "string",
            "doc": "The item that was purchased"
        },
        {
            "name": "quantity",
            "type": "int",
            "doc": "Number of items purchased"
        },
        {
            "name": "unitprice",
            "type": "float",
            "doc": "Unit price of the item"
        }
    ],
    "type": "record",
    "name": "ContosoPurchaseOrderSchema"
}
Delete an event schema
To delete an event schema, select the Trash icon next to the event schema in the Event schemas pane.

Find an event schema
To find an event schema, you can enter text in the Search box in the Event schemas pane.
Update an event schema
You can modify schemas after registering them with Fabric Real-Time intelligence.
Note
Fabric doesn't perform compatibility checks when you update a schema, which means any changes you make could break existing pipelines. For example, removing required fields or changing field types might cause errors in pipelines or downstream services expecting the original structure.
Because of this behavior, we recommend that you add a new schema where needed, instead of modifying an existing one. You can then update your pipelines and configurations to use the new schema, test everything, and retire the old version once you confirm that everything works correctly.
To update an event schema and create a new version of the schema, select Update.

In the Update event schema window, update the schema, and select Finish.
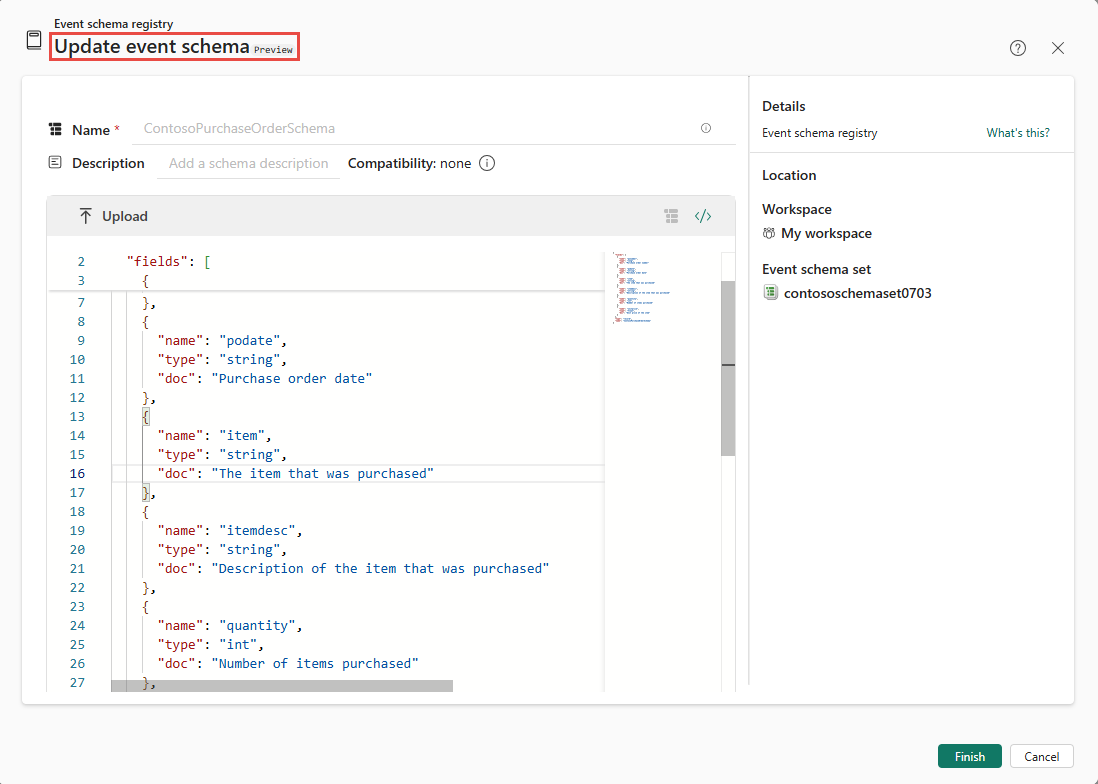
You notice that a new version of the schema is created in the schema set.


View versions of an event schema
Use the version drop-down list to select the version of the schema you want to view.

View history of an event schema
You can see the history of creation and update of the schema in the History section of Details pane to the right.

Related content
To learn how to use schemas in Fabric eventstreams, see Use schemas in eventstreams.