Note
Access to this page requires authorization. You can try signing in or changing directories.
Access to this page requires authorization. You can try changing directories.
This article shows you how to add an Azure SQL Database Change Data Capture (CDC) source to an eventstream.
The Azure SQL Database CDC source connector for Microsoft Fabric event streams allows you to capture a snapshot of the current data in an Azure SQL database. The connector then monitors and records any future row-level changes to this data. Once the changes are captured in the eventstream, you can process this CDC data in real-time and send it to different destinations within Fabric for further processing or analysis.
Note
This source is not supported in the following regions of your workspace capacity: West US3, Switzerland West.
Prerequisites
- Access to a workspace in the Fabric capacity license mode (or) the Trial license mode with Contributor or higher permissions.
- A running Azure SQL server with an Azure SQL database.
- Your Azure SQL database must be publicly accessible and not be behind a firewall or secured in a virtual network.
- Enabled CDC in your Azure SQL database by running the stored procedure
sys.sp_cdc_enable_db. For details, see Enable and disable change data capture. - If you don't have an eventstream, create an eventstream.
Note that you must not enable mirroring in your Azure SQL database.
Enable CDC in your Azure SQL Database
Go to the Azure portal, open your Azure SQL database, and select Query editor. Choose an authentication method to log in.
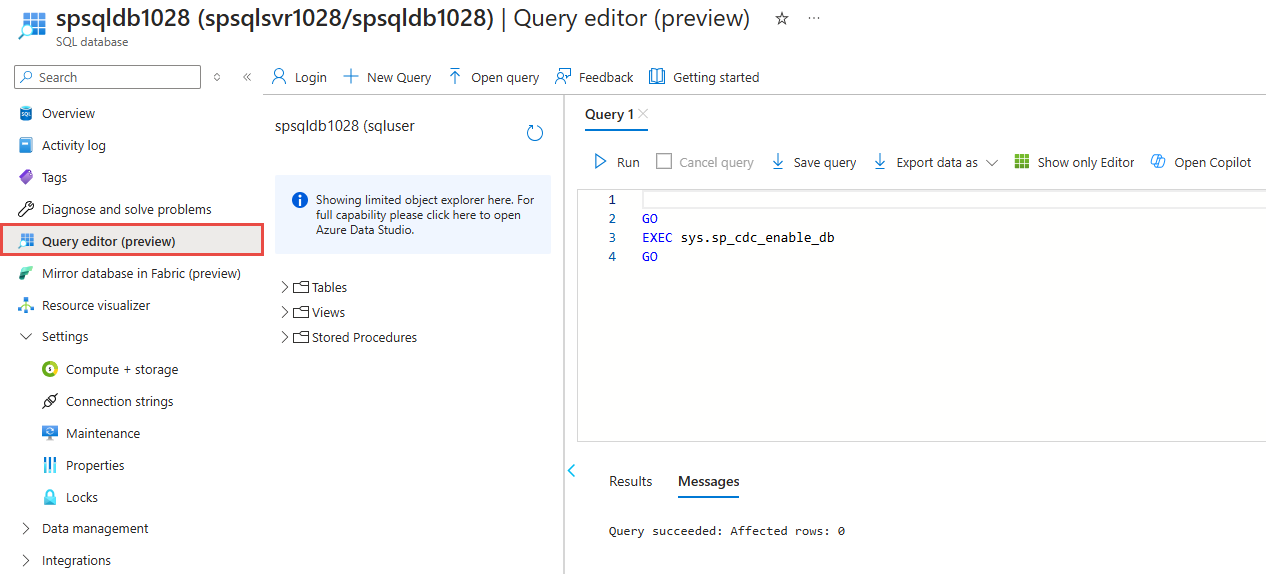
Run the following SQL commands to enable CDC in your database:
-- Enable Database for CDC
EXEC sys.sp_cdc_enable_db;

-- Enable CDC for a table using a gating role option
EXEC sys.sp_cdc_enable_table
    @source_schema = N'dbo',
    @source_name   = N'MyTable',
    @role_name     = NULL
GO

Launch the Select a data source wizard
If you haven't added any source to your eventstream yet, select Use external source tile.

If you're adding the source to an already published eventstream, switch to Edit mode, select Add source on the ribbon, and then select External sources.

On the Select a data source page, search for and select Connect on the Azure SQL DB (CDC) tile.

Configure and connect to Azure SQL Database CDC
On the Connect page, select New connection.

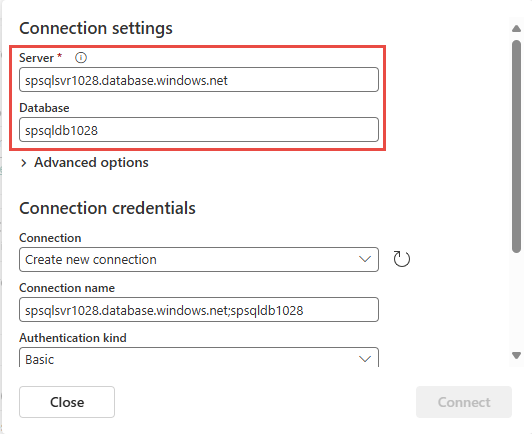
In the Connection settings section, enter the following values for your Azure SQL database:
Server: Enter the Azure SQL server name from the Azure portal. It's in this form:
mysqlservername.database.windows.net.Database: Enter the Azure SQL database name from the Azure portal.
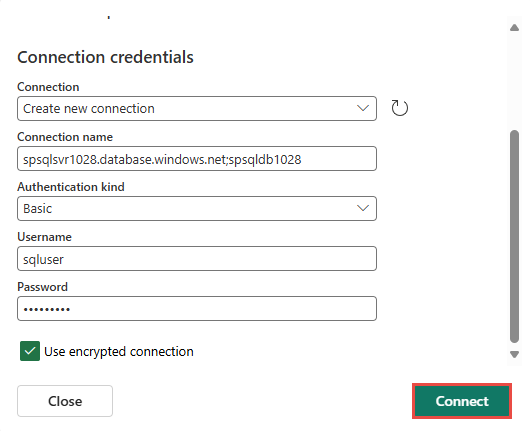
Scroll down, and in the Connection credentials section, follow these steps.
For Connection name, enter a name for the connection.
For Authentication kind, select Basic.
Note
Currently, Fabric Eventstream supports only Basic authentication.
Enter Username and Password for the database.
Select Connect.
Now, on the Connect page, select All tables, or Enter table name(s). If you select the latter, specify tables using a comma-separated list of full table identifiers (
schemaName.tableName) or valid regular expressions. For example:- Use
dbo.test.*to select all tables whose names start withdbo.test. - Use
dbo\.(test1|test2)to selectdbo.test1anddbo.test2.
You can mix both formats using commas. The total character limit for the entire entry is 102,400 characters.
- Use
You can expand Advanced settings to configure the Decimal handling mode, which specifies how the connector handles
DECIMALandNUMERICcolumn values:Precise: Represents values using exact decimal types (for example, JavaBigDecimal) to ensure full precision and accuracy in data representation.Double: Converts values to double-precision floating-point numbers. This setting improves usability and performance but might result in a loss of precision.String: Encodes values as formatted strings. This setting makes it easy to consume in downstream systems but loses semantic information about the original numeric type.
Select Next.

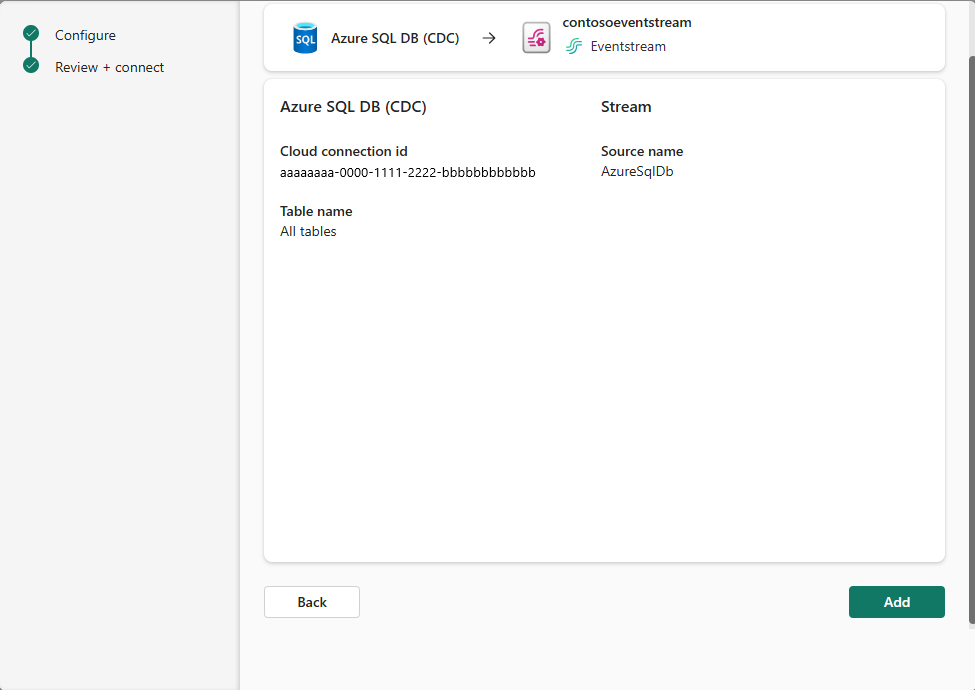
On the Review and create screen, review the summary, and then select Add.


Ingest change data from Azure SQL databases with automatic table schema registration via CDC into Eventstream.
On the Connect page, select New connection.
In the Connection settings section, enter the following values for your Azure SQL database:
Server: Enter the Azure SQL server name from the Azure portal. It's in this form:
mysqlservername.database.windows.net.Database: Enter the Azure SQL database name from the Azure portal.
Scroll down, and in the Connection credentials section, follow these steps.
For Connection name, enter a name for the connection.
For Authentication kind, select Basic.
Note
Currently, Fabric Eventstream support only Basic authentication.
Enter Username and Password for the database.
Select Connect.
Now, on the Connect page, select All tables, or Enter table name(s). If you select the latter, specify tables using a comma-separated list of full table identifiers (
schemaName.tableName) or valid regular expressions. For example:- Use
dbo.test.*to select all tables whose names start withdbo.test. - Use
dbo\.(test1|test2)to selectdbo.test1anddbo.test2.
You can mix both formats using commas. The total character limit for the entire entry is 102,400 characters.
- Use
You might expand Advanced settings to configure the Decimal handling mode, which specifies how the connector handles
DECIMALandNUMERICcolumn values:Precise: Represents values using exact decimal types (for example, JavaBigDecimal) to ensure full precision and accuracy in data representation.Double: Converts values to double-precision floating-point numbers. This setting improves usability and performance but might result in a loss of precision.String: Encodes values as formatted strings. This setting makes it easy to consume in downstream systems but loses semantic information about the original numeric type.
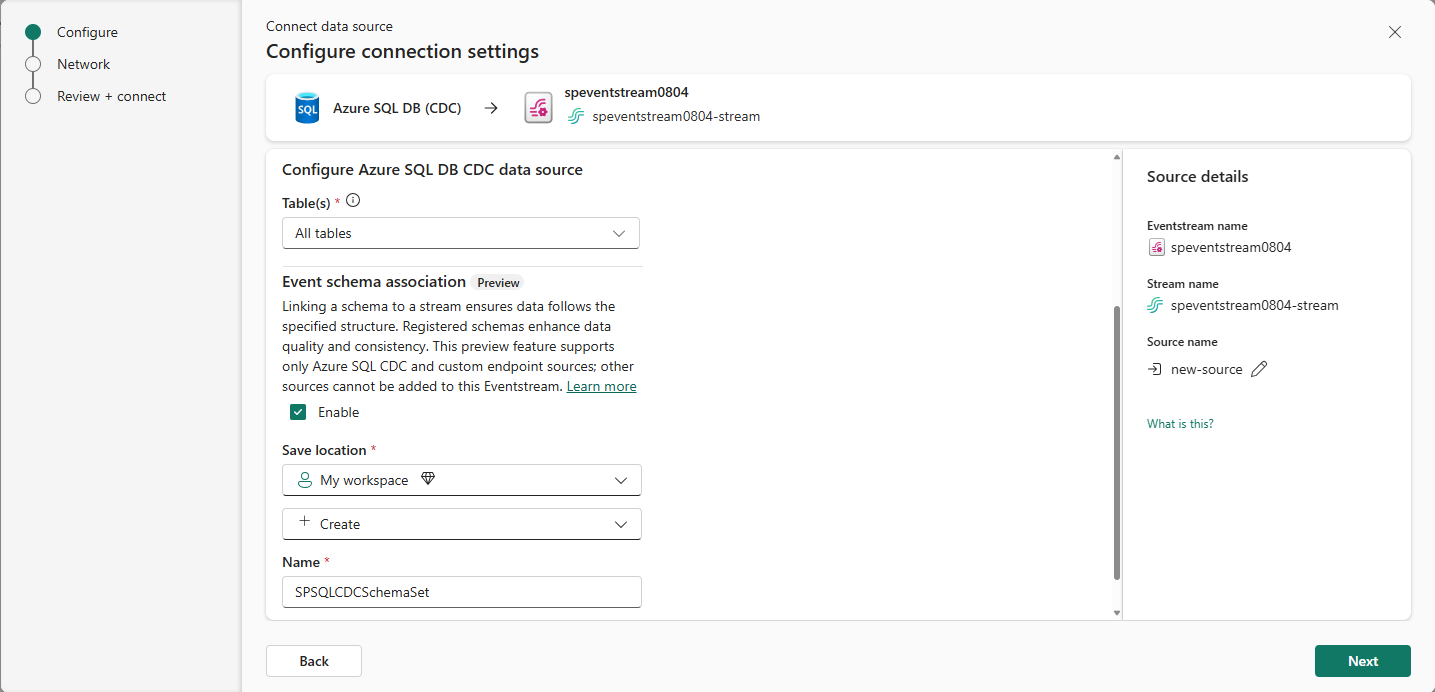
Enable event schema association.
For Workspace, select a Fabric workspace for the schema set.
For Schema set, + Create is selected by default, which creates a new schema set. You can change it to select an existing event schema set.
If you selected the + Create option in the previous step, enter a name for the schema set.
On the Review + connect page, select Add.
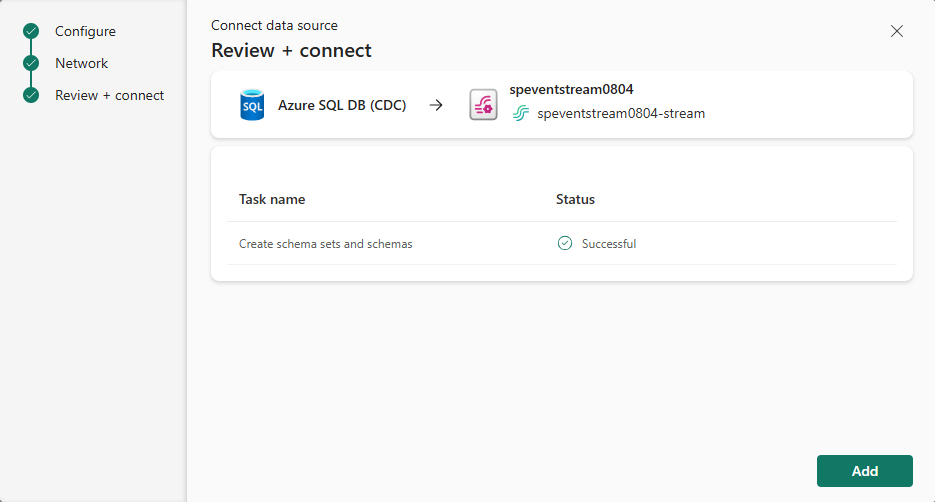
For all tables or selected tables in the Azure SQL database, the connector autodiscovers and creates schemas, and registers them with the schema registry.
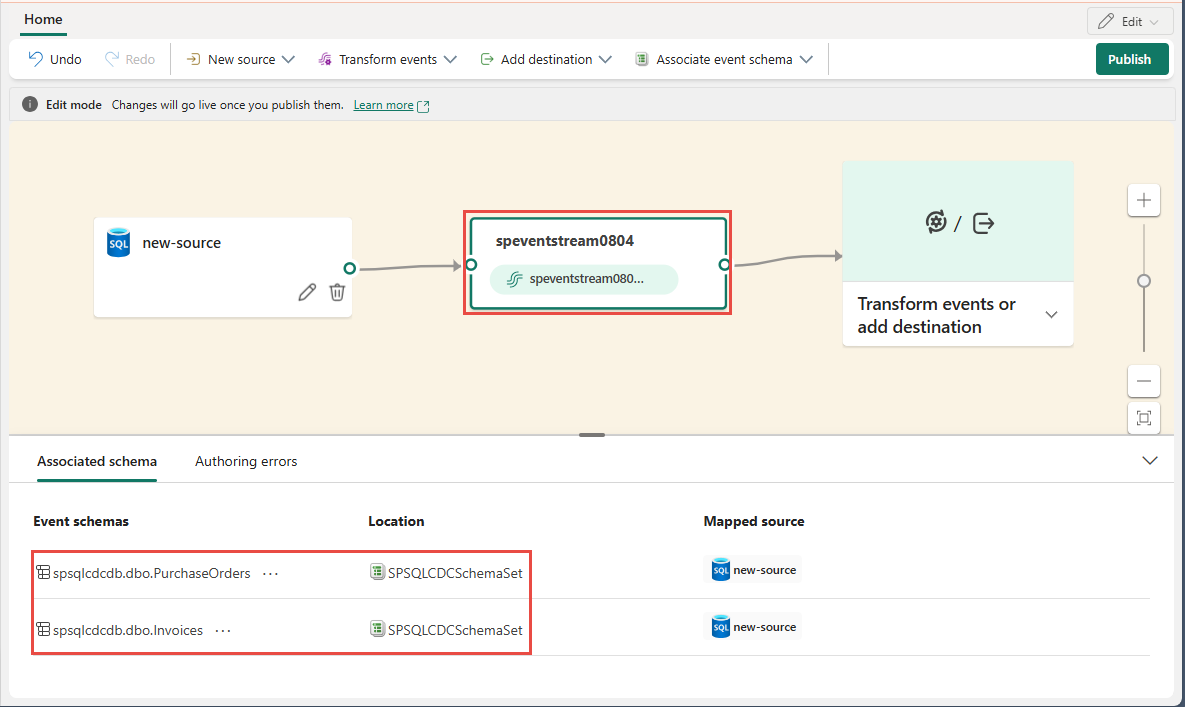
Select the eventstream node in the middle, and switch to the Associated schemas tab in the bottom pane.


Schema set
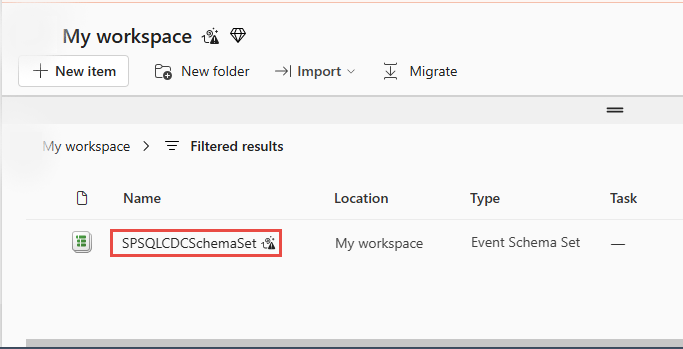
Navigate to the workspace you selected in the previous step. In the following example, it's My workspace.
Select the schema set that the Azure SQL Database (CDC) connector created.
You see the schemas in the schema set as shown in the following image.
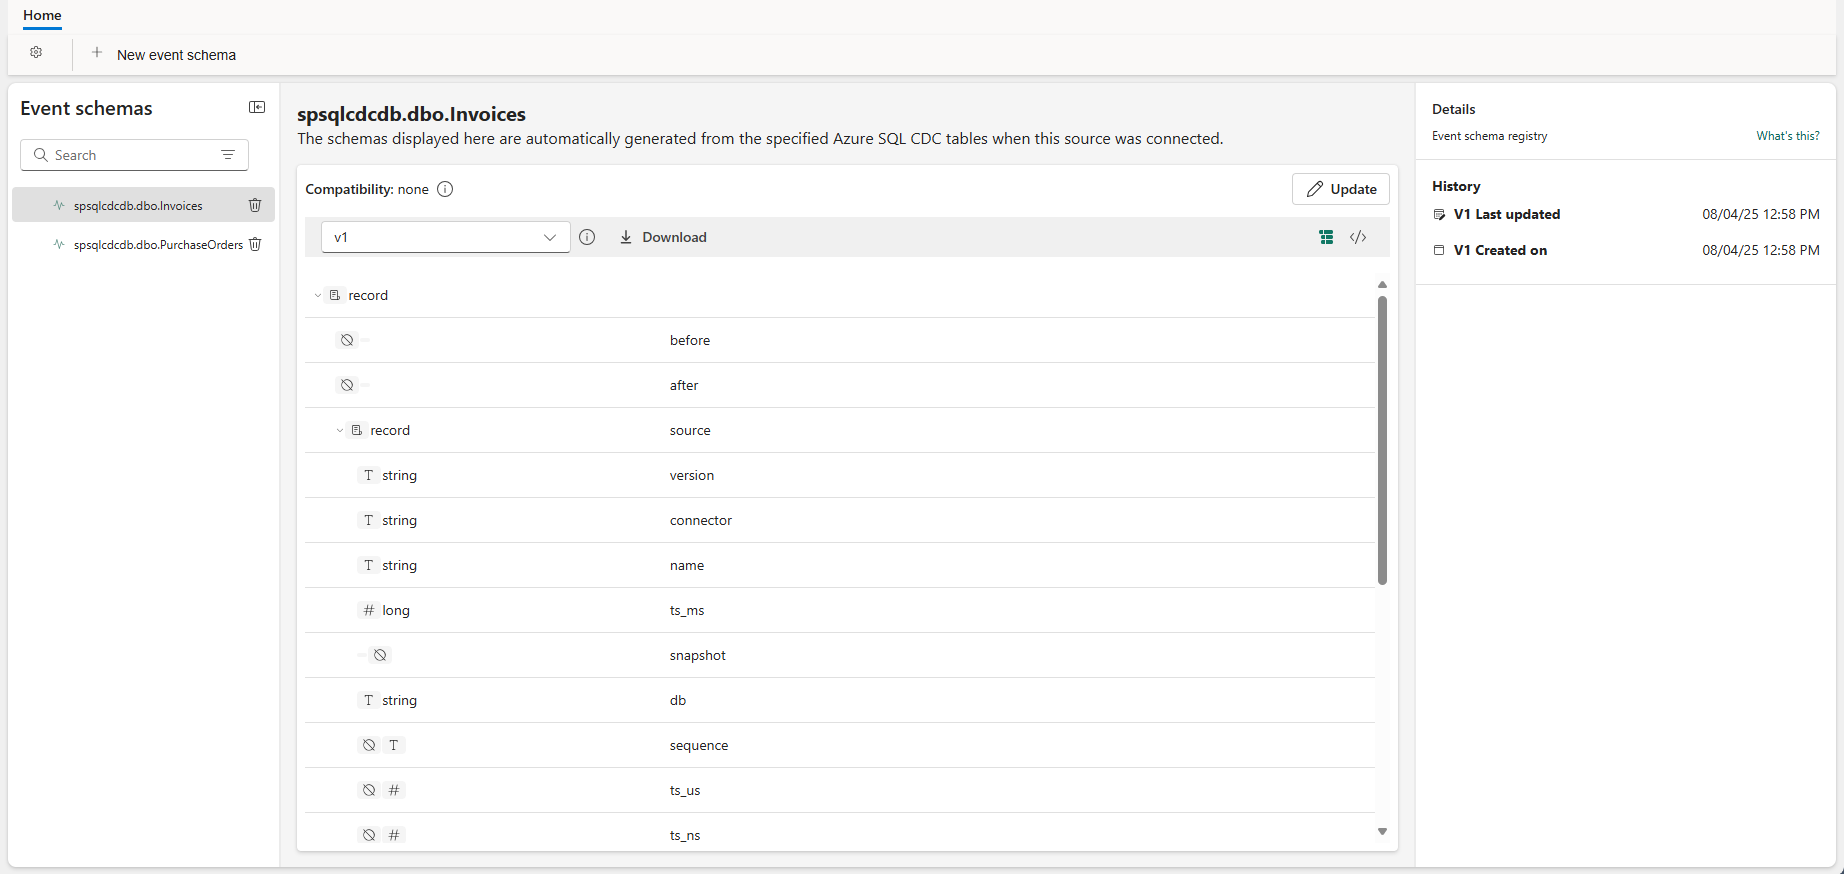
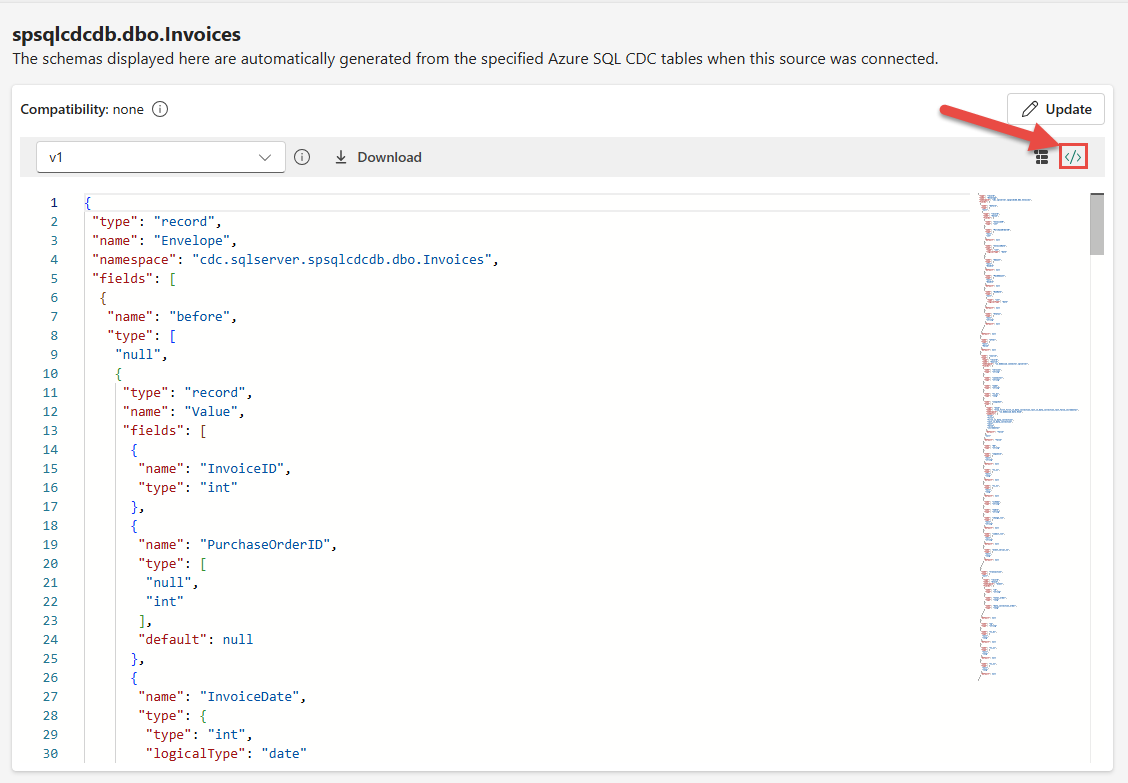
To see the JSON version of the schema, switch to the JSON schema view.
Don't change these discovered schemas using this editor as it becomes nonconfirmant with the schema of tables in the Azure SQL database source.


View updated eventstream
You can see the Azure SQL Database (CDC) source added to your eventstream in Edit mode.
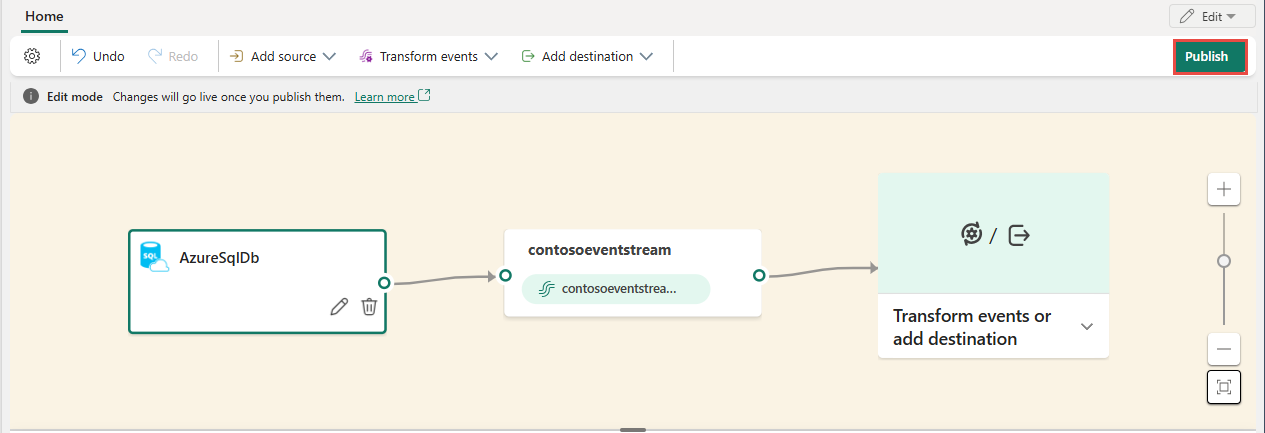
To implement this newly added Azure SQL Database CDC source, select Publish. After you complete these steps, your Azure SQL Database CDC source is available for visualization in the Live view.


Configure eventstream destinations to use schemas
Currently, only the Eventhouse, custom endpoint, and derived stream destinations are supported for eventstreams with extended features (like schema support) enabled. This section shows you how to add and configure an Eventhouse destination when extended features (like schema support) are enabled for the eventstream.
Configure schema for a custom endpoint destination
Select Transform events or add destination, and then select Custom endpoint.
In the Custom endpoint pane, specify a name for the destination as usual.
For Input schema, select the schema for events. This field is the extra field you fill when you enable the schema support for an eventstream.

For detailed steps on configuring a custom endpoint destination, see Add a custom endpoint or custom app destination to an eventstream.

Configure schemas for an eventhouse destination
- Select Transform events or add destination, and then select Eventhouse.
- On the Eventhouse page, configure the following schema-related settings:
For Input schema, select one or more schemas from the drop-down list.

Note
If you selected Dynamic schema via headers option when configuring an Event Hubs source, you might have configured multiple schemas for the source and map them to different properties and their values.
For Table creation method, select one of the options depending on your requirements: A single table with all schemas combined or Separate tables for each schema.

For Write data with, select one of the following options:
Payload only: To write extracted payload data to the table. If there are multiple input schemas, data is sent to multiple tables.
Metadata and payload: Write metadata and payload data to a single table. Example columns:
source,subject,type,data, etc.
For detailed steps on configuring an Eventhouse destination, see Add an Eventhouse destination to an eventstream.


Related content
Other connectors: