Note
Access to this page requires authorization. You can try signing in or changing directories.
Access to this page requires authorization. You can try changing directories.
Use the Azure CLI and Azure portal to manage, uninstall, or update Azure IoT Operations instances.
Prerequisites
An Azure IoT Operations instance deployed to a cluster. For more information, see Deploy Azure IoT Operations.
Azure CLI installed on your development machine. This scenario requires Azure CLI version 2.53.0 or higher. Use
az --versionto check your version andaz upgradeto update if necessary. For more information, see How to install the Azure CLI.The Azure IoT Operations extension for Azure CLI. Use the following command to add the extension or update it to the latest version:
az extension add --upgrade --name azure-iot-ops
Manage
After deployment, you can use the Azure CLI and Azure portal to view and manage your Azure IoT Operations instance.
List instances
- In the Azure portal, search for and select Azure IoT Operations.
- Use the filters to view Azure IoT Operations instances based on subscription, resource group, and more.
View instance
You can view your Azure IoT Operations instance in the Azure portal.
In the Azure portal, go to the resource group that contains your Azure IoT Operations instance, or search for and select Azure IoT Operations.
Select the name of your Azure IoT Operations instance.
On the Overview page of your instance, you can see the properties of your instance. For example, you can see the status of the preview connectors, which can be enabled or disabled. To change the status of the preview connectors, click on Edit.
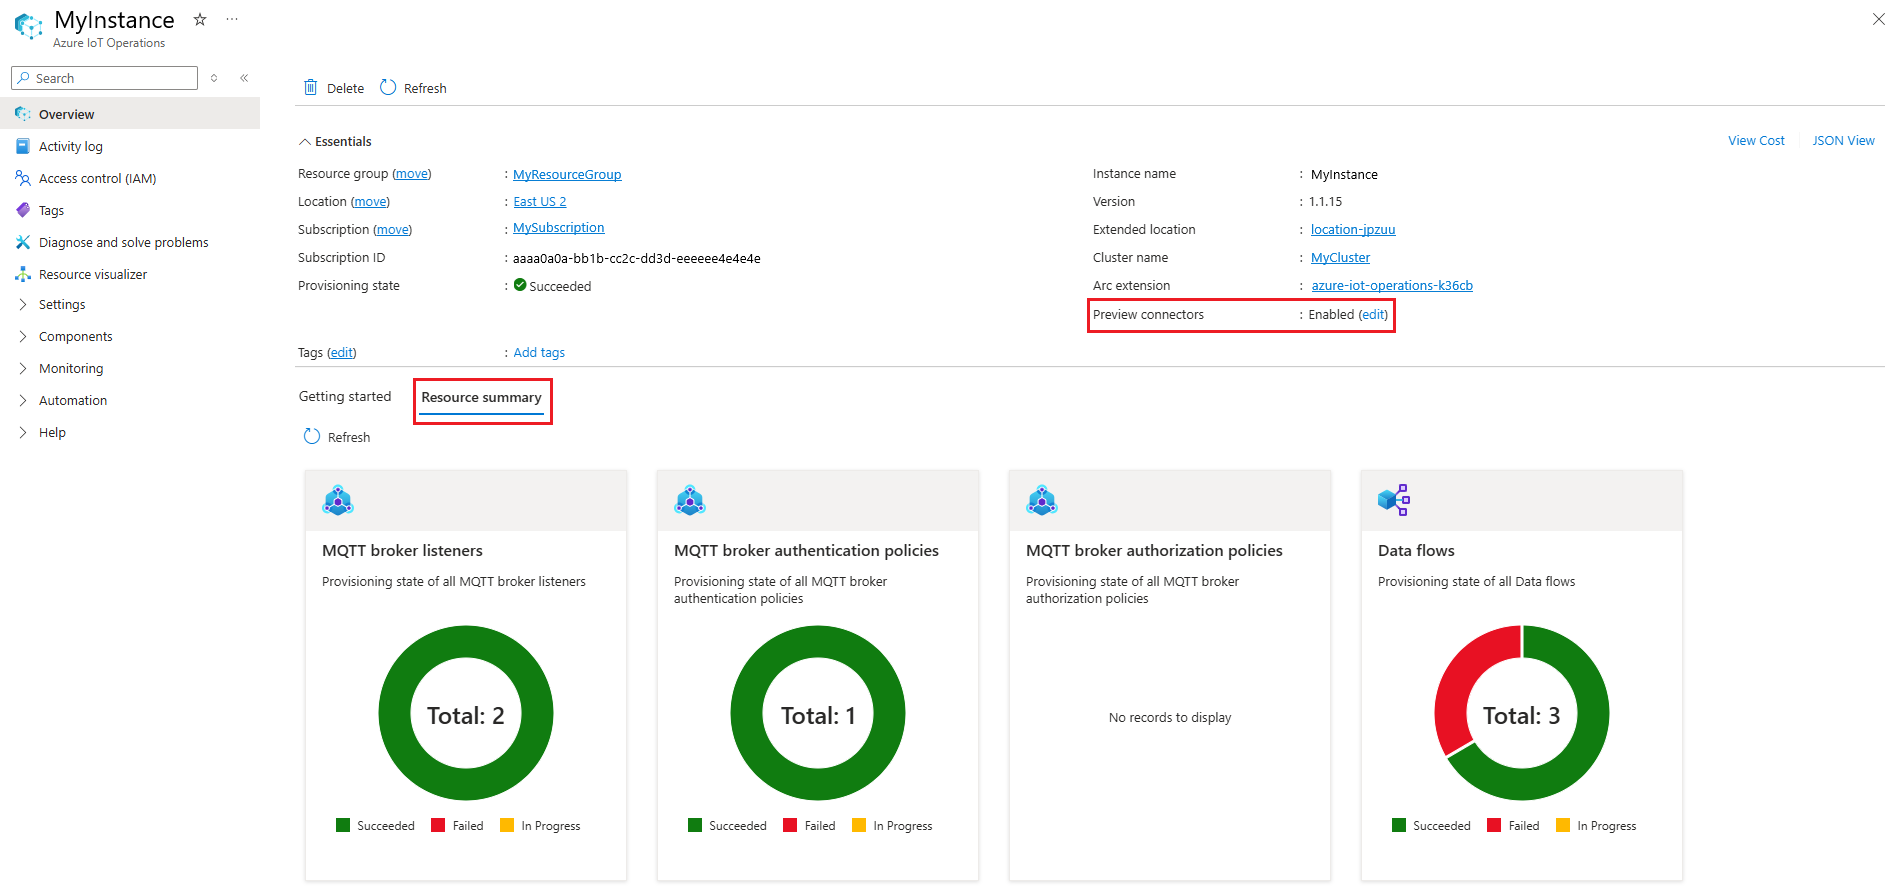
This action opens a configuration panel where you can enable or disable the ONVIF preview connector.
The Resource Summary tab displays the resources that were deployed to your cluster.

View Azure Device Registry
In the Azure portal, you can view the Azure Device Registry, which is a collection of all the devices and assets that are connected to your Azure IoT Operations instance.
The Azure Device Registry uses namespaces (preview) to organize assets and devices. Each Azure IoT Operations instance uses a single namespace for its assets and devices. Multiple instances can share a single namespace.
To view items in the Azure Device Registry in the Azure portal:
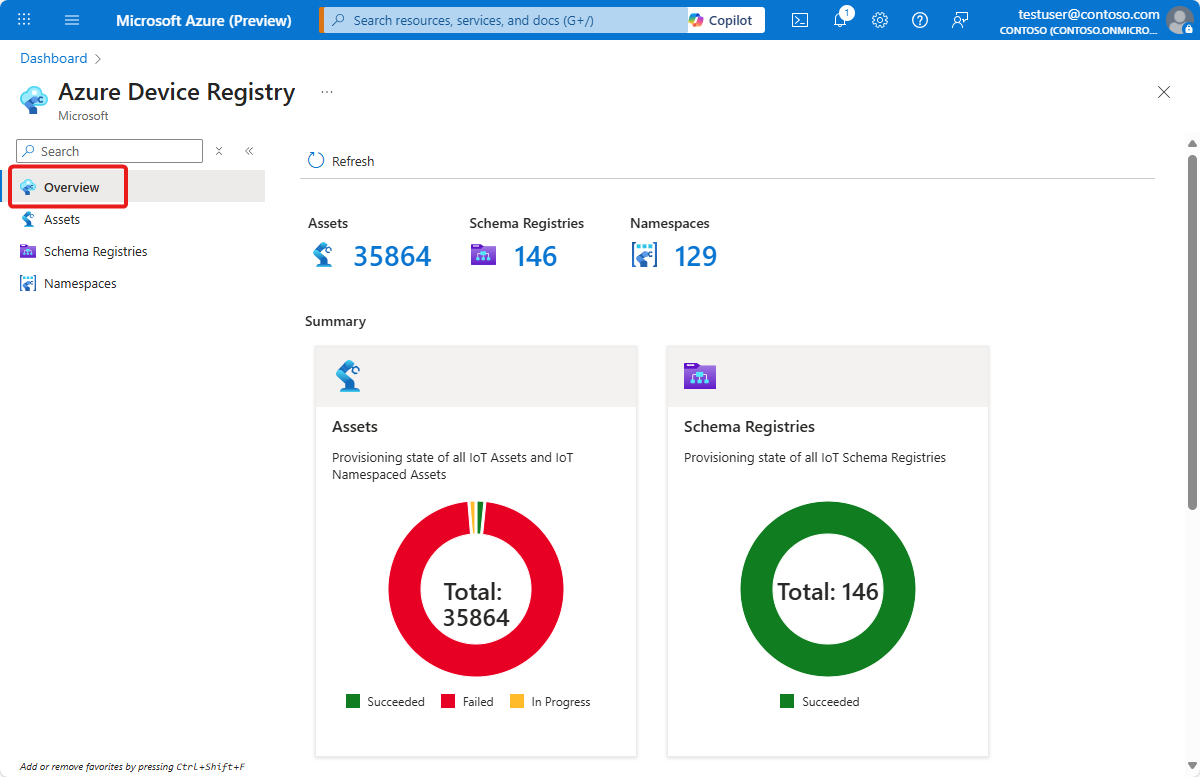
In the Azure portal, search for and select Azure Device Registry. The Overview page summarizes the number of assets, schema registries and namespaces in your subscription:
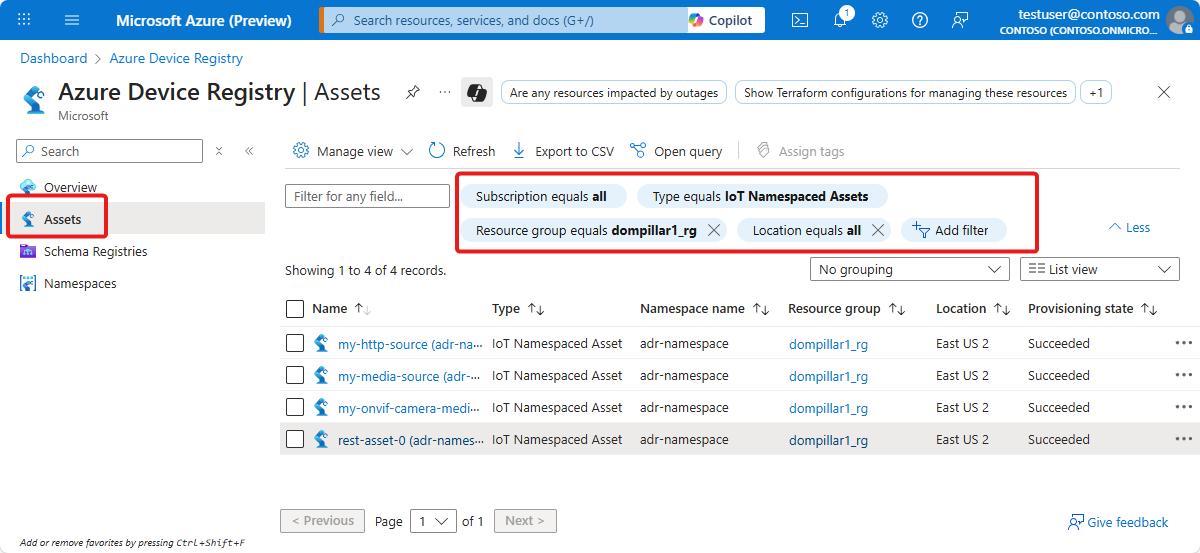
Use the Assets page to view the assets in Azure Device Registry. By default, the Assets page shows the assets in all namespaces in your subscription. Use the filters to view a subset of the assets, such as the assets in a specific namespace or resource group:
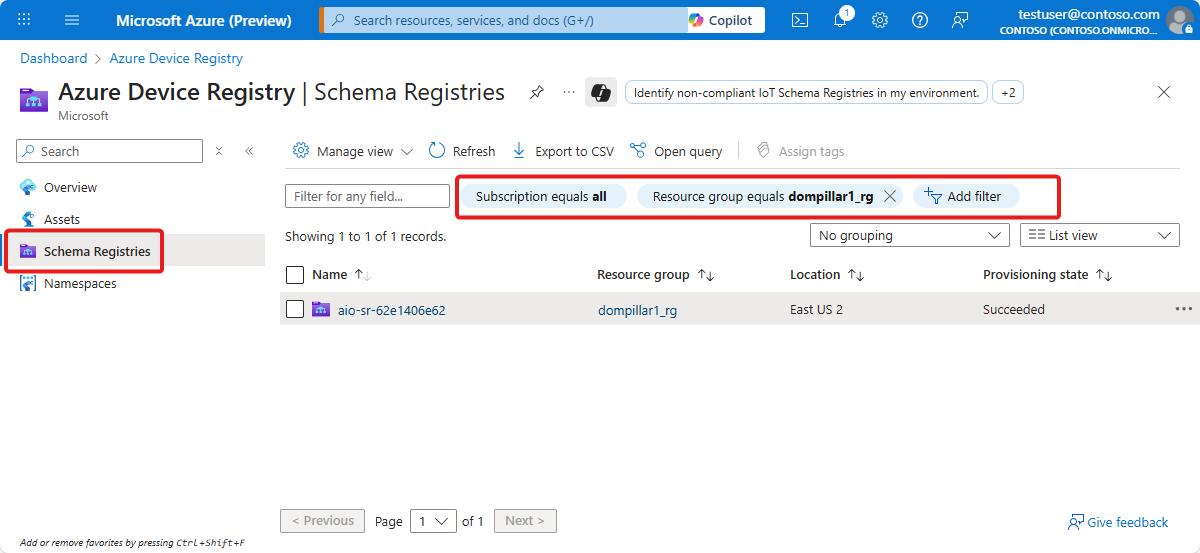
Use the Schema registries page to view the schema registries in Azure Device Registry. By default, the Schema registries page shows the schema registries in all namespaces in your subscription. Use the filters to view a subset of the schema registries, such as the schema registries in a specific namespace or resource group:
Use the Namespaces page to view the namespaces in Azure Device Registry. By default, the Namespaces page shows the namespaces in your subscription. Use the filters to view a subset of the namespaces, such as the namespaces in a specific resource group. From this page, you can create new namespaces, or view the details of existing namespaces:
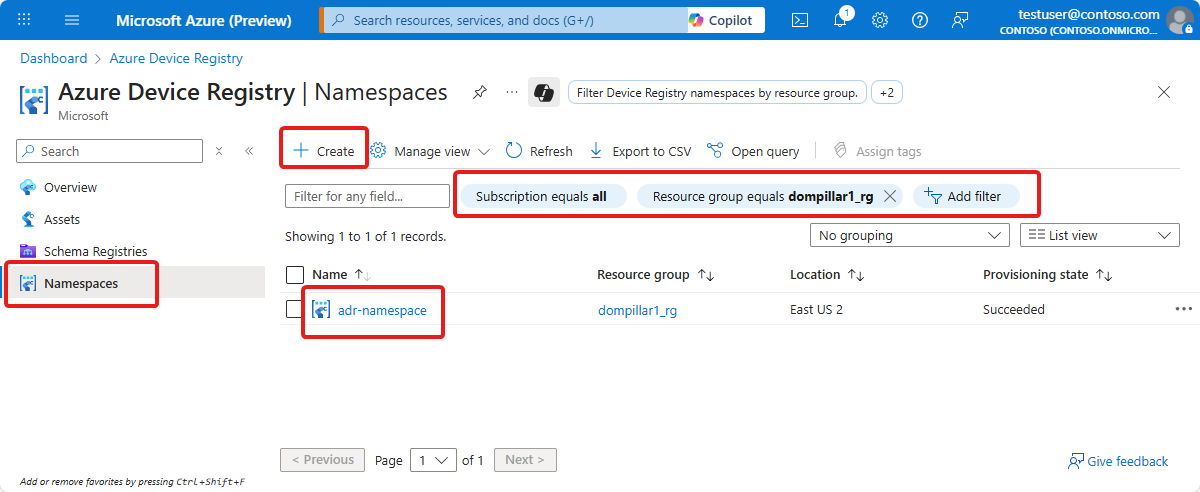


You can also view the details of an existing namespace in the resource group that includes your Azure IoT Operations instance. For example, the following screenshot shows the adr-namespace resource associated with the aio-131235032 Azure IoT Operations instance:

The previous screenshot also shows the other resources in Azure Device Registry such as the IoT Schema Registry, IoT Namespace Assets, and Devices in the context of the resource group that contains your Azure IoT Operations instance.
Migrate existing assets to namespace assets
If you have existing assets in your Azure IoT Operations instance that you want to move to a namespace, you can use the az iot ops migrate-assets command. This command migrates top-level (or root-level) assets to namespace assets in Azure Device Registry.
Note
Migrating assets requires Azure IoT Operations instance version 1.2.36 or later.
The target set of root assets is converted to an equivalent namespace asset representation, and it replaces the original root asset. During the migration, namespace devices are created in-place of the endpoint profiles referenced by the root assets. If multiple assets reference the same endpoint profile, only one namespace device is referenced by the migrated assets.
To migrate all root assets associated with an instance, run the following command:
az iot ops migrate-assets -n <INSTANCE_NAME> --resource-group <RESOURCE_GROUP>
To migrate specifics root assets associated with an instance, run the following command:
az iot ops migrate-assets -n <INSTANCE_NAME> --resource-group <RESOURCE_GROUP> --pattern <ASSET_ID_1> <ASSET_ID_2> <ASSET_ID_3>
To migrate all root assets associated with an instance that match glob-style patterns, run the following command:
az iot ops migrate-assets -n <INSTANCE_NAME> --resource-group <RESOURCE_GROUP> --pattern asset-pl-* asset-eng?-01
Important
Before migrating assets, make sure to take a snapshot of your instance using the az iot ops clone command. This allows you to restore your instance to its previous state if needed. For more information, see Clone an IoT Operations instance.
Once the migration is complete, you can use az iot ops ns asset and az iot ops ns device commands to manage the namespace assets and devices in your Azure IoT Operations instance.
Configure connector templates
In the Azure portal, you can configure connector templates for your Azure IoT Operations instance. Connector templates define the configuration of connectors, such as the connector for OPC UA, that are deployed to your cluster. When you create a connector template, it enables an OT user to create a device that uses the connector type in the operations experience web UI.
To learn more about connector templates, see Deploy the connector for ONVIF.
Manage instance components
Each Azure IoT Operations instance includes several components, like the MQTT broker, connector for OPC UA, and data flows. To learn more about managing these components, see their respective articles. For example, to manage the MQTT broker, start with Broker overview.
Manage components using Kubernetes deployment manifests (preview)
In general, Azure IoT Operations uses the Azure Arc platform to provide a hybrid cloud experience where you can manage the configuration through Azure Resource Manager (ARM) and front-end tools like the Azure portal, Bicep, and the Azure CLI.
However, you can also manage the components of Azure IoT Operations using YAML Kubernetes deployment manifests. This means you can use tools like kubectl to manage some components of Azure IoT Operations. This feature is in preview and has some limitations:
- Only some components support using Kubernetes deployment manifests. These components are the MQTT broker and data flows. Other components like the connector for OPC UA and Akri services don't support this feature.
- Unless you enable resource sync in Azure IoT Operations using
az iot ops rsync enable, changes made to the resources using Kubernetes deployment manifests are not synced to Azure. To learn more about resource sync, see Resource sync. - Even if resource sync is enabled, brand new resources created using Kubernetes deployment manifests are not synced to Azure. Only changes to existing resources are synced.
Update instances and configuration
In the Azure portal, go to the resource group that contains your Azure IoT Operations instance, or search for and select Azure IoT Operations.
Select the name of your Azure IoT Operations instance.
On the Overview page of your instance, select Add tags or edit to modify tags on your instance.
Uninstall
The Azure IoT Operations CLI and Azure portal offer different options for uninstalling Azure IoT Operations.
Important
If you want to clean up your cluster and resource group, it's recommended to first remove Azure IoT Operations from the cluster using the Azure IoT Operations CLI commands in the following section. Then, you can delete the resource group. Deleting the resource group directly will leave orphaned resources on the cluster.
In the Azure portal, go to the resource group that contains your Azure IoT Operations instance, or search for and select Azure IoT Operations.
Select the name of your Azure IoT Operations instance.
On the Overview page of your instance, select Delete.
Review the list of resources that are and aren't deleted as part of this operation, then type the name of your instance and select Delete to confirm.

Note
Deleting the Azure IoT Operations instance in the Azure portal doesn't remove the dependencies that were created when you deployed Azure IoT Operations. To remove these dependencies, use the az iot ops delete --name <INSTANCE_NAME> --resource-group <RESOURCE_GROUP> --include-deps command described in the Azure CLI procedure.