Note
Access to this page requires authorization. You can try signing in or changing directories.
Access to this page requires authorization. You can try changing directories.
APPLIES TO:
![]() MongoDB vCore
MongoDB vCore
MongoDB Shell (mongosh) is a JavaScript and Node.js environment for interacting with MongoDB deployments. It's a popular community tool to test queries and interact with the data in your Azure Cosmos DB for MongoDB (vCore) cluster. The Azure portal contains multiple tools to query MongoDB data including the Azure Cloud Shell. Azure Cloud Shell is an interactive, authenticated, browser-accessible terminal for managing Azure resources. This article explains how to connect to an Azure Cosmos DB for MongoDB (vCore) cluster using MongoDB Shell within Azure Cloud Shell.
Prerequisites
An existing Azure Cosmos DB for MongoDB (vCore) cluster.
Firewall rules that allow clients within your networks to connect to the cluster. For more information, see configure firewall.
(Optional) These prerequisites are only required if you're using Azure Cloud Shell within a virtual network that's the same or peered with Azure Cosmos DB for MongoDB vCore.
One or more existing Azure Virtual Networks with subnets for Azure Cloud Shell and Azure Cosmos DB for MongoDB vCore deployment.
A private endpoint for the Azure Cosmos DB for MongoDB (vCore) cluster. For more information, see configure private link.
Azure Cloud Shell deployed to the same or a peered virtual network with connectivity to the Azure Cosmos DB for MongoDB (vCore) private endpoint. For more information, see deploy Cloud Shell to virtual network.
Enable access to your cluster from Azure Cloud Shell
First, ensure that Azure Cloud Shell can access your Azure Cosmos DB for MongoDB (vCore) cluster by allowing its IP addresses in the firewall.
Sign in to the Azure portal (https://portal.azure.com).
Navigate to the Azure Cosmos DB for MongoDB (vCore) cluster.
Select Networking from the navigation menu.
On the Networking page within the Public access section, select the + Add Azure Cloud Shell IPs option to automatically add your current IP address to the allowed list.
Select Save to apply the changes.
Note
To ensure connectivity, make sure the specific IP addresses for your region are allowed. For more information, see IP addresses for Azure Cosmos DB for MongoDB (vCore).
Connect using Azure Cloud Shell from Quick Start
Now, use the Quick Start experience in the resource's page on the Azure portal to connect directly to Azure Cosmos DB for MongoDB (vCore) using MongoDB Shell.
In the cluster resource page, select Quick start (preview) from the navigation menu.
Then, select Open MongoDB (vCore) shell.
Wait for the MongoDB Shell environment to start.
Once the environment is ready, enter Y to accept the notice.
Note
If you're experiencing an issue connecting using MongoDB Shell after accepting the notice, make sure Azure Cloud Shell has access to your cluster. For more information, see enable access to your cluster.
Now, enter your password to connect your cluster to Cloud Shell.
Get cluster credentials
Get the connection string you need to connect to this cluster.
Sign in to the Azure portal (https://portal.azure.com).
Navigate to the Azure Cosmos DB for MongoDB (vCore) cluster.
Select the Connection strings navigation menu option.
Copy or record the value from the Connection string field.
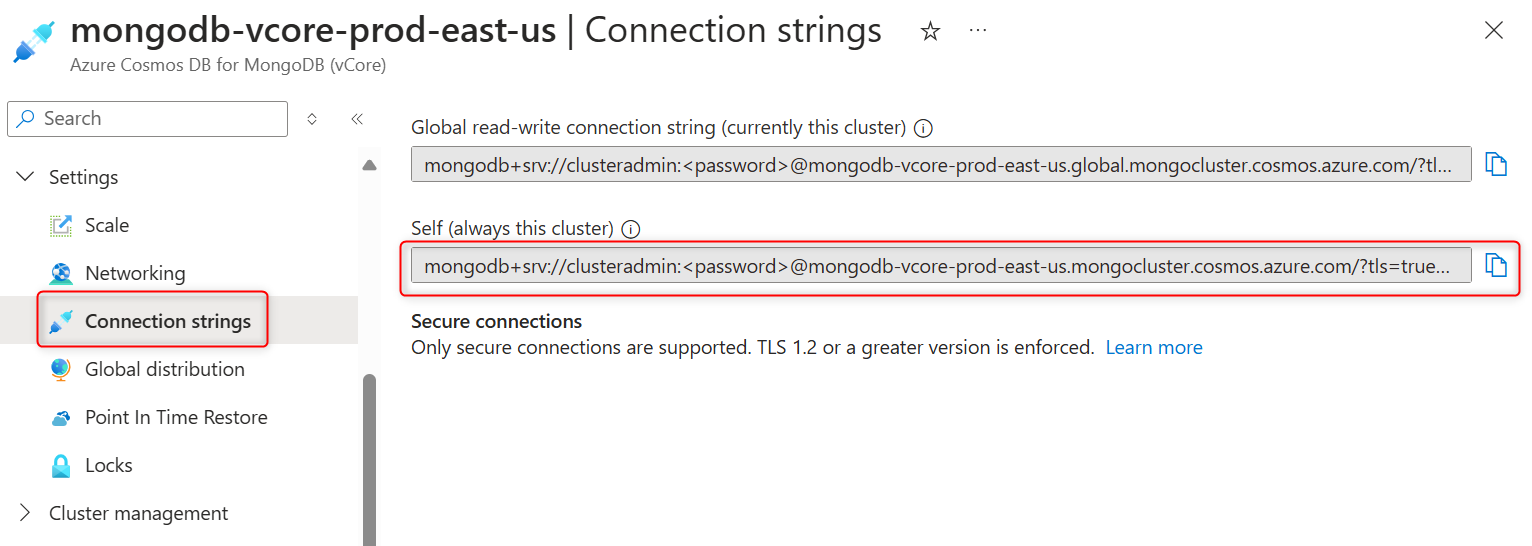
Important
The connection string in the portal doesn't include the password value. You must replace the
<password>placeholder with the credentials you entered when you created the cluster or enter the password interactively.
Configure MongoDB Shell in Azure Cloud Shell manually
Install the MongoDB Shell (mongosh) client to your Azure Cloud Shell instance using Node Package Manager (npm).
Open the Azure Cloud Shell configured with a Bash scripting environment.
Install version 1 of the MongoDB Shell locally in your user directory.
npm install mongosh@1Wait for the installation to complete.
Verify that the installation was successful by getting the version of the
mongoshtool.npx mongosh --version
Connect to the cluster
Connect to your cluster by using the MongoDB Shell with a connection string that doesn't include a password. Use the interactive password prompt to enter your password as part of the connection steps.
Connect by entering the password in the MongoDB Shell prompt. For this step, use a connection string without the password.
npx mongosh "mongodb+srv://<username>@<cluster-name>.mongocluster.cosmos.azure.com/?tls=true&authMechanism=SCRAM-SHA-256&retrywrites=false&maxIdleTimeMS=120000"After you provide the password and are successfully authenticated, observe the warning that appears
------
   Warning: Non-Genuine MongoDB Detected
   This server or service appears to be an emulation of MongoDB rather than an official MongoDB product.
------
Tip
You can safely ignore this warning. This warning is generated because the connection string contains
cosmos.azure. Azure Cosmos DB for MongoDB (vCore) is a native Azure platform as a service (PaaS) offering.
Perform test queries
Verify that you're successfully connected to your cluster by performing a series of test commands and queries.
Check your connection status by running the
connectionStatuscommand.db.runCommand({connectionStatus: 1})List the databases in your cluster.
show dbsSwitch to a specific database. Replace the
<database-name>placeholder with the name of any database in your cluster.use <database-name>Tip
For example, if the database name is
inventory, then the command would beuse inventory.List the collections within the database.
show collectionsFind the first five items within a specific collection. Replace the
<collection-name>placeholder with the name of any collection in your cluster.db.<collection-name>.find().limit(5)Tip
For example, if the collection name is
equipment, then the command would bedb.equipment.find().limit(5).