Note
Access to this page requires authorization. You can try signing in or changing directories.
Access to this page requires authorization. You can try changing directories.
In this article, you learn how to add and use Model Context Protocol (MCP) tools with Azure AI agents by using the Azure AI Foundry for Visual Studio Code extension.
After you build an agent in Azure AI Foundry Agent Service by using this Visual Studio Code (VS Code) extension, you can add MCP tools to your agent.
Using or building an MCP server allows your agent to:
- Access up-to-date information from your APIs and services.
- Retrieve relevant context to enhance the quality of responses from your AI models.
Agents combine AI models with tools to access and interact with your data.
Azure AI Foundry developers can stay productive by developing, testing, and deploying MCP tool-calling agents in the familiar environment of VS Code.
Important
Items marked (preview) in this article are currently in public preview. This preview is provided without a service-level agreement, and we don't recommend it for production workloads. Certain features might not be supported or might have constrained capabilities. For more information, see Supplemental Terms of Use for Microsoft Azure Previews.
Create an Azure AI agent within the designer view
To create an Azure AI agent, follow the steps in Create and edit Azure AI agents within the designer view.
Add an existing MCP server tool to the AI agent
After you create your agent, you can add tools to it, including MCP tools. For more information about available tools, see Tools for Azure AI agents.
You can bring multiple remote MCP servers by adding them as tools. For each tool, you need to provide a unique Server Label value within the same agent and a Server URL value that points to the remote MCP server.
Warning
The remote MCP servers that you use with the MCP tool in this article are not from Microsoft. Microsoft doesn't test or verify these servers. For details, see Considerations for using non-Microsoft services and servers.
To add an existing MCP server tool to your AI agent, follow these steps:
In the designer, in the upper-right corner of the TOOL section, select the Add tool button. In the dropdown list, select the MCP Server tool.
Find the remote MCP server that you want to connect to, such as the GitHub MCP server. Create or update an Azure AI Foundry agent with an MCP tool by using the following information:
Server URL: The URL of the MCP server; for example,
https://gitmcp.io/Azure/azure-rest-api-specs.Server Label: A unique identifier of this MCP server to the agent; for example,
fetch_rest_api_docs.

In the Allowed tools dropdown list, choose which tools the MCP server can use.

After you enter the required information, select the Create tool button.


Create an Azure AI agent on Azure AI Foundry
After you add an MCP tool, you can create an agent directly on Azure AI Foundry by using the following steps:
In the designer, select the Create Agent on Azure AI Foundry button.

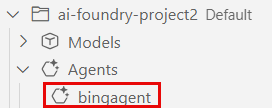
In VS Code, refresh the Azure Resources view. The deployed agent appears in the Agents subsection.


View the details of a deployed AI agent
Selecting the deployed agent opens the AGENT PERFERENCES pane in a view-only mode. You can:
- Select the Edit Agent button to view the agent designer and the .yaml definition of the agent for editing.
- Select the Open Code File button to create a sample code file that uses the agent.
- Select the Open Playground button to open the agent playground.

Edit and update the deployed AI agent
On the AGENT PERFERENCES pane, select the Edit Agent button. The agent designer opens with the agent's .yaml file.
Edit the agent's configuration, such as the model, tools, and instructions.
After you finish editing, select the Update Agent on Azure AI Foundry button to save your changes.

Interact with agents by using the MCP server tool in the agent playground
Right-click your deployed agent that has an MCP Server tool, and then select the Open Playground option. This action starts a thread with your agent so that you can send messages.
On the Agent Playground pane, enter a prompt such as Give me an example for creating a container app and send it.
Select the authentication method for the MCP server tool and proceed.

Select the approval preference for the MCP server tool and proceed.

If you chose Ask every time for your approval preference, you need to approve or reject the tool call.

The agent uses the model and the MCP server tools that you configured in the agent designer to retrieve the information. The source of the information appears in the section for agent annotations.


Clean up resources
The Azure resources that you created in this article are billed to your Azure subscription. If you don't expect to need these resources in the future, delete them to avoid incurring more charges.
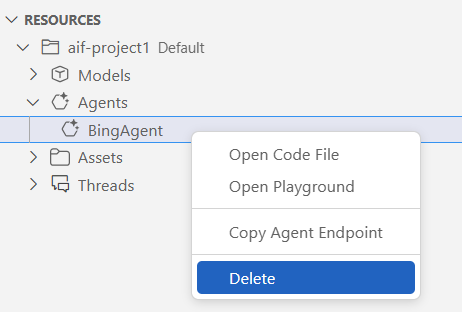
Delete your agents
Tip
Because you can customize the left pane in the Azure AI Foundry portal, you might see different items than shown in these steps. If you don't see what you're looking for, select ... More at the bottom of the left pane.
In the Azure AI Foundry portal, on the left menu, select Agents.
Select the agent that you want to delete, and then select Delete.

Delete your models
In VS Code, refresh the Azure Resources view. Expand the Models subsection to display the list of deployed models.
Right-click the deployed model that you want to delete, and then select Delete.


Delete your connected tools
Open the Azure portal.
Select the Azure resource group that contains the tool.
Select the Delete button.
Related content
- Learn about the tools that you can use with Azure AI agents, such as file search or code interpreter.