你当前正在访问 Microsoft Azure Global Edition 技术文档网站。 如果需要访问由世纪互联运营的 Microsoft Azure 中国技术文档网站,请访问 https://docs.azure.cn。
本教程介绍如何通过创建与 Azure Function 集成的实时纳斯达克索引应用程序,将数据发布到 Python 中的无服务器模式下 Socket.IO 客户端。
查找本教程中使用的完整代码示例:
重要
默认模式需要持久性服务器,不能在默认模式下将 Web PubSub 与 Azure Function 集成用于 Socket.IO。
先决条件
- 拥有有效订阅的 Azure 帐户。 如果没有帐户,可以 创建一个免费帐户。
- Azure Function Core 工具
- 对 Socket.IO 库有一定了解。
在无服务器模式下为 Socket.IO 资源创建 Web PubSub
若要为 Socket.IO 创建 Web PubSub,可以使用以下 Azure CLI 命令:
az webpubsub create -g <resource-group> -n <resource-name>---kind socketio --service-mode serverless --sku Premium_P1
在本地创建 Azure Function 项目
应按照步骤启动本地 Azure 函数项目。
按照步骤安装最新的 Azure Function Core 工具
在终端窗口中或通过命令提示符,运行以下命令在
SocketIOProject文件夹中创建项目:func init SocketIOProject --worker-runtime python此命令创建基于 Python 的函数项目。 然后输入文件夹
SocketIOProject以运行以下命令。目前,函数捆绑包不包括 Socket.IO 函数绑定,因此需要手动添加包。
若要消除函数捆绑包引用,请编辑 host.json 文件并删除以下行。
"extensionBundle": {
    "id": "Microsoft.Azure.Functions.ExtensionBundle",
    "version": "[4.*, 5.0.0)"
}
运行以下命令:
func extensions install -p Microsoft.Azure.WebJobs.Extensions.WebPubSubForSocketIO -v 1.0.0-beta.4
将
function_app.py中的内容替换为代码:import random import azure.functions as func from azure.functions.decorators.core import DataType from azure.functions import Context import json app = func.FunctionApp() current_index= 14000 @app.timer_trigger(schedule="* * * * * *", arg_name="myTimer", run_on_startup=False, use_monitor=False) @app.generic_output_binding("sio", type="socketio", data_type=DataType.STRING, hub="hub") def publish_data(myTimer: func.TimerRequest, sio: func.Out[str]) -> None: change = round(random.uniform(-10, 10), 2) global current_index current_index = current_index + change sio.set(json.dumps({ 'actionName': 'sendToNamespace', 'namespace': '/', 'eventName': 'update', 'parameters': [ current_index ] })) @app.function_name(name="negotiate") @app.route(auth_level=func.AuthLevel.ANONYMOUS) @app.generic_input_binding("negotiationResult", type="socketionegotiation", hub="hub") def negotiate(req: func.HttpRequest, negotiationResult) -> func.HttpResponse: return func.HttpResponse(negotiationResult) @app.function_name(name="index") @app.route(auth_level=func.AuthLevel.ANONYMOUS) def index(req: func.HttpRequest) -> func.HttpResponse: path = './index.html' with open(path, 'rb') as f: return func.HttpResponse(f.read(), mimetype='text/html')下面是这些函数的说明:
publish_data:此函数每隔一秒更新一次纳斯达克指数,并随机更改并将其广播到具有 Socket.IO 输出绑定的连接客户端。negotiate:此函数将协商结果响应给客户端。index:此函数返回静态 HTML 页。
然后添加
index.html文件创建包含特定内容的 index.html 文件:
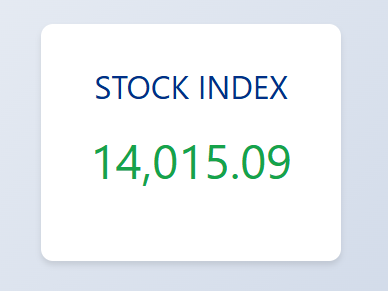
<!DOCTYPE html>
<html lang="en">
<head>
    <meta charset="UTF-8">
    <meta name="viewport" content="width=device-width, initial-scale=1.0">
    <title>Nasdaq Index</title>
    <style>
        /* Reset some default styles */
        * {
            margin: 0;
            padding: 0;
            box-sizing: border-box;
        }

        body {
            font-family: 'Segoe UI', Tahoma, Geneva, Verdana, sans-serif;
            background: linear-gradient(135deg, #f5f7fa, #c3cfe2);
            height: 100vh;
            display: flex;
            justify-content: center;
            align-items: center;
        }

        .container {
            background-color: white;
            padding: 40px;
            border-radius: 12px;
            box-shadow: 0 4px 6px rgba(0,0,0,0.1);
            text-align: center;
            max-width: 300px;
            width: 100%;
        }

        .nasdaq-title {
            font-size: 2em;
            color: #003087;
            margin-bottom: 20px;
        }

        .index-value {
            font-size: 3em;
            color: #16a34a;
            margin-bottom: 30px;
            transition: color 0.3s ease;
        }

        .update-button {
            padding: 10px 20px;
            font-size: 1em;
            color: white;
            background-color: #003087;
            border: none;
            border-radius: 6px;
            cursor: pointer;
            transition: background-color 0.3s ease;
        }

        .update-button:hover {
            background-color: #002070;
        }
    </style>
</head>
<body>
    <div class="container">
        <div class="nasdaq-title">STOCK INDEX</div>
        <div id="nasdaqIndex" class="index-value">14,000.00</div>
    </div>

    <script src="https://cdn.socket.io/4.7.5/socket.io.min.js"></script>
    <script>
        function updateIndexCore(newIndex) {
            newIndex = parseFloat(newIndex);
            currentIndex = parseFloat(document.getElementById('nasdaqIndex').innerText.replace(/,/g, ''))
            change = newIndex - currentIndex;
            // Update the index value in the DOM
            document.getElementById('nasdaqIndex').innerText = newIndex.toLocaleString('en-US', {minimumFractionDigits: 2, maximumFractionDigits: 2});

            // Optionally, change the color based on increase or decrease
            const indexElement = document.getElementById('nasdaqIndex');
            if (change > 0) {
                indexElement.style.color = '#16a34a'; // Green for increase
            } else if (change < 0) {
                indexElement.style.color = '#dc2626'; // Red for decrease
            } else {
                indexElement.style.color = '#16a34a'; // Neutral color
            }
        }

        async function init() {
            const negotiateResponse = await fetch(`/api/negotiate`);
            if (!negotiateResponse.ok) {
                console.log("Failed to negotiate, status code =", negotiateResponse.status);
                return;
            }
            const negotiateJson = await negotiateResponse.json();
            socket = io(negotiateJson.endpoint, {
                path: negotiateJson.path,
                query: { access_token: negotiateJson.token}
            });

            socket.on('update', (index) => {
                updateIndexCore(index);
            });
        }

        init();
    </script>
</body>
</html>
关键部分在
index.html中:async function init() { const negotiateResponse = await fetch(`/api/negotiate`); if (!negotiateResponse.ok) { console.log("Failed to negotiate, status code =", negotiateResponse.status); return; } const negotiateJson = await negotiateResponse.json(); socket = io(negotiateJson.endpoint, { path: negotiateJson.path, query: { access_token: negotiateJson.token} }); socket.on('update', (index) => { updateIndexCore(index); }); }它首先与函数应用协商以获取 URI 和服务的路径。 然后注册一个回调以更新索引。
如何在本地运行应用
准备好代码后,按照说明运行示例。
为 Azure Function 设置 Azure 存储
Azure Functions 需要存储帐户,即使在本地运行也是如此。 选择以下两个选项之一:
- 运行免费的 Azurite 模拟器。
- 使用 Azure 存储服务。 如果继续使用它,可能会产生费用。
安装 Azurite
npm install -g azurite启动 Azurite 存储模拟器:
azurite -l azurite -d azurite\debug.log确保 local.settings.json 中的
AzureWebJobsStorage设置为UseDevelopmentStorage=true。
为 Socket.IO 设置 Web PubSub 的配置
将连接字符串添加到 Function APP:
func settings add WebPubSubForSocketIOConnectionString "<connection string>"
运行示例应用
隧道工具运行后,可以在本地运行 Function App:
func start
请访问网页http://localhost:7071/api/index。
后续步骤
接下来,可以尝试使用 Bicep 通过基于标识的身份验证联机部署应用: