本文介绍如何准备用于 Azure 本地虚拟机(VM)的 Ubuntu Azure 市场映像。 按照以下步骤作,可确保 VM 具有最新的安全更新、支持和集成功能。
先决条件
具有使用逻辑卷管理(LVM)(例如 Ubuntu 22.04 或更高版本)设置和许可 Ubuntu VM 的权限的活动 Azure 订阅。
对 Azure 门户的访问权限。
为工作负荷设置逻辑网络和存储路径的 Azure 本地群集。 有关详细信息,请参阅 “创建逻辑网络 ”和 “创建存储路径”。
请确保查看并完成先决条件。
如果使用客户端连接到 Azure 本地实例,请参阅 通过 Azure CLI 客户端连接到 Azure 本地。
登录并设置订阅
登录。 类型:
az login --use-device-code设置订阅。
az account set --subscription <Subscription ID>
设置和准备 Azure VM
若要设置和准备 Azure VM,请执行以下步骤:
登录到 Azure 门户。
在左窗格中,依次选择 “虚拟机”、“ 创建”和“ 虚拟机”。
浏览可用的映像并选择首选的 Ubuntu 版本。
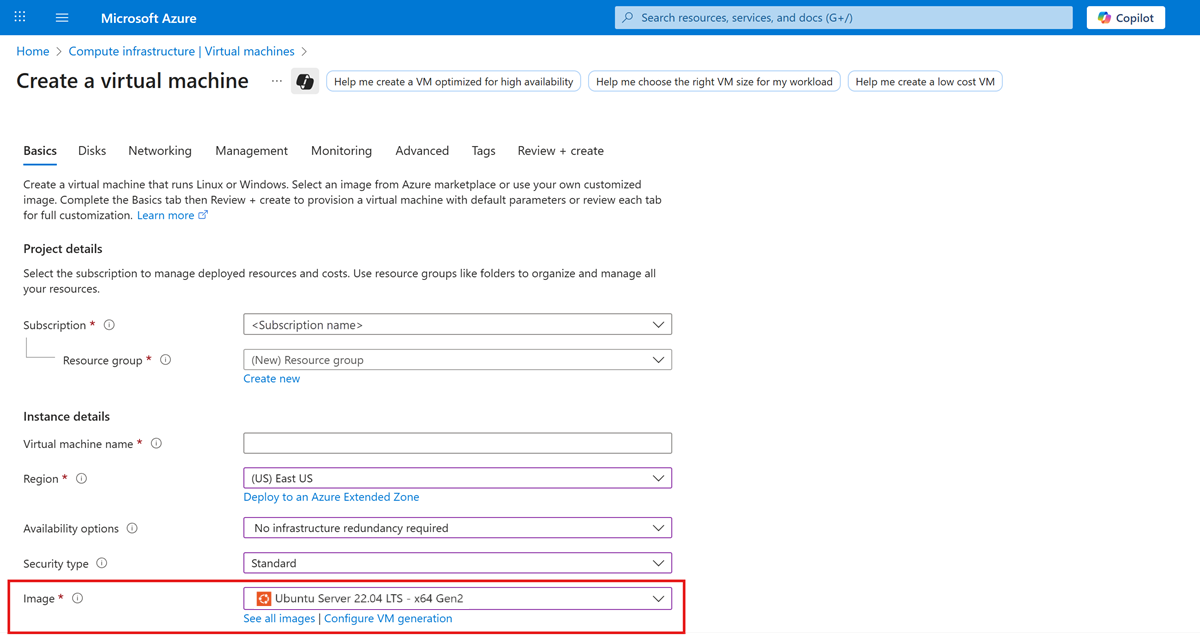
在向导中输入所需的详细信息并完成 Azure VM 的设置。
注释
使用 Azure 本地不使用的用户名创建 Azure VM 来避免用户名冲突。 如果在 Azure VM 和 Azure 本地上使用同一用户名(例如“usernameA”),然后重复使用 VHD,则 VM 将保留原始登录信息。 为了获得最佳结果,请使用不同的凭据(如“usernameB”)设置 Azure 本地 VM。
部署 VM 后,转到 VM 概述 页,选择 “连接 ”选项,然后选择“ 串行控制台”。
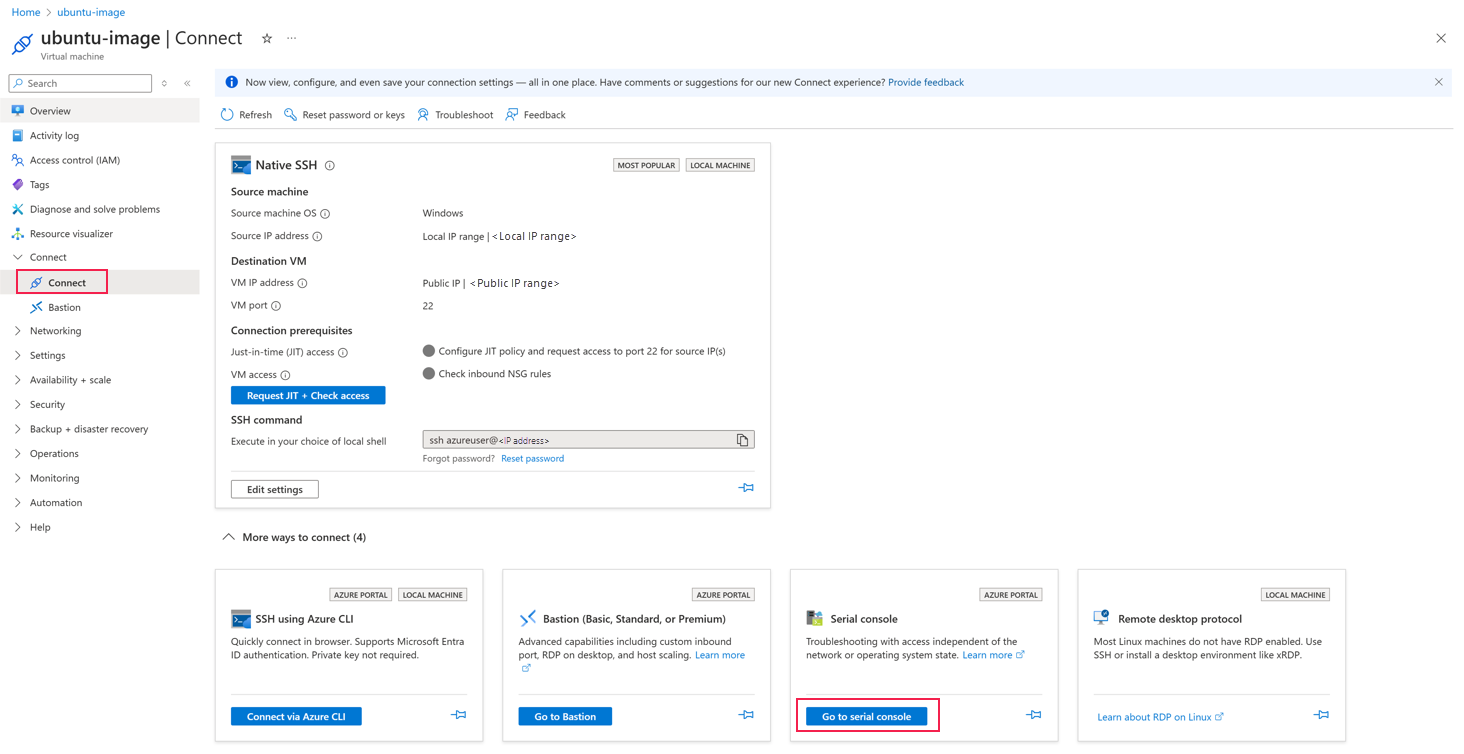
使用凭据连接到 VM 并运行以下命令:
以根用户身份登录到 VM:
sudo sucloud-init清理默认配置,因为它与 Azure 本地 VM 无关。sudo cloud-init clean sudo rm -rf /var/lib/cloud/ /var/log/* /tmp/*清理特定于 VM 的 SSH 主机密钥。
sudo rm -f /etc/ssh/ssh_host*


更改 VM 映像的数据源
若要更改 VM 映像的数据源,请执行以下步骤:
将目录更改为以下路径,并列出文件以查找数据源文件
90_dpkg.cfg。运行以下命令:cd /etc/cloud/cloud.cfg.d/ ls示例输出:
azureuser@ubuntu-image:/etc/cloud/cloud.cfg.d$ ls
05_logging.cfg  10-azure-kvp.cfg  90-azure.cfg  90_dpkg.cfg
打开
90_dpkg.cfg文件。 运行以下命令:cat 90_dpkg.cfg示例输出:
azureuser@ubuntu-image:/etc/cloud/cloud.cfg.d$ cat 90_dpkg.cfg
# to update this file, run dpkg-reconfigure cloud-init
datasource_list: [ Azure ]
打开 datasource_list 并将其从 Azure 更新到 NoCloud。 运行以下命令:
sudo dpkg-reconfigure cloud-init示例输出:
Cloud-init supports searching different "Data Sources" for information that it uses to configure a cloud instance. Warning: Only select 'Ec2' if this system will be run on a system with the EC2 metadata service present. Doing so incorrectly will result in a substantial timeout on boot. Which data sources should be searched? [ ] NoCloud: Reads info from /var/lib/cloud/seed only [ ] ConfigDrive: Reads data from Openstack Config Drive [ ] OpenNebula: read from OpenNebula context disk [ ] DigitalOcean: reads data from Droplet datasource [*] Azure: read from MS Azure cdrom. Requires walinux-agent <Ok>通过按空格键切换(*),激活NoCloud并删除Azure。
按 Enter 保存文件。
示例输出:
Cloud-init supports searching different "Data Sources" for information that it uses to configure a cloud instance.

Warning: Only select 'Ec2' if this system will be run on a system with the EC2 metadata service present. Doing so incorrectly will result in a substantial timeout on boot.

Which data sources should be searched?

[*] NoCloud: Reads info from /var/lib/cloud/seed only
[ ] ConfigDrive: Reads data from Openstack Config Drive
[ ] OpenNebula: read from OpenNebula context disk
[ ] DigitalOcean: reads data from Droplet datasource
[ ] Azure: read from MS Azure cdrom. Requires walinux-agent
<Ok>
若要检查文件是否已更新,请运行以下命令:
cat 90_dpkg.cfg示例输出:
azureuser@ubuntu-image:/etc/cloud/cloud.cfg.d$ cat 90_dpkg.cfg
# to update this file, run dpkg-reconfigure cloud-init
datasource_list: [ NoCloud ]
删除 bash 历史记录。 运行以下命令:
sudo rm -f ~/.bash_history
export HISTSIZE=0
exit
停止 Azure VM,因为配置更改现已完成。
将 Azure VM OS 磁盘导出到 Azure 本地群集上的 VHD
若要将 Azure VM OS 磁盘导出到 Azure 本地群集上的 VHD,请执行以下步骤:
在 Azure 门户的 Azure 本地资源中,转到 VM 概述。 在 “设置” 选项下,选择“ 磁盘”,然后选择 “磁盘名称 ”链接。

在 “设置”下,选择“ 磁盘导出”,然后选择“ 生成 URL ”以生成磁盘的安全 URL。

复制下一步生成的安全 URL 链接。


创建 Azure 本地映像
若要使用 SAS 令牌创建 Azure 本地映像,请运行以下命令:
$rg = "<resource-group>"
$cl = "/subscriptions/<sub>/resourcegroups/$rg/providers/microsoft.extendedlocation/customlocations/<customlocation-name>"
$sas = '"https://EXAMPLE.blob.storage.azure.net/EXAMPLE/abcd<sas-token>"'

az stack-hci-vm image create -g $rg --custom-location $cl --name "<IMAGE-NAME>" --os-type "Linux" --image-path $sas
创建 Azure 本地 VM
若要使用创建的 Azure 本地 VM 映像创建 Azure 本地 VM,请按照 Azure Arc 启用的“创建 Azure 本地虚拟机”中的步骤作。