本文介绍如何准备用于 Azure 本地虚拟机(VM)的 Red Hat Enterprise Linux(RHEL)Azure 市场映像。 按照以下步骤作,可确保 VM 具有最新的安全更新、支持和集成功能。
先决条件
在开始之前,必须具备:
具有使用逻辑卷管理(LVM)(例如 RHEL 7.6 或更高版本)设置和许可 RHEL VM 的权限的活动 Azure 订阅。
访问 Azure 门户。
为工作负荷设置逻辑网络和存储路径的 Azure 本地群集。 有关详细信息,请参阅 “创建逻辑网络 ”和 “创建存储路径”。
请确保查看并完成先决条件。
如果使用客户端连接到 Azure 本地实例,请参阅 通过 Azure CLI 客户端连接到 Azure 本地。
登录并设置订阅
登录。 类型:
az login --use-device-code设置订阅。
az account set --subscription <Subscription ID>
设置和准备 Azure VM
若要设置和准备 Azure VM,请执行以下步骤:
登录到 Azure 门户。
在左窗格中,依次选择 “虚拟机”、“ 创建”和“ 虚拟机”。
浏览可用的映像并选择首选 RHEL LVM Gen2 版本。
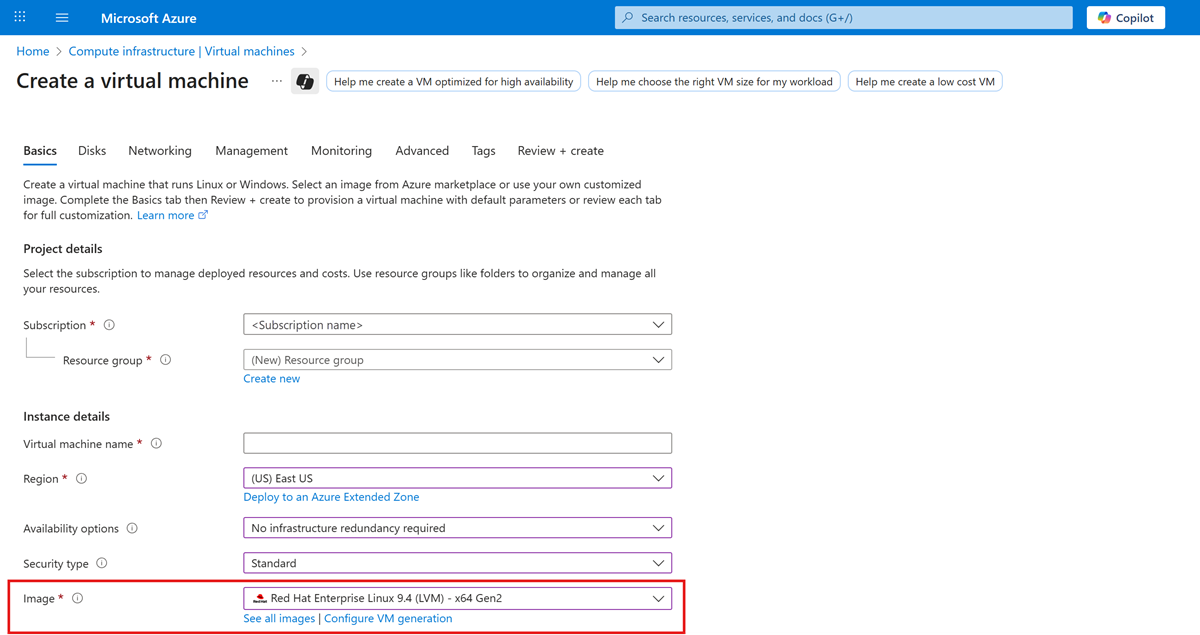
在向导中输入所需的详细信息并完成 Azure VM 的设置。
注释
使用 Azure 本地不使用的用户名创建 Azure VM 来避免用户名冲突。 如果在 Azure VM 和 Azure 本地上使用同一用户名(例如“usernameA”),然后重复使用 VHD,则 VM 将保留原始登录信息。 为了获得最佳结果,请使用不同的凭据(如“usernameB”)设置 Azure 本地 VM。
部署 VM 后,转到 VM 概述 页,选择 “连接 ”选项,然后选择“ 串行控制台”。

使用凭据连接到 VM 并运行以下命令:
以根用户身份登录到 VM:
sudo sucloud-init清理默认配置,因为它与 Azure 本地 VM 无关。sudo yum clean all sudo cloud-init clean示例输出:
[contosotest@localhost ~]$ sudo yum clean all Updating Subscription Management repositories. 17 files removed [contosotest@localhost ~]$ sudo cloud-init cleancloud-init清理默认配置,因为它与 Azure 本地 VM 无关。sudo rm -rf /var/lib/cloud/ /var/log/* /tmp/*清理特定于 VM 的详细信息。
sudo rm -f /etc/sysconfig/network-scripts/*
sudo rm -f /etc/ssh/ssh_host*
sudo rm /etc/lvm/devices/system.devices


更改 VM 映像的数据源
若要更改 VM 映像的数据源,请执行以下步骤
将目录更改为以下路径并列出文件以查找数据源文件 91-azure_datasource.cfg
cd /etc/cloud/cloud.cfg.d/
ls
示例输出:
[root@rhelsysprep cloud.cfg.d]# ls
05_logging.cfg  10-azure-kvp.cfg  91-azure_datasource.cfg  README
打开
91-azure_datasource.cfg文件。 运行以下命令:cat 91-azure_datasource.cfg示例输出:
datasource_list: [ Azure ]
datasource:
  Azure:
    apply network config: False
打开 datasource_list 并将其从 Azure 更新到 NoCloud。 运行以下命令:
vi 91-azure_datasource.cfg若要编辑文件,请按
i。删除数据源并更新详细信息
datasource_list: [Azure]datasource_list: [NoCloud]按 Esc 键并
:x按 Enter 保存文件。示例输出:
datasource_list: [NoCloud]
~??
~
若要检查文件是否已更新,请运行以下命令:
cat 91-azure_datasource.cfg删除 bash 历史记录。 运行以下命令:
sudo rm -f ~/.bash_history
export HISTSIZE=0
exit
停止 Azure VM,因为配置更改现已完成。
将 Azure VM OS 磁盘导出到 Azure 本地群集上的 VHD
若要将 Azure VM OS 磁盘导出到 Azure 本地群集上的 VHD,请执行以下步骤:
在 Azure 门户的 Azure 本地资源中,转到 VM 概述。 在 “设置” 选项下,选择“ 磁盘”,然后选择 “磁盘名称 ”链接。

在 “设置”下,选择“ 磁盘导出”,然后选择“ 生成 URL ”以生成磁盘的安全 URL。
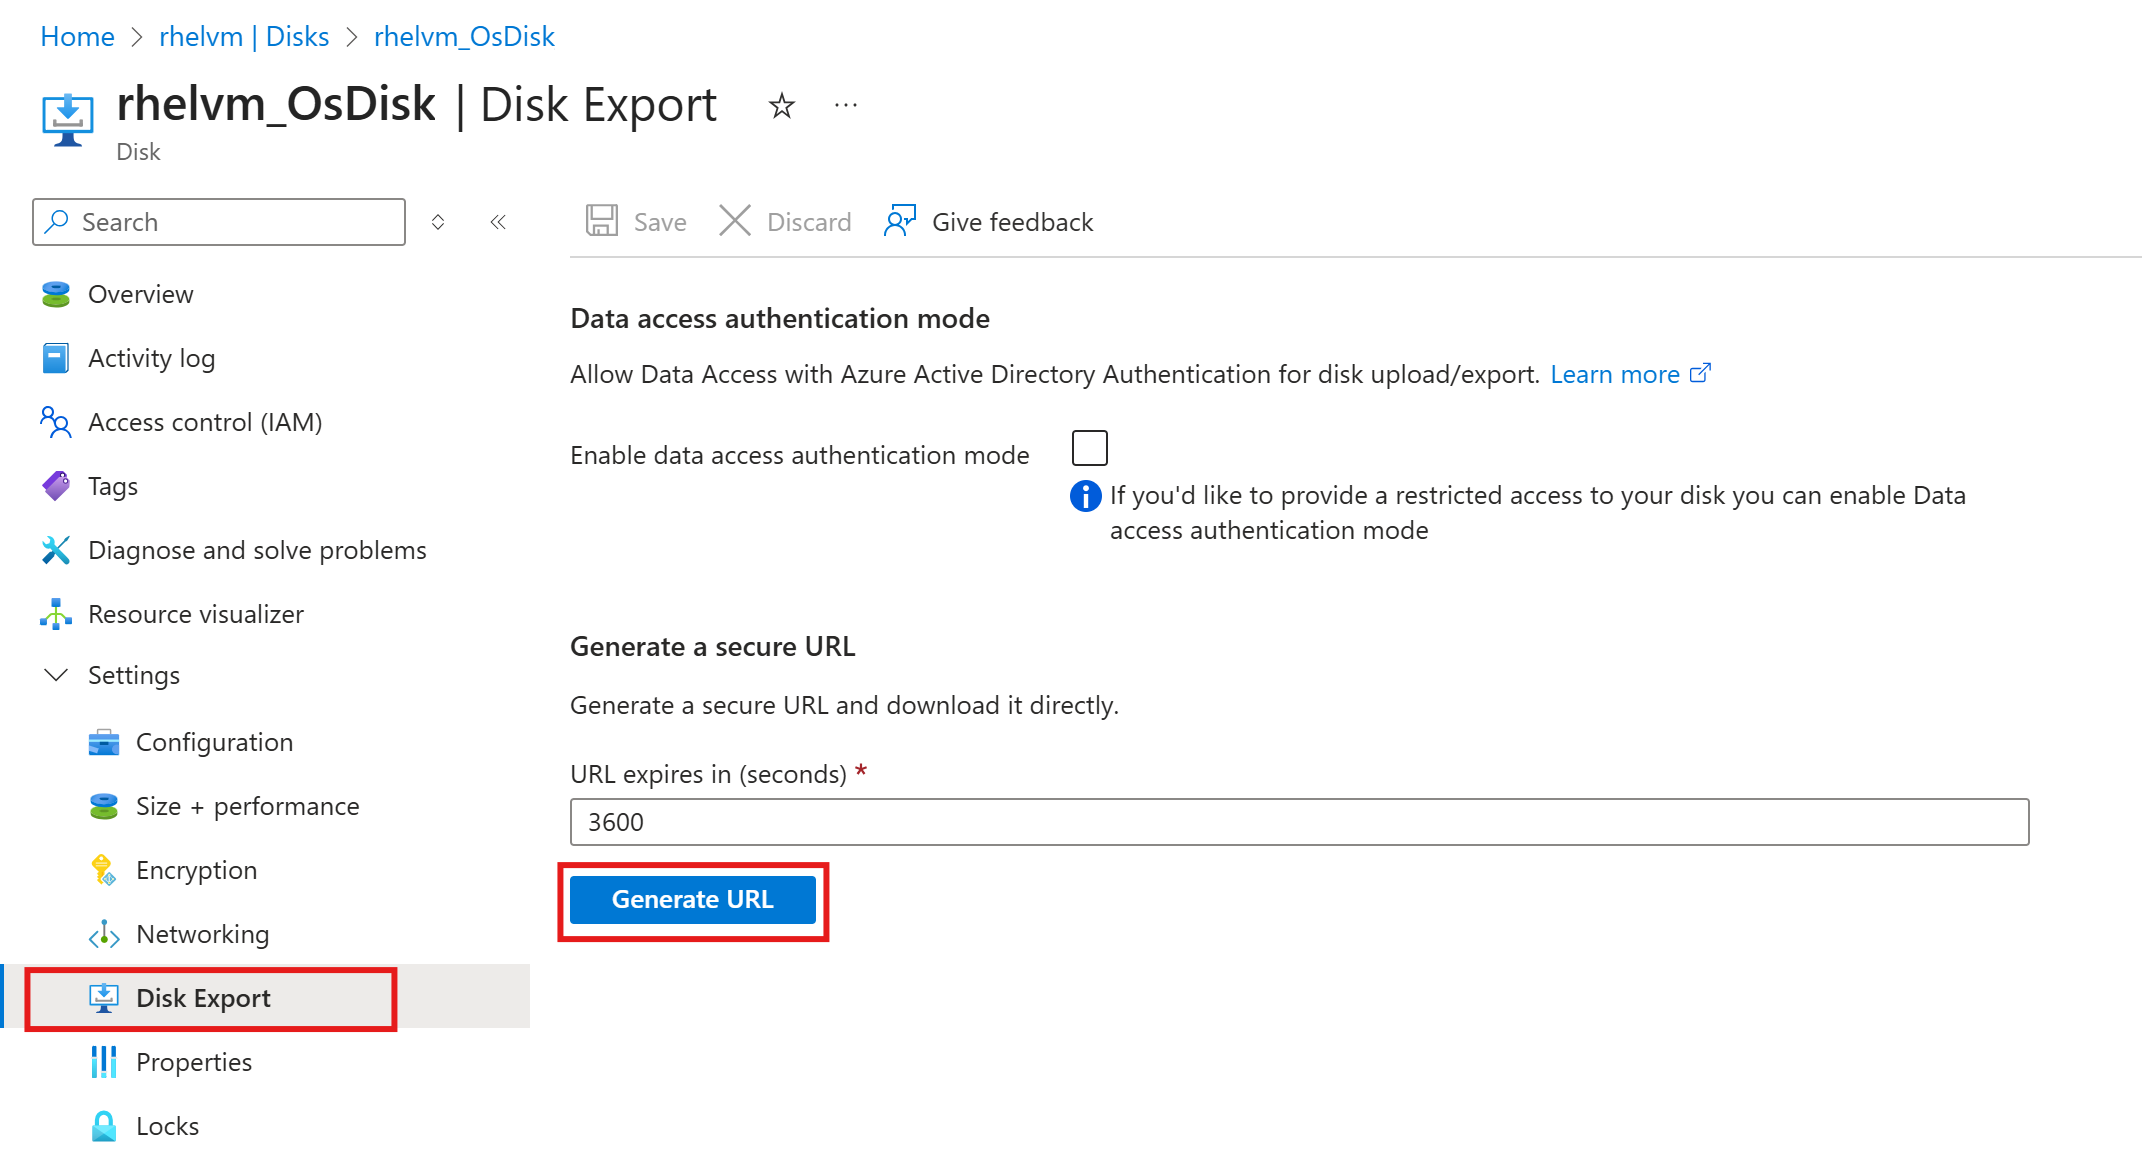
复制下一步生成的安全 URL 链接。


创建 Azure 本地映像
若要使用 SAS 令牌创建 Azure 本地映像,请运行以下命令:
$rg = "<resource-group>"
$cl = "/subscriptions/<sub>/resourcegroups/$rg/providers/microsoft.extendedlocation/customlocations/<customlocation-name>"
$sas = '"https://EXAMPLE.blob.storage.azure.net/EXAMPLE/abcd<sas-token>"'

az stack-hci-vm image create -g $rg --custom-location $cl --name "<IMAGE-NAME>" --os-type "Linux" --image-path $sas
创建 Azure 本地 VM
若要使用创建的 Azure 本地 VM 映像创建 Azure 本地 VM,请按照 Azure Arc 启用的“创建 Azure 本地虚拟机”中的步骤作。