Exercise - Create and deploy an Azure Resource Manager template
In this exercise, you create an Azure Resource Manager (ARM) template, deploy it to Azure, and then update that ARM template to add parameters and outputs.
Create an ARM template
Open Visual Studio Code and create a new file called azuredeploy.json.
Copy and paste the following code into the file.
{
  "$schema": "https://schema.management.azure.com/schemas/2019-04-01/deploymentTemplate.json#",
  "contentVersion": "1.0.0.0",
  "parameters": {},
  "functions": [],
  "variables": {},
  "resources": [],
  "outputs": {}
}
Notice that this file has all of the sections of an ARM template that we described in the previous unit.
Save the changes to the file by pressing Ctrl+S.
Deploy the ARM template to Azure
To deploy this template to Azure, you need to sign in to your Azure account from the Visual Studio Code terminal. Be sure you have the Azure CLI tools installed.
Select Terminal > New Terminal to open a terminal window.
If the command bar of the terminal window says bash, you have the right shell to work from and you can skip to the next section.
If not, select the drop-down and choose Select Default Profile.

Select Git Bash.

Change directory to the folder containing your ARM template file.
Sign in to Azure
In the terminal window, run this command to sign in to Azure.
az login
In the browser window that opens, sign in to your account. After you sign in, a list of the subscriptions associated with this account displays in the terminal. The default subscription is marked with an asterisk (*). If you have multiple subscriptions, select the subscription you want to use for this exercise.
Create and set the default resource group
az group create --name <resource-group-name> --location <location>
Replace <resource-group-name> with a unique name for your resource group. Replace <location> with the Azure region closest to you. For example, use eastus for East US.
By setting the default resource group, you can omit that parameter from the Azure CLI commands in this exercise. To set the resource group, run the following command.
az configure --defaults group="<resource-group-name>"
Replace <resource-group-name> with your resource group name.
Deploy the template to Azure
Run the following commands to deploy the ARM template to Azure. The ARM template doesn't have any resources yet, so there aren't any resources created. You should get a successful deployment.
templateFile="azuredeploy.json"
today=$(date +"%d-%b-%Y")
DeploymentName="blanktemplate-"$today

az deployment group create \
 --name $DeploymentName \
 --template-file $templateFile
The top section of the preceding code sets the Azure CLI variables, which include the path to the template file to deploy and the name of the deployment. The bottom section, az deployment group create, deploys the template to Azure. Notice that the deployment name is blanktemplate with the date as a suffix.
You should see Running... in the terminal.
To deploy this template to Azure, you need to sign in to your Azure account from the Visual Studio Code terminal. Be sure that Azure PowerShell Tools are installed from the Visual Studio Code Extensions.
In the command bar, select Terminal > New Terminal to open a PowerShell window.
If the command bar of the terminal window shows PowerShell, you have the right shell from which to work, and you can skip to the next section.

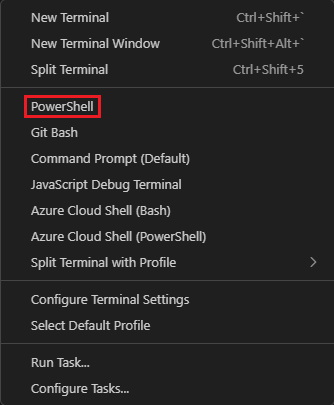
If not, select the down arrow and in the dropdown list select PowerShell. If that option is missing, then select Select Default Profile.
In the input field, scroll down and select PowerShell.
Change directory to the folder containing your ARM template files.
Sign in to Azure by using Azure PowerShell
From the terminal in Visual Studio Code, run the following command to sign in to Azure. A browser opens so you can sign in to your account.
Connect-AzAccount
In the browser window that opens (the browser window could be opened behind the current window, minimize the current window to see it), sign in to your account. After you sign in, a list of the subscriptions associated with this account displays in the terminal. The default subscription is marked with an asterisk (*). If you have multiple subscriptions, select the subscription you want to use for this exercise.
Deploy the template to Azure
New-AzResourceGroup -Name <ResourceGroupName> -Location <Location>
Replace with a unique name for your resource group. Replace with the Azure region closest to you. For example, use eastus for East US.
By setting the default resource group, you can omit that parameter from the Azure CLI commands in this exercise. To set the resource group, run the following command.
Set-AzDefault -ResourceGroupName [resource group name]
replace [resource group name] with your resource group name.
Deploy the template to Azure by running the following commands. The ARM template doesn't have any resources yet, so there aren't any resources created.
$templateFile="azuredeploy.json"
$today=Get-Date -Format "MM-dd-yyyy"
$deploymentName="blanktemplate-"+"$today"
New-AzResourceGroupDeployment `
  -Name $deploymentName `
  -TemplateFile $templateFile
The top section of the preceding code sets Azure PowerShell variables, which includes the path to the deployment file and the name of the deployment. Then, the New-AzResourceGroupDeployment command deploys the template to Azure. Notice that the deployment name is blanktemplate with the date as a suffix.
When you deploy your ARM template to Azure, go to the Azure portal.
In the resource menu, select Resource groups.
Select the resource group you created in this exercise.
On the Overview pane, you see that one deployment succeeded.

Select 1 Succeeded to see the details of the deployment.

Select
blanktemplateto see what resources were deployed. In this case, it's empty because you didn't specify any resources in the template yet.
Leave the page open in your browser so that you can check on deployments again.
Add a resource to the ARM template
In the previous task, you learned how to create a blank template and deploy it. Now, you're ready to deploy an actual resource. In this task, you add an Azure storage account resource to the ARM template.
In the azuredeploy.json file in Visual Studio Code, update the file so it looks like:
{
  "$schema": "https://schema.management.azure.com/schemas/2019-04-01/deploymentTemplate.json#",
  "contentVersion": "1.0.0.0",
  "parameters": {},
  "functions": [],
  "variables": {},
  "resources": [
    {
      "type": "Microsoft.Storage/storageAccounts",
      "apiVersion": "2025-01-01",
      "name": "storageaccount1",
      "tags": {
        "displayName": "storageaccount1"
      },
      "location": "[resourceGroup().location]",
      "kind": "StorageV2",
      "sku": {
        "name": "Standard_LRS"
      }
    }
  ],
  "outputs": {}
}
Change the values of the resource name and displayName to something unique (for example, learnexercise12321). This name must be globally unique across Azure, contain 3 to 24 characters, and include only lowercase letters, numbers, and hyphens.
The resource location is set to the same location as the resource group where the resource is deployed. Leave the default here.
Save the file.
Deploy the updated ARM template
Here, you change the name of the deployment to better reflect what this deployment does.
Run the following Azure CLI commands in the terminal. This snippet is the same code you used previously, but the name of the deployment is changed.
templateFile="azuredeploy.json"
today=$(date +"%d-%b-%Y")
DeploymentName="addstorage-"$today

az deployment group create \
  --name $DeploymentName \
  --template-file $templateFile
Run the following Azure PowerShell commands in the terminal. This snippet is the same code you used previously, but the name of the deployment is changed.
$templateFile="azuredeploy.json"
$today=Get-Date -Format "MM-dd-yyyy"
$deploymentName="addstorage-"+"$today"
New-AzResourceGroupDeployment `
  -Name $deploymentName `
  -TemplateFile $templateFile
Check your deployment
When the deployment finishes, go back to the Azure portal in your browser. Go to your resource group, and you see that there are now 2 Succeeded deployments. Select this link.
Notice that both deployments are in the list.

Select addstorage.

Notice that the storage account is deployed.