Note
Access to this page requires authorization. You can try signing in or changing directories.
Access to this page requires authorization. You can try changing directories.
This article describes the process to deploy a connector that uses the Office 365 Import service to import data from your organization's Twitter account to Microsoft 365. For a high-level overview of this process and a list of prerequisites required to deploy a Twitter connector, see Set up a connector to archive Twitter data.
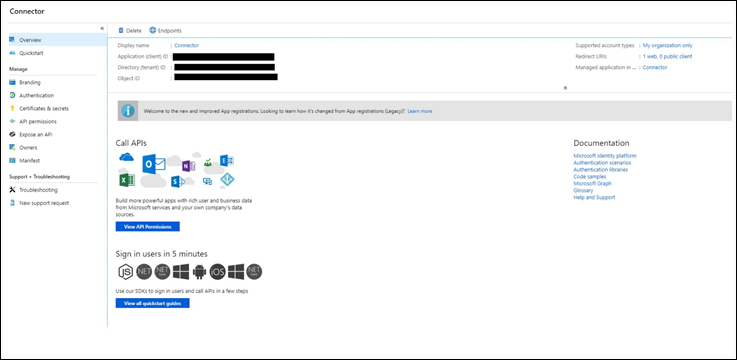
Step 1: Create an app in Microsoft Entra ID
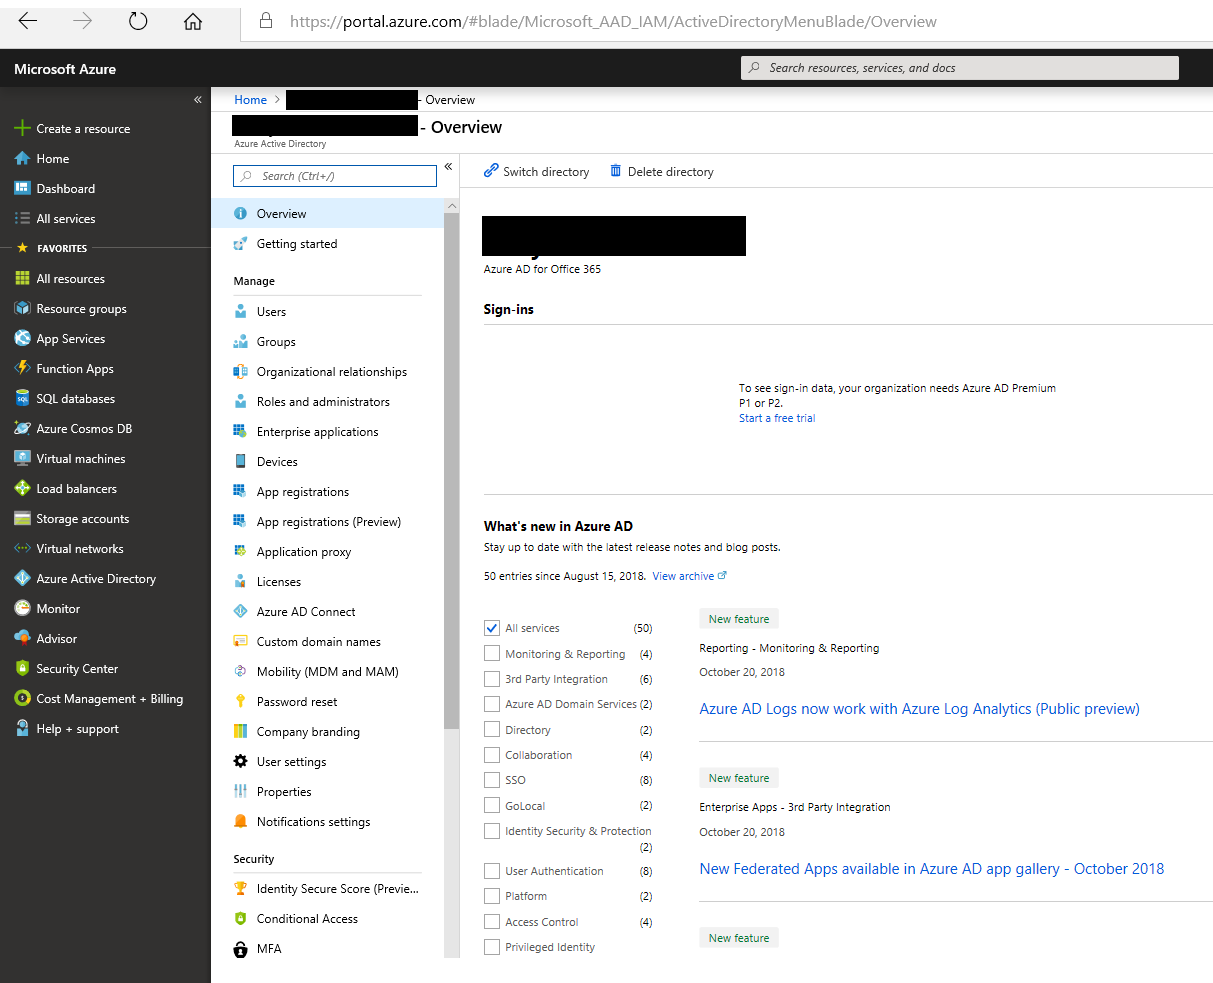
Go to https://portal.azure.com and sign in with the credentials of a global admin account.
In the left navigation pane, select Microsoft Entra ID.
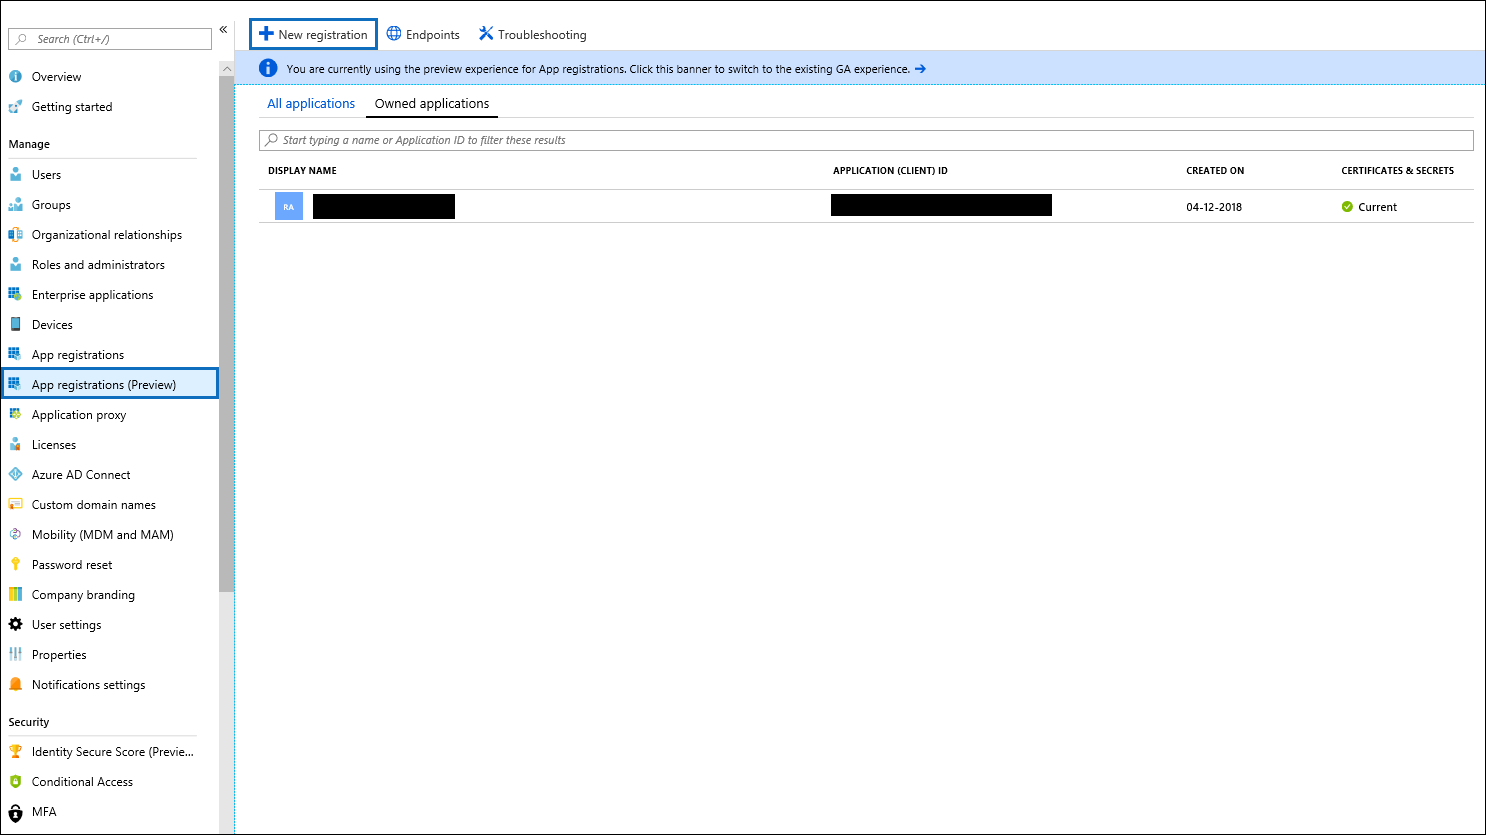
In the left navigation pane, select App registrations (Preview), then select New registration.
Register the application. Under Redirect URI (optional), select Web in the application type dropdown list, then type
https://portal.azure.comin the box for the URI.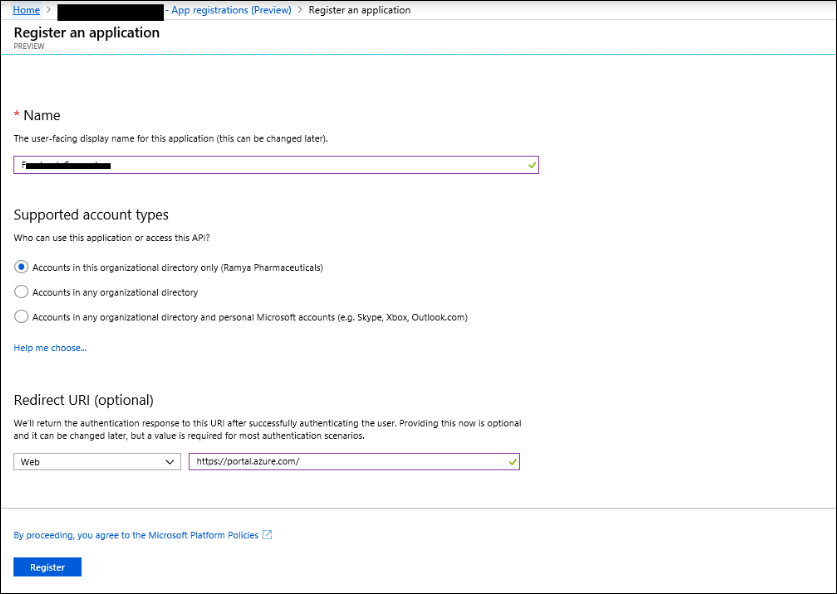
Copy the Application (client) ID and Directory (tenant) ID and save them to a text file or other safe location. You use these IDs in later steps.
Go to Certificates & secrets for the new app and under Client secrets, select New client secret.
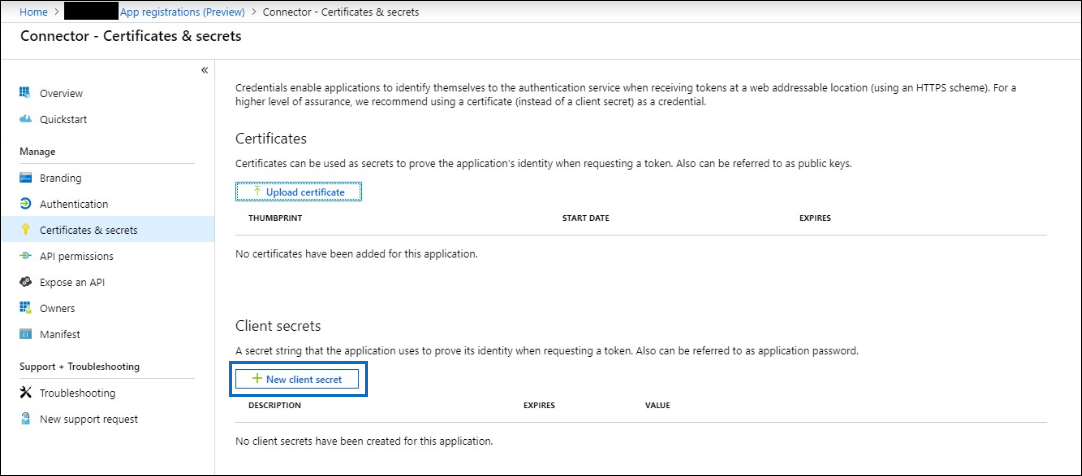
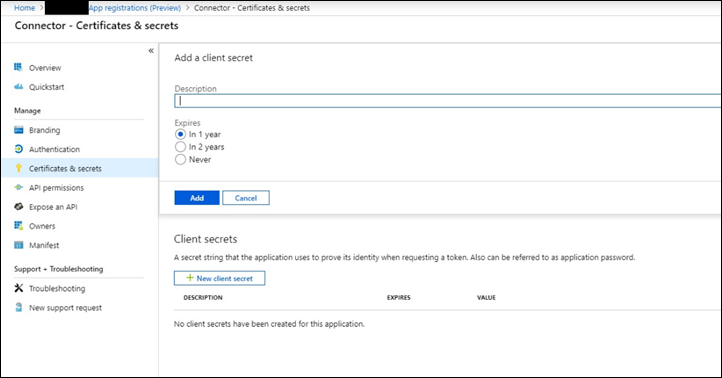
Create a new secret. In the description box, type the secret and then choose an expiration period.
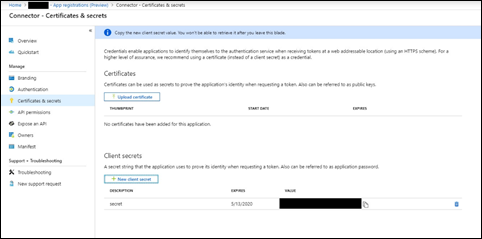
Copy the value of the secret and save it to a text file or other storage location. This is the Microsoft Entra application secret that you use in later steps.
Step 2: Deploy the connector web service from GitHub to your Azure account
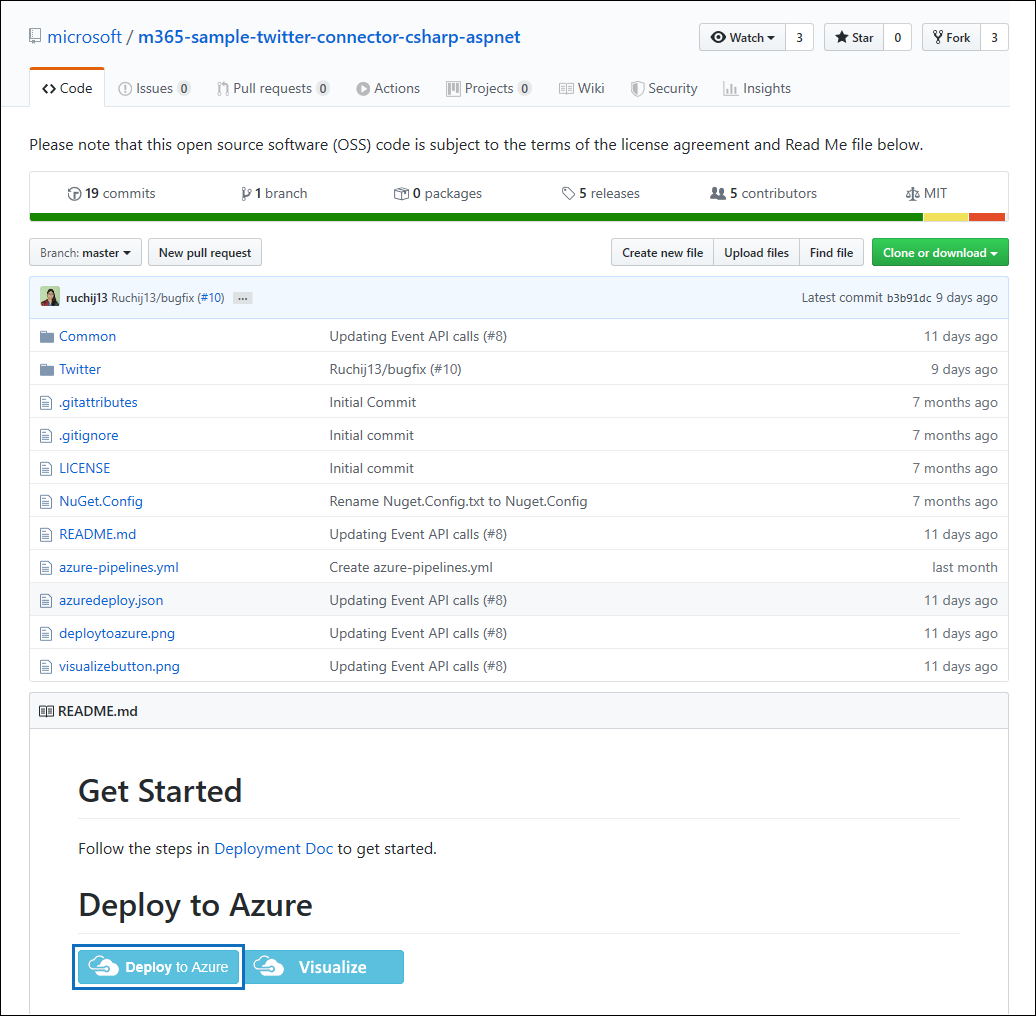
Go to this GitHub site and select Deploy to Azure.
After you select Deploy to Azure, you're redirected to an Azure portal with a custom template page. Fill in the Basics and Settings details, then select Purchase.
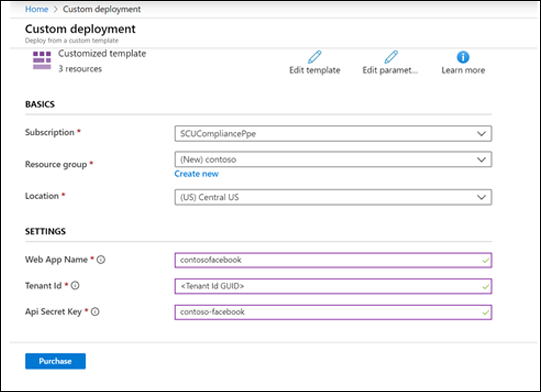
- Subscription: Select your Azure subscription that you want to deploy the Twitter connector web service to.
- Resource group: Choose or create a new resource group. A resource group is a container that holds related resources for an Azure solution.
- Location: Choose a location.
- Web App Name: Provide a unique name for the connector web app. The name must be between 3 and 18 characters in length. This name is used to create the Azure app service URL; for example, if you provide the Web app name of twitterconnector then the Azure app service URL is twitterconnector.azurewebsites.net.
- tenantId: The tenant ID of your Microsoft 365 organization that you copied after creating the Facebook connector app in Microsoft Entra ID in Step 1.
- APISecretKey: You can type any value as the secret. This value is used to access the connector web app in Step 5.
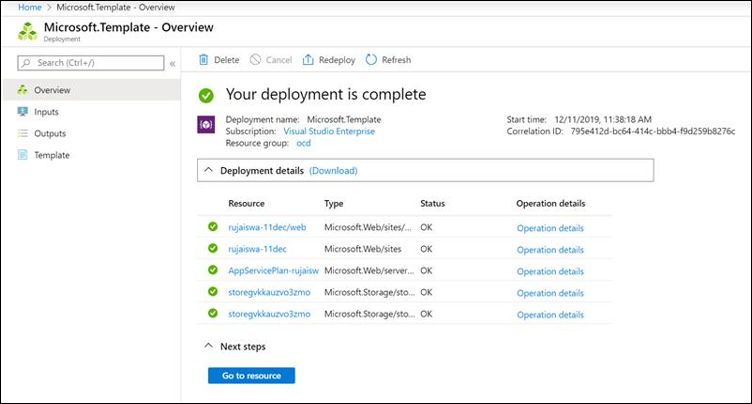
When the deployment succeeds, the page looks similar to the following screenshot:
Step 3: Create the Twitter app
Go to https://developer.twitter.com, sign in with the credentials for the developer account for your organization, and select Apps.

Select Create an app.

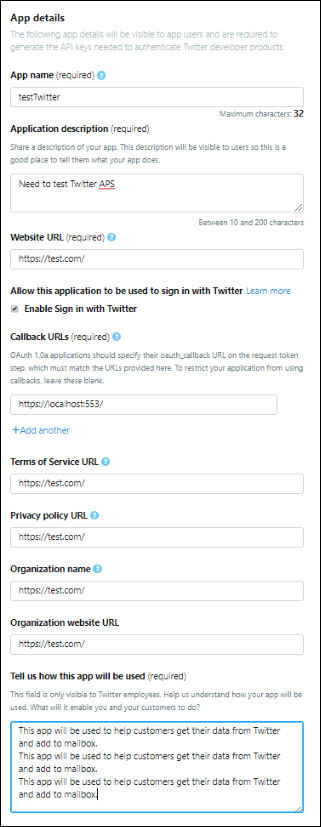
Under App details, enter information about the application.
On the Twitter developer dashboard, select the app that you just created, then select Details.

On the Keys and tokens tab, under Consumer API keys, copy both the API Key and the API secret key and save them to a text file or other storage location. Then select Create to generate an access token and an access token secret and copy these to a text file or other storage location.
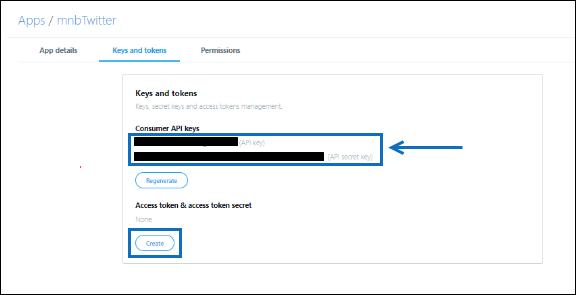
Select Create to generate an access token and an access token secret, and copy these to a text file or other storage location.
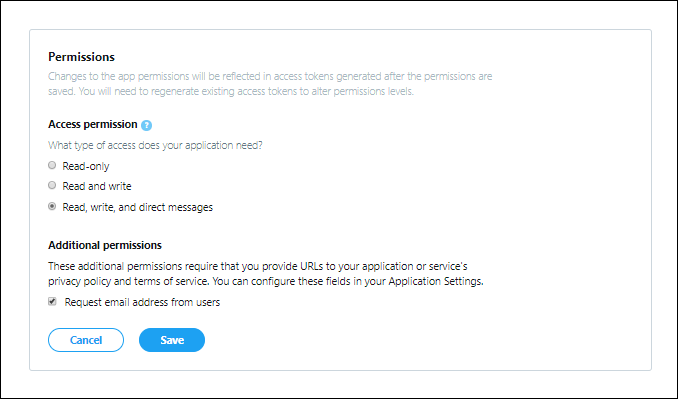
Select the Permissions tab and configure the permissions as shown in the following screenshot:
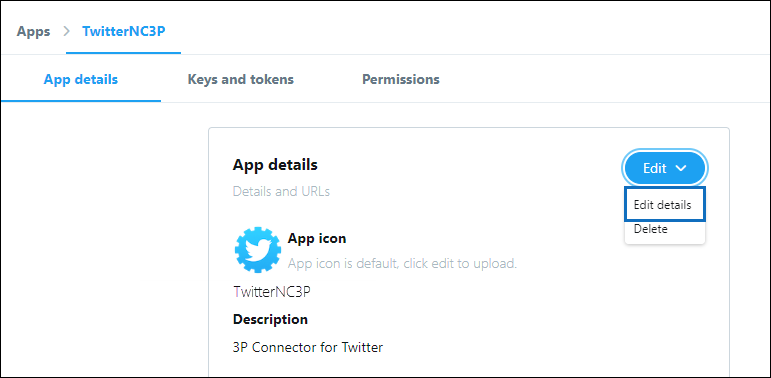
After you save the permission settings, select the App details tab, then select Edit > Edit details.
Complete the following tasks:
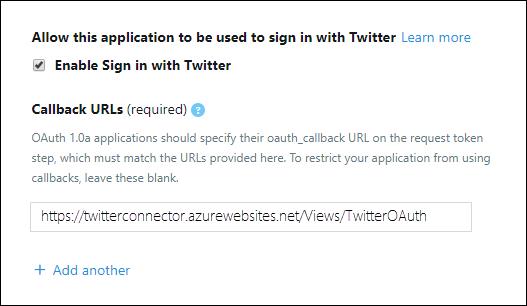
- Select the checkbox to allow the connector app to sign in to Twitter.
- Add the OAuth redirect Uri using the following format: <connectorserviceuri>/Views/TwitterOAuth, where the value of connectorserviceuri is the Azure app service URL for your organization.
The Twitter developer app is now ready to use.
Step 4: Configure the connector web app
Go to
https://<AzureAppResourceName>.azurewebsites.net(where AzureAppResourceName is the name of your Azure app resource that you named in Step 4). The home page of the app looks like the following screenshot:
Select Configure to display a sign in page.
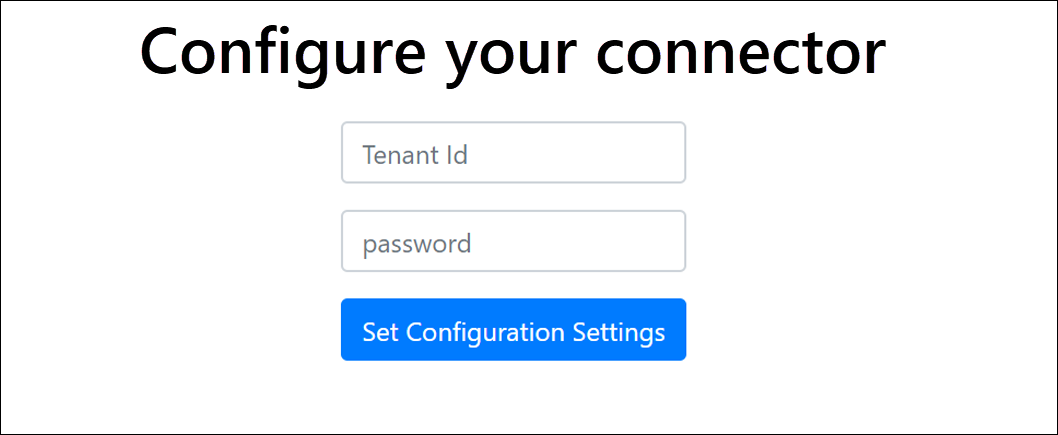
In the Tenant Id box, type or paste your tenant Id (that you obtained in Step 2). In the password box, type or paste the APISecretKey (that you obtained in Step 2), then select Set Configuration Settings to display the configuration details page.
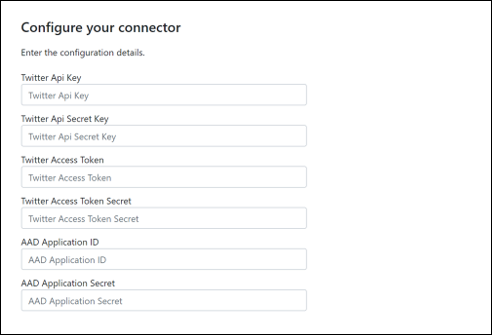
Enter the following configuration settings:
- Twitter Api Key: The API key for the Twitter application that you created in Step 3.
- Twitter Api Secret Key: The API secret key for the Twitter application that you created in Step 3.
- Twitter Access Token: The access token that you created in Step 3.
- Twitter Access Token Secret: The access token secret that you created in Step 3.
- Microsoft Entra Application ID: The application ID for the Microsoft Entra app that you created in Step 1
- Microsoft Entra Application Secret: The value for the APISecretKey secret that you created in Step 1.
Select Save to save the connector settings.
Step 5: Set up a Twitter connector
Sign in to the Microsoft Purview portal.
Select Settings > Data connectors.
Select My connectors, then select Add connector.
From the list, choose Twitter.
On the Terms of service page, select Accept.
On the Add credentials for your connector app page, enter the following information and then select Validate connection.
- In the Name box, type a name for the connector, such as Twitter help handle.
- In the Connector URL box, type or paste the Azure app service URL.
- In the Password box, type or paste the value of the APISecretKey that you created in Step 2.
- In the Azure App ID box, type or paste the value of the Azure Application App Id (also called the client ID) that you obtained in Step 1.
After the connection is successfully validated, select Next.
On the Authorize Microsoft 365 to import data page, type or paste the APISecretKey again and then select Login web app.
Select Login with Twitter.
On the Twitter sign in page, sign in by using the credentials for your organization's Twitter account. After you sign in, the Twitter page displays the following message, "Twitter Connector Job Successfully set up."
Select Continue to complete setting up the Twitter connector.
On the Set filters page, you can apply a filter to initially import items that are a certain age. Select an age, and then select Next.
On the Choose storage location page, type the email address of Microsoft 365 mailbox that the Twitter items are imported to, and then select Next.
Select Next to review the connector settings and then select Finish to complete the connector setup.