TFS 2018
Visual Studio 2019 | Visual Studio 2022
This article describes how to delete a Git branch by using two different methods: in Visual Studio and from the command line.
Note
Deleting a branch in your local repo doesn't remove the branch on the remote.
View your repo's branches by selecting Repos > Branches while viewing your repo on the web.

Select the More options button at the end of the row of the branch you want to delete.
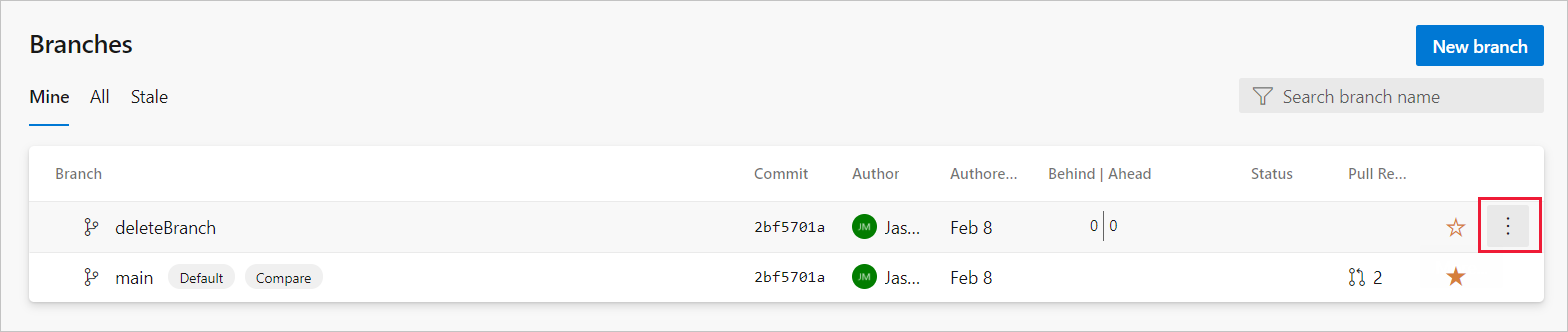
In the options menu, select Delete branch.
In the Delete branch dialog box, select Delete.
To delete a branch, follow these steps:
From the Git menu on the menu bar, choose Manage Branches.
Under Branches, right-click a branch and select Delete. If you have unpublished changes, Visual Studio asks if you're sure you want to delete the branch.
Visual Studio 2019 version 16.8 and later versions provides a Git version control experience while maintaining the Team Explorer Git user interface. To use Team Explorer, uncheck Tools > Options > Preview Features > New Git user experience from the menu bar. You can exercise Git features from either interface interchangeably.
Open up Team Explorer and go to the Branches view.
Locate the branch you want to delete. Remember that you can't delete a branch you're currently working in.
Right-click the branch name and select Delete. Visual Studio will ask if you're sure you want to delete the branch if you have unpublished changes.
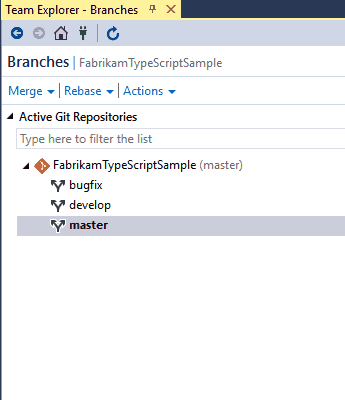
You can delete a remote branch using the same method. Locate the tree for the remote in Team Explorer's Branches view (such as remotes/origin), right-click, and select Delete.
Delete a local branch using the git branch -d command while checked out to a different branch.
git branch -d <branch_name>
Deleting a remote branch requires use of the git push command using the --delete option.
git push origin --delete <branch_name>
Next Steps