Note
Access to this page requires authorization. You can try signing in or changing directories.
Access to this page requires authorization. You can try changing directories.
Private links improve security by routing traffic through Azure Private Link and private endpoints, ensuring data stays on Microsoft’s private network rather than the public internet. Microsoft Fabric offers private links at two scopes: tenant-level and workspace-level. Tenant-level private links secure all workspaces within a tenant, while workspace-level private links allow you to manage network access for specific workspaces individually.
This article provides instructions for setting up workspace-level private links in Fabric.
Prerequisites
- The workspace must be assigned to a Fabric capacity (F SKUs). Other capacities, such as premium (P SKU) and trial capacities, aren't supported.
- A Fabric administrator must enable the tenant setting Configure workspace-level inbound network rules. For details, see Enable workspace inbound access protection for your tenant.
- You need the workspace ID. Find it in the URL after
group. - You need the tenant ID. In the Fabric portal, select the question mark in the upper right corner, then select About Power BI. The tenant ID is the ctid part of the Tenant URL.
- You must be a workspace admin and have sufficient Azure permissions to set up a private link service in Azure.
- You must be a workspace admin to configure the workspace communication policy.
- If this is the first time setting up workspace-level private links in your tenant, re-register the Microsoft.Fabric resource provider in Azure for subscriptions containing the workspace private link resource and private endpoint. In the Azure portal, go to Subscriptions > Settings > Resource providers, select Microsoft.Fabric, and then select Re-register.
Step 1. Create a workspace in Fabric
Create a workspace in Fabric. Make sure the workspace is assigned to a Fabric capacity. You can check assignment by going to the workspace settings and selecting License info, as described in Step 1 of Reassign a workspace to a different capacity.
Step 2. Create the private link service in Azure
To create a private link service, deploy an ARM template in Azure by following these steps:
Sign in to the Azure portal.
From the Azure portal search bar, search for deploy a custom template and then select it from the available options.
On the Custom deployment page, select Build your own template in the editor.
In the editor, create a Fabric resource using the following ARM template, where:
<resource-name>is the name you choose for the Fabric resource.<tenant-object-id>is your Microsoft Entra tenant ID. See How to find your Microsoft Entra tenant ID.<workspace-id>is the workspace ID you noted as part of the prerequisites.
    {
      "$schema": "http://schema.management.azure.com/schemas/2015-01-01/deploymentTemplate.json#",
      "contentVersion": "1.0.0.0",
      "parameters": {},
      "resources": [
        {
          "type": "Microsoft.Fabric/privateLinkServicesForFabric",
          "apiVersion": "2024-06-01",
          "name": "<resource-name>",
          "location": "global",
          "properties": {
            "tenantId": "<tenant-id>",
            "workspaceId": "<workspace-id>"
          }
        }
      ]
    }
You can find details about the Private Link Service in the JSON file.
You can also find the private link service resource in the resource group, but you need to select Show hidden resources.
Step 3. Create a virtual network
The following procedure creates a virtual network with a resource subnet, an Azure Bastion subnet, and an Azure Bastion host.
We recommend reserving at least 10 IP addresses for each workspace-level private endpoint for future use. Currently, we create five IP addresses per workspace-level private link in the subnet.
Sign in to the Azure portal.
In the search box, enter Virtual networks and select it in the search results.
On the Virtual networks page, select + Create.
On the Basics tab of Create virtual network, enter or select the following information:
Setting Value Subscription Select your subscription. Resource group Select the resource group you created earlier for the private link service, such as test-PL. Name Enter a name for your virtual network, such as vnet-1. Region Select the region where you'll initiate the connection to Fabric. 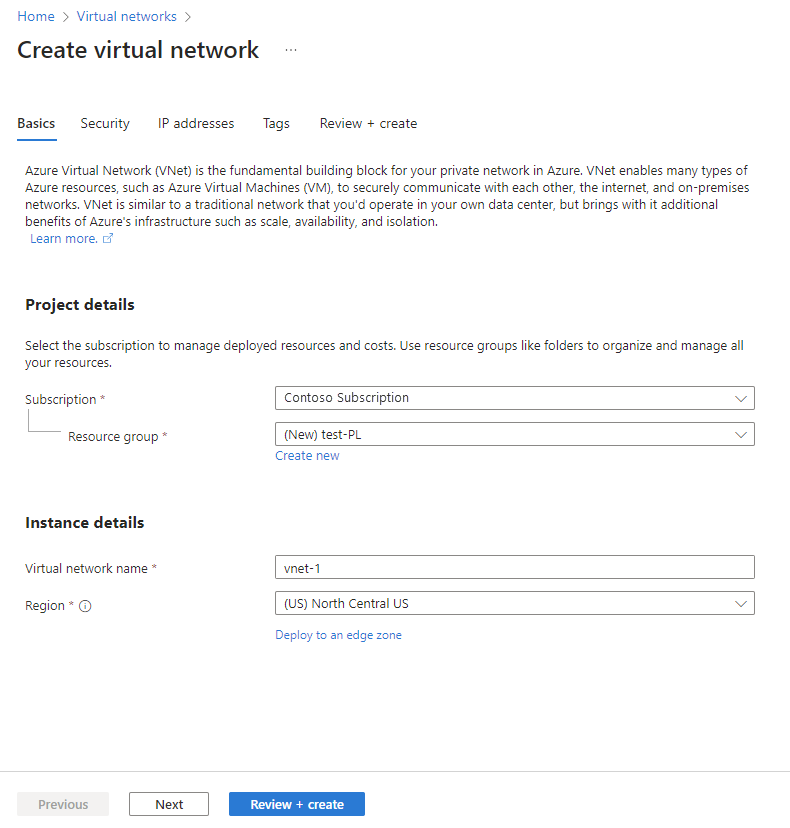
Select Next to proceed to the Security tab. You can keep the default settings or modify them according to your organization's requirements.
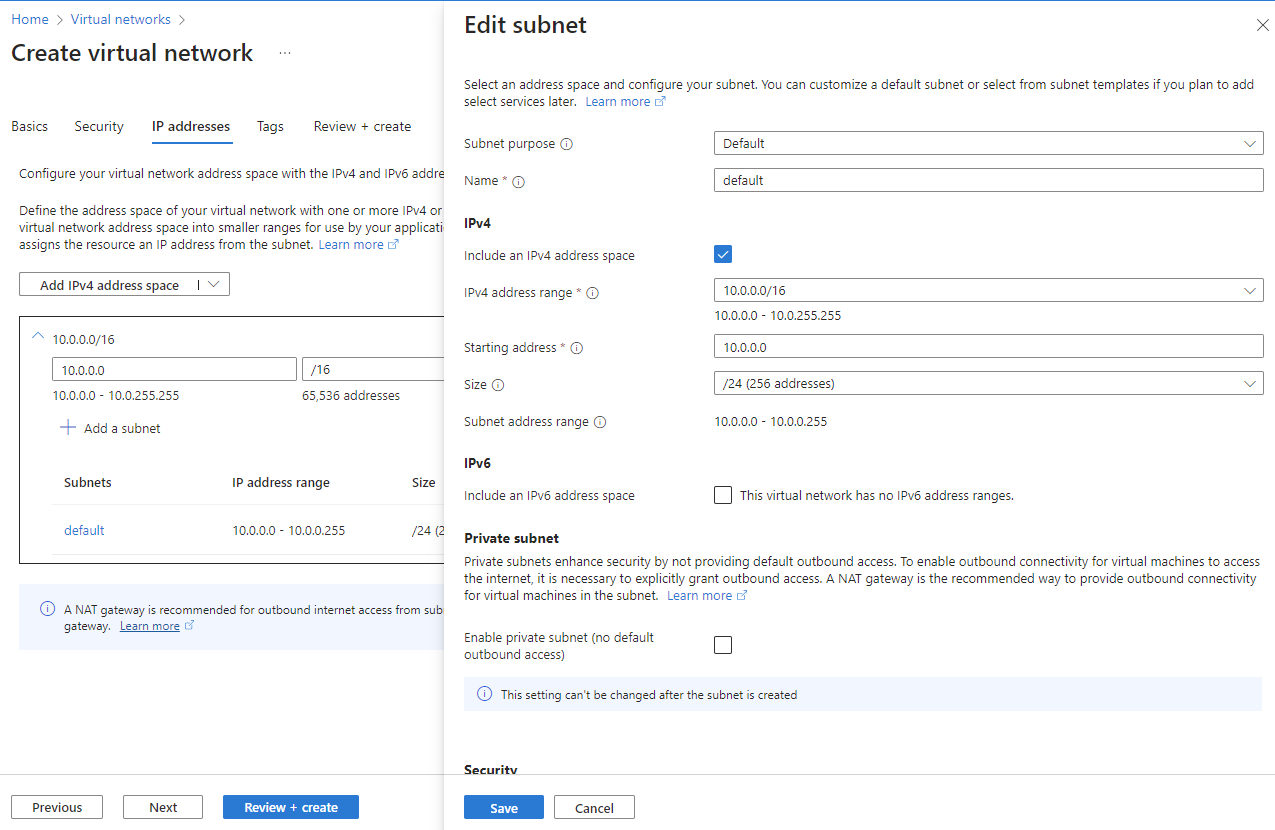
Select Next to proceed to the IP Addresses tab. You can keep the default settings or modify them according to your organization's requirements.
Select Save.
Select Review + create at the bottom of the screen. When validation passes, select Create.

Step 4. Create a virtual machine
Sign in to the Azure portal.
Go to Create a resource > Compute > Virtual machines.
On the Basics tab, enter or select the following information:
Setting Value Subscription Select your Azure Subscription. Resource group Select the same resource group you used earlier when you created the private link service. Virtual machine name Enter a name for the new virtual machine. Select the info bubble next to the field name to see important information about virtual machine names. Region Select the same region you used previously when creating the virtual network. Availability options For testing, choose No infrastructure redundancy required Security Type Leave the default. Image Select the image you want. For example, choose Windows Server 2022. VM architecture Leave the default of x64. Size Select a size. Username Enter a username of your choosing. Password Enter a password of your choosing. The password must be at least 12 characters long and meet the defined complexity requirements. Confirm password Reenter password. Public inbound ports Choose None. 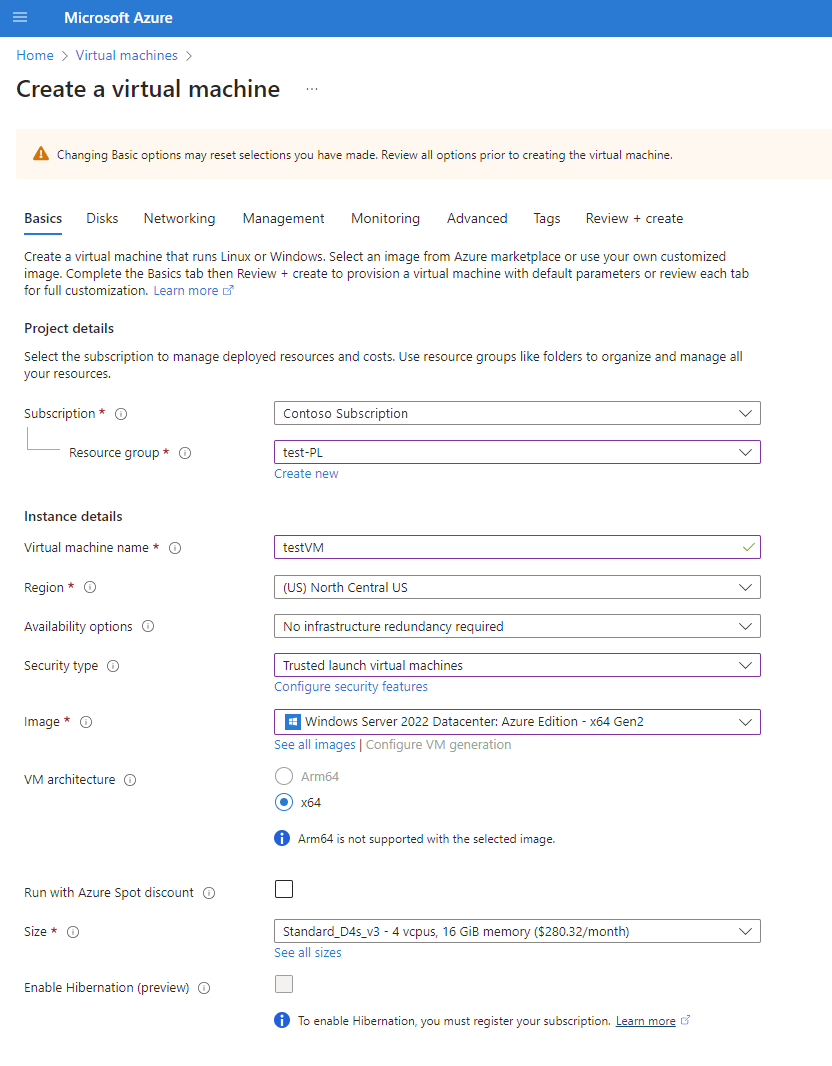
Select Next: Disks.
On the Disks tab, leave the defaults and select Next: Networking.
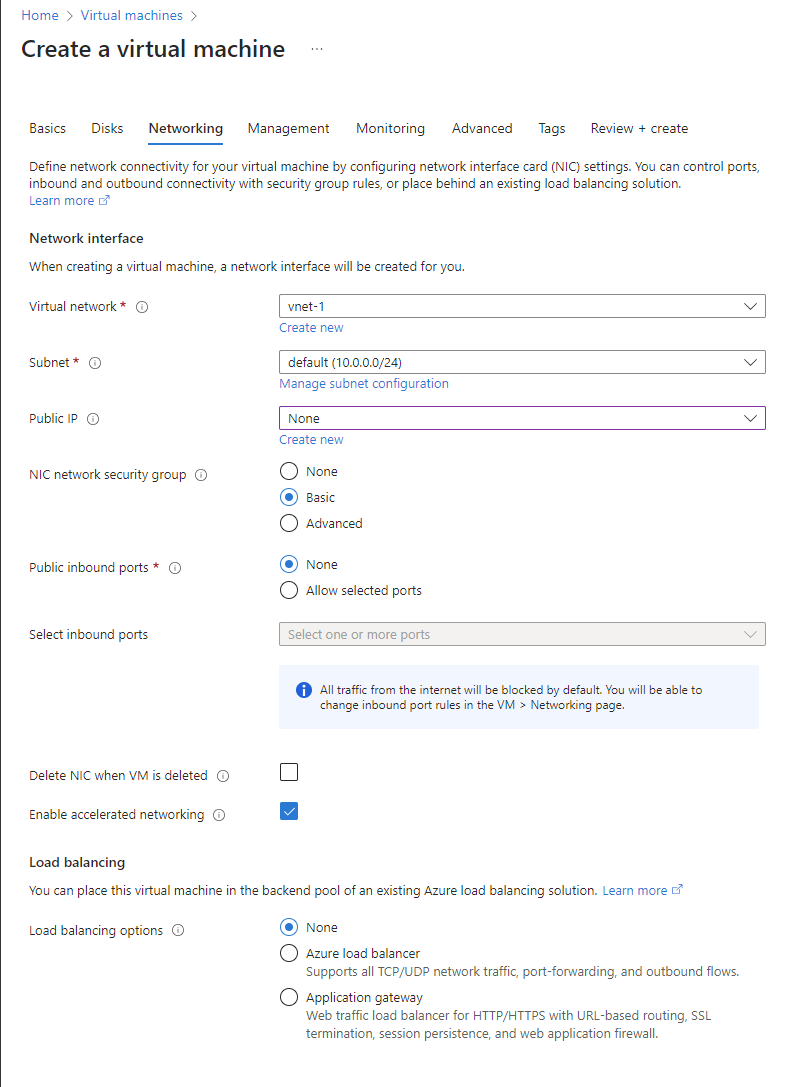
On the Networking tab, select the following information:
Setting Value Virtual network Select the virtual network you created earlier for this deployment. Subnet Select the default subnet (for example, 10.0.0.0/24) that you created earlier as part of the virtual network setup. For the rest of the fields, leave the defaults.
Select Review + create. You're taken to the Review + create page where Azure validates your configuration.
When you see the Validation passed message, select Create.


Step 5. Create a private endpoint
Create a managed private endpoint in the virtual network you created in step 3, and point to the private link service you created in step 2.
In the search box at the top of the portal, enter Private endpoint. Select Private endpoints.
Select + Create in Private endpoints.
On the Basics tab of Create a private endpoint, enter or select the following information:
Setting Value Subscription Select your Azure Subscription. Resource group Select the resource group you created earlier when creating the private link service in Azure. Name Enter a unique name. Network interface name Enter FabricPrivateEndpointNIC. If this name is taken, create a unique name. Region Select the region you created earlier for your virtual network. 
Select Next: Resource. In the Resource pane, enter or select the following information.
Setting Value Connection method Select connect to an Azure resource in my directory. Subscription Select your subscription. Resource type Select Microsoft.Fabric/privateLinkServicesForFabric Resource Choose the Fabric resource you created earlier when creating the private link service in Azure. Target subresource workspace The following image shows the Create a private endpoint - Resource window.

Select Next: Virtual Network. In Virtual Network, enter or select the following information.
Setting Value Virtual network Select virtual network name you created earlier (for example vnet-1). Subnet Select the subnet name you created earlier (for example subnet-1). Select Next: DNS. Under Private DNS Integration, enter or select the following information.
Setting Value Integrate with private DNS zone Select Yes. Private DNS Zone Select
(New)privatelink.fabric.microsoft.com
Select Next: Tags, then Next: Review + create.
Select Create.
Step 6. Connect to the virtual machine
Azure Bastion protects your virtual machines by providing lightweight, browser-based connectivity without the need to expose them through public IP addresses. For more information, see What is Azure Bastion?.
Connect to your VM using the following steps:
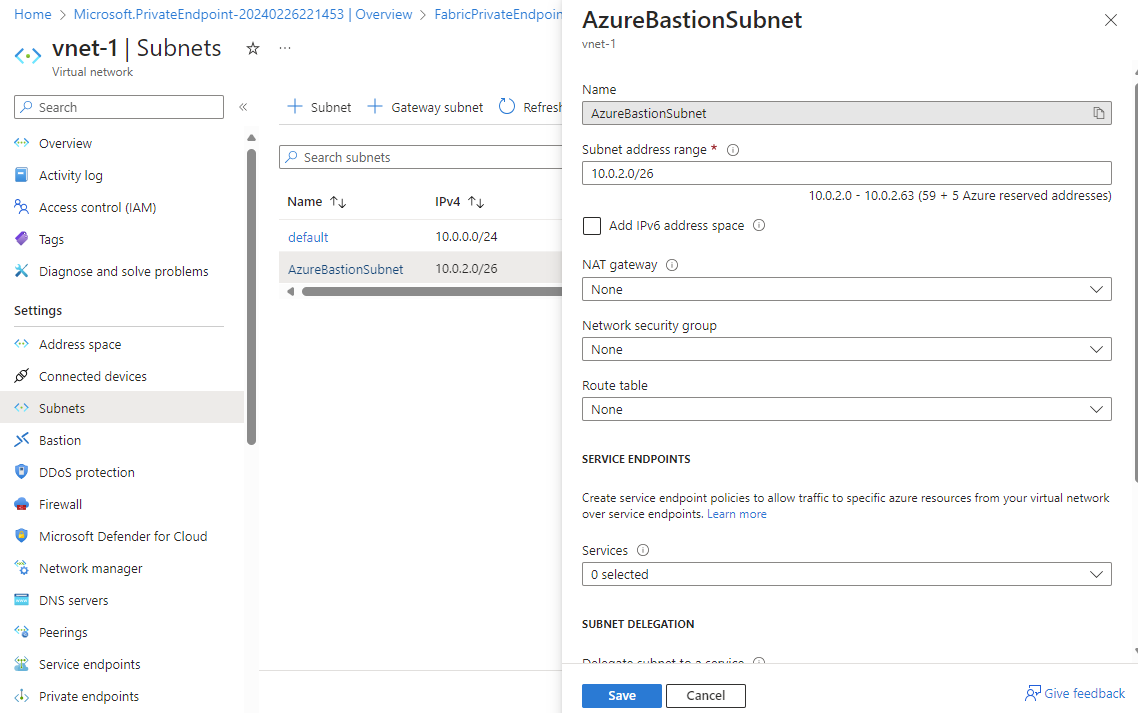
In the virtual network you created earlier, add a new subnet named AzureBastionSubnet.
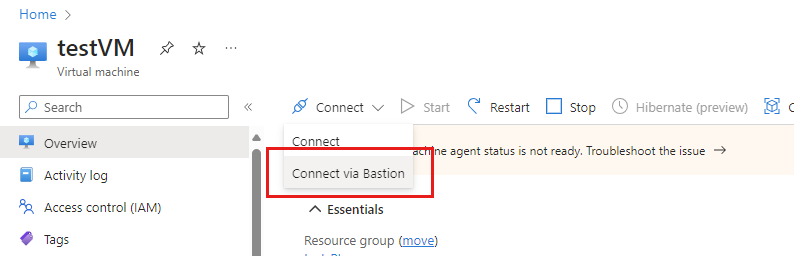
In the portal's search bar, type the name of the virtual machine you created earlier, and select it from the search results.
Select the Connect button, and choose Connect via Bastion from the dropdown menu.
Select Deploy Bastion.
On the Bastion page, enter the required authentication credentials, then select Connect.


Step 7. Access Fabric privately from the virtual machine
Next, access Fabric privately from the virtual machine you created in the previous step. This step verifies that the private endpoint is correctly configured and that you can resolve the Fabric workspace fully qualified domain name (FQDN) to the private IP address.
In the virtual machine, open the Command Prompt.
Enter the following command:
nslookup {workspaceid}.z{xy}.w.api.fabric.microsoft.comwhere workspaceid is the workspace object ID without dashes, and xy represents the first two characters of the workspace object ID.
The private IP address is returned.
Step 8. Deny public access to the workspace
You can optionally deny public access to the workspace. When the workspace is set to deny public access, it means the workspace can only be accessed via workspace-level private link. You can use either the Fabric portal or the Microsoft Graph API to create the access rule for denying public access.
Note
The workspace-level setting to deny public access can take up to 30 minutes to take effect.
In the Fabric portal, select the workspace you want to configure.
Select Workspace settings.
Select Inbound networking.
Under Workspace connection settings, select Allow connections only from workspace level private links.

Select Apply.
