Note
Access to this page requires authorization. You can try signing in or changing directories.
Access to this page requires authorization. You can try changing directories.
Microsoft Entra ID Protection helps protect your organization by automatically detecting and responding to identity-based risks. While automated remediation handles many threats, some situations require manual investigation and action. The ID Protection risk reports provide the insights you need to identify, investigate, and respond to potential security threats affecting your users, sign-ins, and workload identities.
Access the risk reports
The ID Protection Dashboard provides a summary of important insights that you can use at any time to identify potential risks.
- Sign in to the Microsoft Entra admin center as at least a Security Reader.
- Browse to ID Protection > Dashboard.
- Select a report from the ID Protection navigation menu.
Each report launches with a list of all detections for the period shown at the top of the report. You can filter and add or remove columns based on your preference. Download the data in .CSV or .JSON format for further processing. To integrate the reports with Security Information and Event Management (SIEM) tools for further analysis, see Configure diagnostic settings.
View details and take action
Select an entry in a report to view more details, which differ based on the report you're viewing. From the details pane you can also take action on the selected user or sign-in. You can select one or multiple entries and either confirm the risk or dismiss it. You can also start a password reset flow from the user. These capabilities have different role requirements, so if an option is greyed out, you need a higher privileged role. For more information, see ID Protection required roles.
Risky users
The details of a selected risky user provide information on the risk that was remediated, dismissed, or is still currently at risk and needs investigation. You're also provided details about the associated risk detections.
A user becomes a risky user when:
- They have one or more risky sign-ins.
- They have one or more risks detected on their account, like leaked credentials.
Tip
If you have Security Copilot, you have access to a summary in natural language including: why the user risk level was elevated, guidance on how to mitigate and respond, and links to other helpful items or documentation.
From the Risky users report, select a user to view more details about their risk events and even take action on that user.
Risky users details include:
- User ID
- Recent risky sign-ins
- Detections not linked to a sign-in
- Risk history
The Risk history tab shows the events that led to a user risk change in the last 90 days. This list includes risk detections that increased the user's risk. It can also include user or admin remediation actions that lowered the user's risk; for example, a user resetting their password or an admin dismissing the risk.
Taking action on the user level applies to all the detections currently associated with that user. If the action buttons are greyed out, you need a higher privileged role. Administrators can take action on users and choose to:
- Reset password - This action revokes user's current sessions.
- Confirm user compromised - This action is taken on a true positive. ID Protection sets the user risk to high and adds a new detection, Admin confirmed user compromised. The user is considered risky until remediation steps are taken.
- Confirm user safe - This action is taken on a false positive. Doing so removes risk and detections on this user and places it in learning mode to relearn the usage properties. You might use this option to mark false positives.
- Dismiss user risk - This action is taken on a benign positive user risk. This user risk we detected is real, but not malicious, like those from a known penetration test. Similar users should continue being evaluated for risk going forward.
- Block user - This action blocks a user from signing in if attacker has access to password or ability to perform MFA.
- Investigate with Microsoft 365 Defender - This action takes administrators to the Microsoft Defender portal to allow an administrator to investigate further.
Risky sign-ins
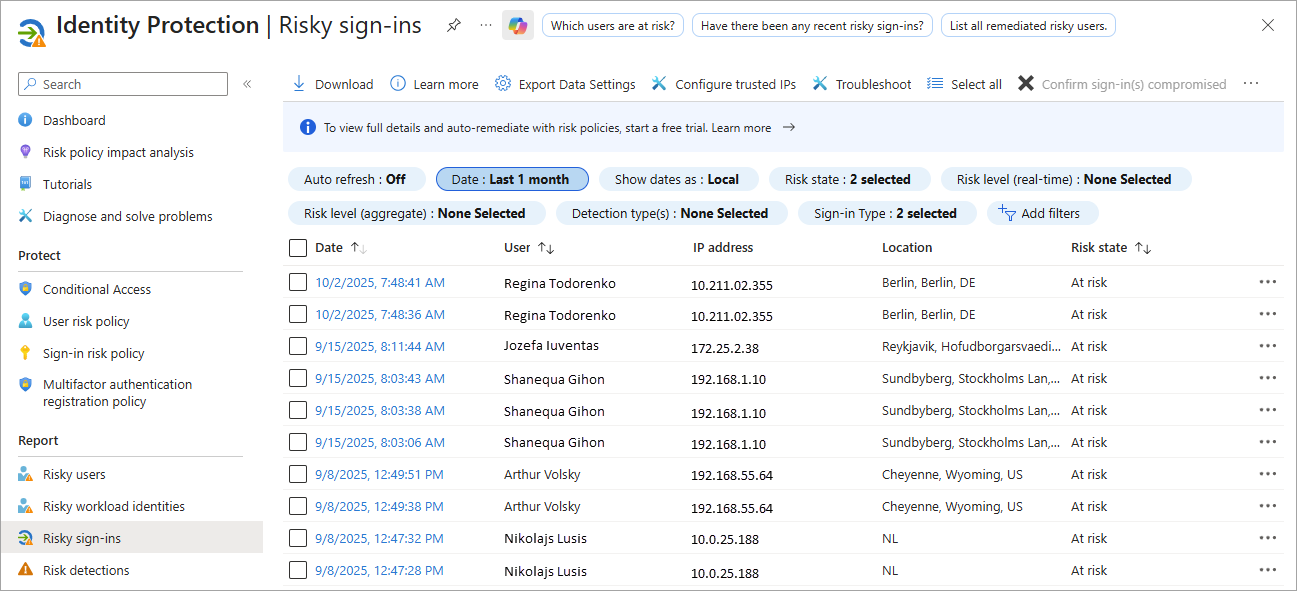
The Risky sign-ins report lists sign-ins that are at risk, confirmed compromised, confirmed safe, dismissed, or remediated. The details pane provides more information about the sign-in attempt that might help during an investigation, such as real-time and aggregate risk levels associated with sign-in attempts and the detection types triggered.
Risky sign-ins details include:
- The application the user was trying to access
- Conditional Access policies applied
- MFA details
- Device, application, and location information
- Risk state, risk level, and the source of the risk detection (ID Protection or Microsoft Defender for Endpoint)
The Risky sign-ins report contains filterable data for up to the past 30 days (one month). ID Protection evaluates risk for all authentication flows, whether it's interactive or non-interactive. The Risky sign-ins report shows both interactive and non-interactive sign-ins. To modify this view, use the "sign-in type" filter.
If the action buttons are greyed out, you need a higher privileged role. Administrators can take action on risky sign-in events and choose to:
- Confirm sign-in compromised – This action confirms the sign-in is a true positive. The sign-in is considered risky until remediation steps are taken.
- Confirm sign-in safe – This action confirms the sign-in is a false positive. Similar sign-ins shouldn't be considered risky in the future.
- Dismiss sign-in risk – This action is used for a benign true positive. This sign-in risk we detected is real, but not malicious, like those from a known penetration test or known activity generated by an approved application. Similar sign-ins should continue being evaluated for risk going forward.
To learn more about when to take each of these actions, see How does Microsoft use my risk feedback
Risky Workload IDs
A workload identity is an identity that allows an application access to resources, sometimes in the context of a user. From the Risky Workload ID details page you can access service principal sign-in and audit logs for further analysis.
Important
Full risk details and risk-based access controls are available to Workload Identities Premium customers; however, customers without a Workload Identities Premium license still receive all detections with limited reporting details.
Risky Workload IDs details include:
- Service principal ID
- Risk state and risk level
- Risk history
Risk detections
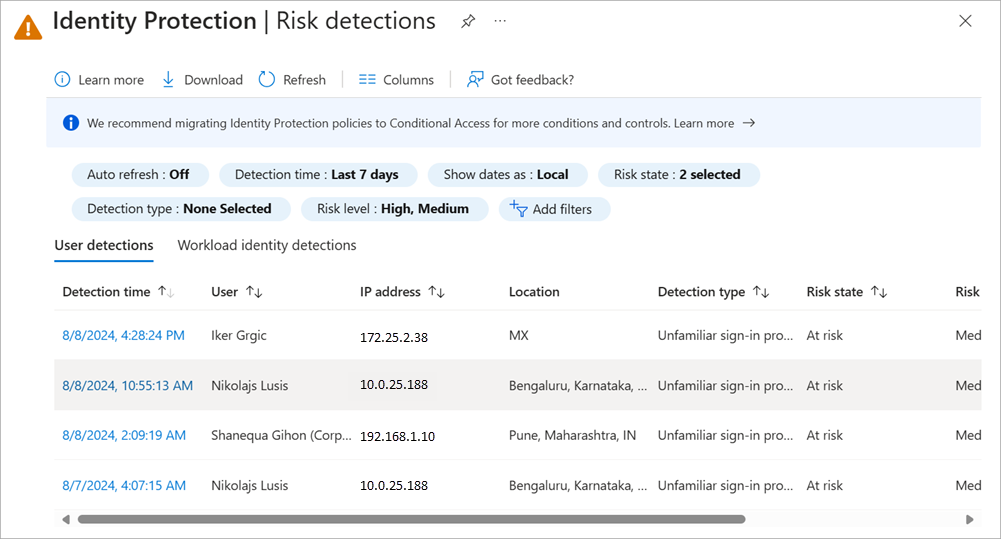
The Risk detections report provides insights into the various risk detections associated with users and sign-ins. The details include information about the type of risk detected, the user, or sign-in it pertains to, and the current status of the risk. From the details pane you can also access the associated user risk report, the user's sign-ins, and risk detections.
Risk detections details include:
- Detection type
- Risk state, risk level, and risk detail
- Attack type
- Source of the risk detection (ID Protection or Microsoft Defender for Endpoint)
The Risk detections report contains filterable data for up to the past 90 days (three months).
With the information provided by the Risk detections report, administrators can find:
- Information about each risk detection
- Attack type based on MITRE ATT&CK framework
- Other risks triggered at the same time
- Sign-in attempt location
- Link out to more detail from Microsoft Defender for Cloud Apps.
Administrators can then choose to return to the user's risk or sign-ins report to take actions based on information gathered.
Note
Our system might detect that:
- the risk event that contributed to the user risk score was a false positive; or
- the user risk was remediated with policy enforcement, such as completing an MFA prompt or secure password change.
Therefore, our system dismisses the risk state and a risk detail of "AI confirmed sign-in safe" surfaces and no longer contributes to the user's risk.


