Note
Access to this page requires authorization. You can try signing in or changing directories.
Access to this page requires authorization. You can try changing directories.
Jupyter notebooks provide an interactive environment for exploring, analyzing, and visualizing data in the Microsoft Sentinel data lake. With notebooks, you can write and execute code, document your workflow, and view results—all in one place. This makes it easy to perform data exploration, build advanced analytics solutions, and share insights with others. By leveraging Python and Apache Spark within Visual Studio Code, notebooks help you transform raw security data into actionable intelligence.
This article shows you how to explore and interact with data lake data using Jupyter notebooks in Visual Studio Code.
Prerequisites
Onboard to the Microsoft Sentinel data lake
To use notebooks in the Microsoft Sentinel data lake, you must first onboard to the data lake. If you haven't onboarded to the Sentinel data lake, see Onboarding to Microsoft Sentinel data lake. If you have recently onboarded to the data lake, it may take some time until sufficient volume of data is ingested before you can create meaningful analyses using notebooks.
Permissions
Microsoft Entra ID roles provide broad access across all workspaces in the data lake. Alternatively you can grant access to individual workspaces using Azure RBAC roles. Users with Azure RBAC permissions to Microsoft Sentinel workspaces can run notebooks against those workspaces in the data lake tier. For more information, see Roles and permissions in Microsoft Sentinel.
To create new custom tables in the analytics tier, the data lake managed identity must be assigned the Log Analytics Contributor role in the Log Analytics workspace.
To assign the role, follow the steps below:
- In the Azure portal, navigate to the Log Analytics workspace that you want to assign the role to.
- Select Access control (IAM) in the left navigation pane.
- Select Add role assignment.
- In the Role table, select Log Analytics Contributor, then select Next
- Select Managed identity, then select Select members.
- Your data lake managed identity is a system assigned managed identity named
msg-resources-<guid>. Select the managed identity, then select Select. - Select Review and assign.
For more information on assigning roles to managed identities, see Assign Azure roles using the Azure portal.
Install Visual Studio Code and the Microsoft Sentinel extension
If you don't already have Visual Studio Code, download and install Visual Studio Code for Mac, Linux, or Windows.
The Microsoft Sentinel extension for Visual Studio Code (VS Code) is installed from the extensions marketplace. To install the extension, follow these steps:
- Select the Extensions Marketplace in the left toolbar.
- Search for Sentinel.
- Select the Microsoft Sentinel extension and select Install.
- After the extension is installed, the Microsoft Sentinel shield icon appears in the left toolbar.

Install the GitHub Copilot extension for Visual Studio Code to enable code completion and suggestions in notebooks.
- Search for GitHub Copilot in the Extensions Marketplace and install it.
- After installation, sign in to GitHub Copilot using your GitHub account.
Explore data lake tier tables
After installing the Microsoft Sentinel extension, you can start exploring data lake tier tables and creating Jupyter notebooks to analyze the data.
Sign in to the Microsoft Sentinel extension
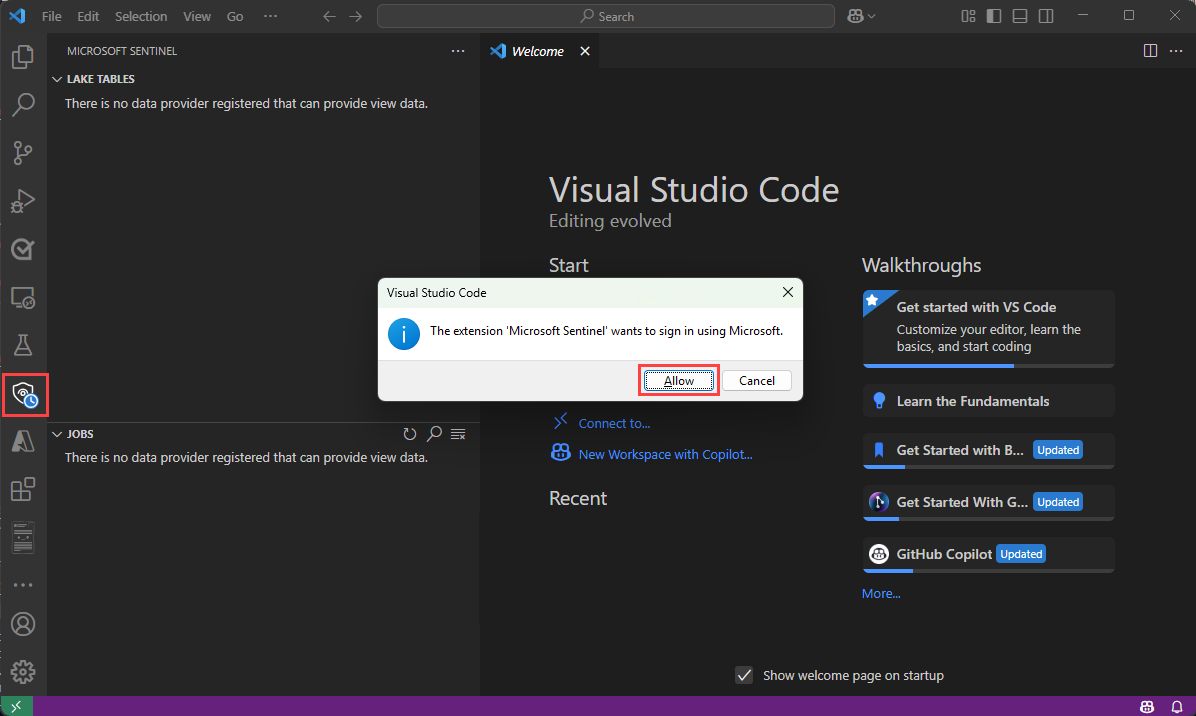
Select the Microsoft Sentinel shield icon in the left toolbar.
A dialog appears with the following text The extension "Microsoft Sentinel" wants to sign in using Microsoft. Select Allow.
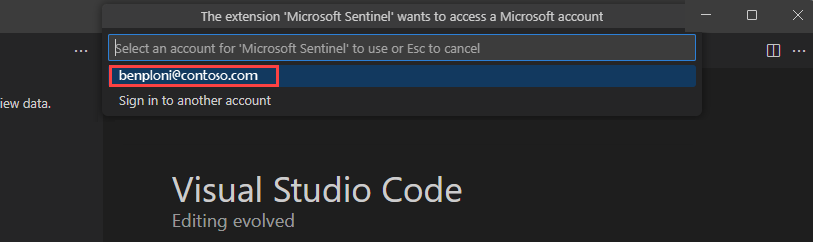
Select your account name to complete the sign in.


View data lake tables and jobs
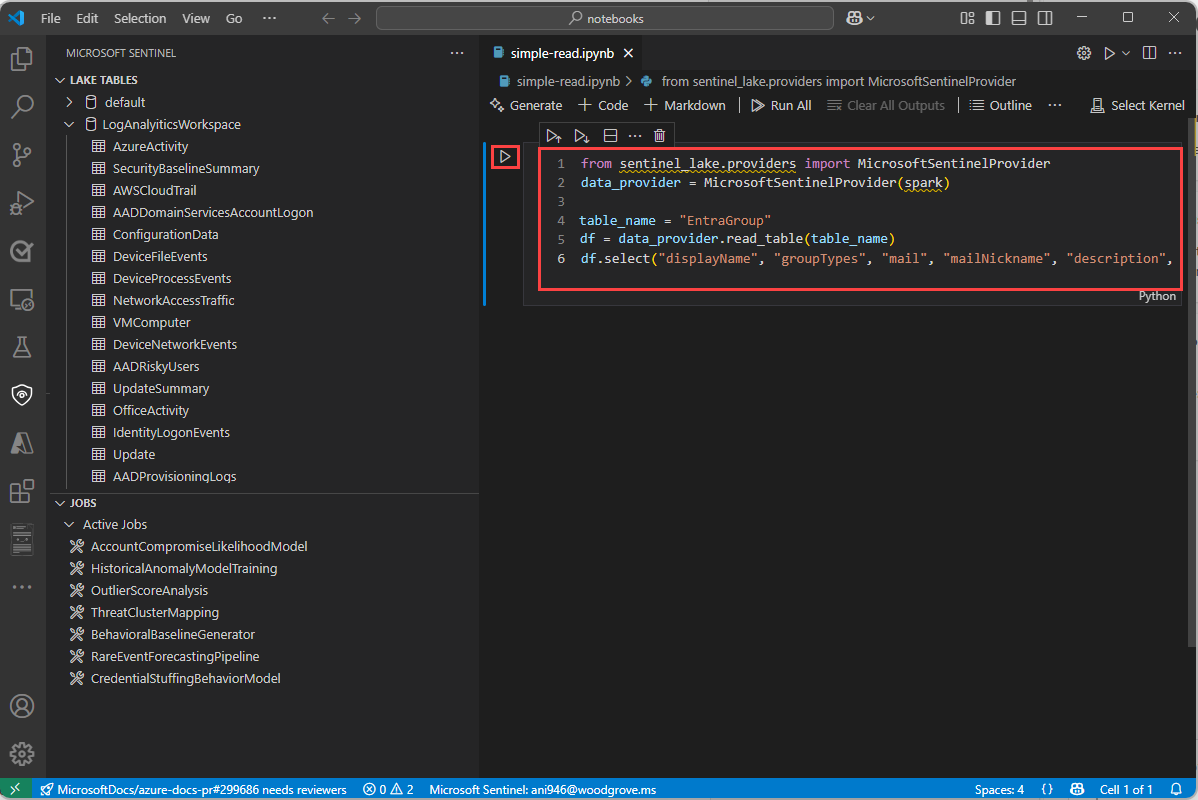
Once you sign in, the Sentinel extension displays a list of Lake tables and Jobs in the left pane. The tables are grouped by the database and category. Select a table to see the column definitions.
For information on Jobs, see Jobs and Scheduling.

Create a new notebook
To create a new notebook, use one of the following methods.
Enter > in the search box or press Ctrl+Shift+P and then enter Create New Jupyter Notebook.

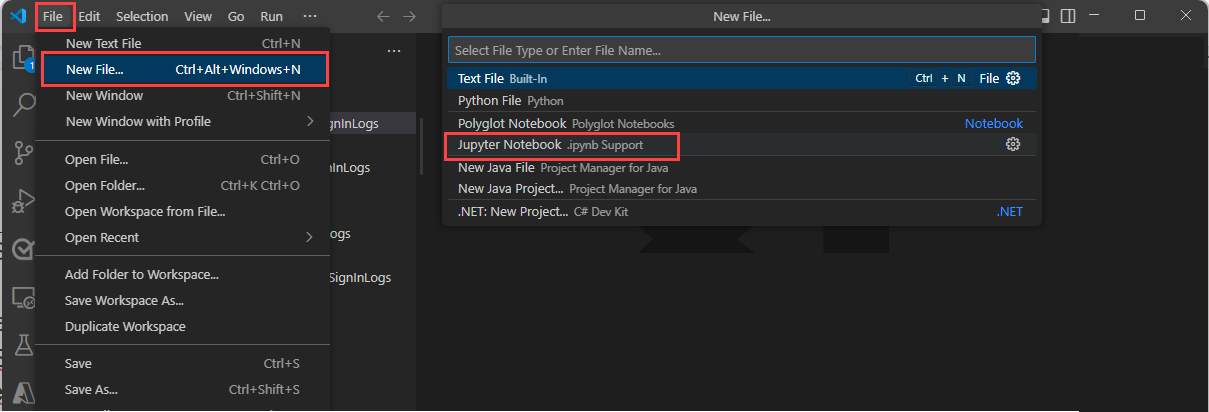
Select File > New File, then select Jupyter Notebook from the dropdown.
In the new notebook, paste the following code into the first cell.
from sentinel_lake.providers import MicrosoftSentinelProvider
data_provider = MicrosoftSentinelProvider(spark)

table_name = "EntraGroups"
df = data_provider.read_table(table_name)
df.select("displayName", "groupTypes", "mail", "mailNickname", "description", "tenantId").show(100,   truncate=False)


The editor provides intellisense code completion for both the MicrosoftSentinelProvider class and the table names in the data lake.
Select the Run triangle to execute the code in the notebook. The results are displayed in the output pane below the code cell.
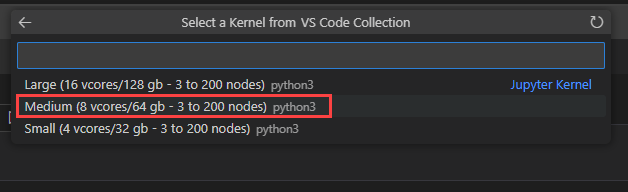
Select Microsoft Sentinel from the list for a list of runtime pools.

Select Medium to run the notebook in the medium sized runtime pool. For more information on the different runtimes, see Selecting the appropriate Microsoft Sentinel runtime.


Note
Selecting the kernel starts the Spark session and runs the code in the notebook. After selecting the pool, it can take 3-5 mins for the session to start. Subsequent runs a faster as the session is already active.
When the session is started, the code in the notebook runs and the results are displayed in the output pane below the code cell, for example:

For sample notebooks that demonstrate how to interact with the Microsoft Sentinel data lake, see Sample notebooks for Microsoft Sentinel data lake.
Status bar
The status bar at the bottom of the notebook provides information about the current state of the notebook and the Spark session. The status bar includes the following information:
The vCore utilization percentage for the selected Spark pool. Hover over the percentage to see the number of vCores used and the total number of vCores available in the pool. The percentages represent the current usage across interactive and job workloads for the logged in account.
The connection status of the Spark session for example
Connecting,Connected, orNot Connected.

Set session timeouts
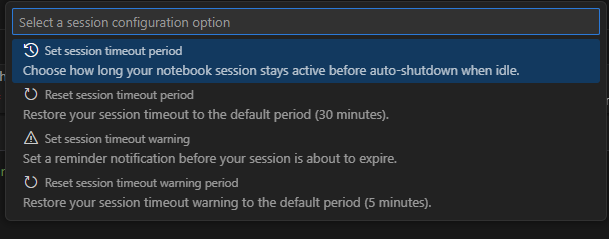
You can set the session timeout and timeout warnings for interactive notebooks. To change the timeout, select the connection status in the status bar at the bottom of the notebook. Choose from the following options:
Set session timeout period: Sets the time in minutes before the session times out. The default is 30 minutes.
Reset session timeout period: Resets the session timeout to the default value of 30 minutes.
Set session timeout warning period: Sets the time in minutes before the timeout that a warning is displayed that the session is about to time out. The default is 5 minutes.
Reset session timeout warning period: Resets the session timeout warning to the default value of 5 minutes.

Use GitHub Copilot in notebooks
Use GitHub Copilot to help you write code in notebooks. GitHub Copilot provides code suggestions and autocompletion based on the context of your code. To use GitHub Copilot, ensure that you have the GitHub Copilot extension installed in Visual Studio Code.
Copy code from the Sample notebooks for Microsoft Sentinel data lake and save it in your notebooks folder to provide context for GitHub Copilot. GitHub Copilot will then be able to suggest code completions based on the context of your notebook.
The following example shows GitHub Copilot generating a code review.

Microsoft Sentinel Provider class
To connect to the Microsoft Sentinel data lake, use the SentinelLakeProvider class.
This class is part of the access_module.data_loader module and provides methods to interact with the data lake. To use this class, import it and create an instance of the class using a spark session.
from sentinel_lake.providers import MicrosoftSentinelProvider
data_provider = MicrosoftSentinelProvider(spark)
For more information on the available methods, see Microsoft Sentinel Provider class reference.
Select the appropriate runtime pool
There are three runtime pools available to run your Jupyter notebooks in the Microsoft Sentinel extension. Each pool is designed for different workloads and performance requirements. The choice of runtime pool affects the performance, cost, and execution time of your Spark jobs.
| Runtime Pool | Recommended Use Cases | Characteristics |
|---|---|---|
| Small | Development, testing, and lightweight exploratory analysis. Small workloads with simple transformations. Cost efficiency prioritized. |
Suitable for small workloads Simple transformations. Lower cost, longer execution time. |
| Medium | ETL jobs with joins, aggregations, and ML model training. Moderate workloads with complex transformations. |
Improved performance over Small. Handles parallelism and moderate memory-intensive operations. |
| Large | Deep learning and ML workloads. Extensive data shuffling, large joins, or real-time processing. Critical execution time. |
High memory and compute power. Minimal delays. Best for large, complex, or time-sensitive workloads. |
Note
When first accessed, kernel options may take about 30 seconds to load.
After selecting a runtime pool, it can take 3–5 minutes for the session to start.
View messages, logs, and errors
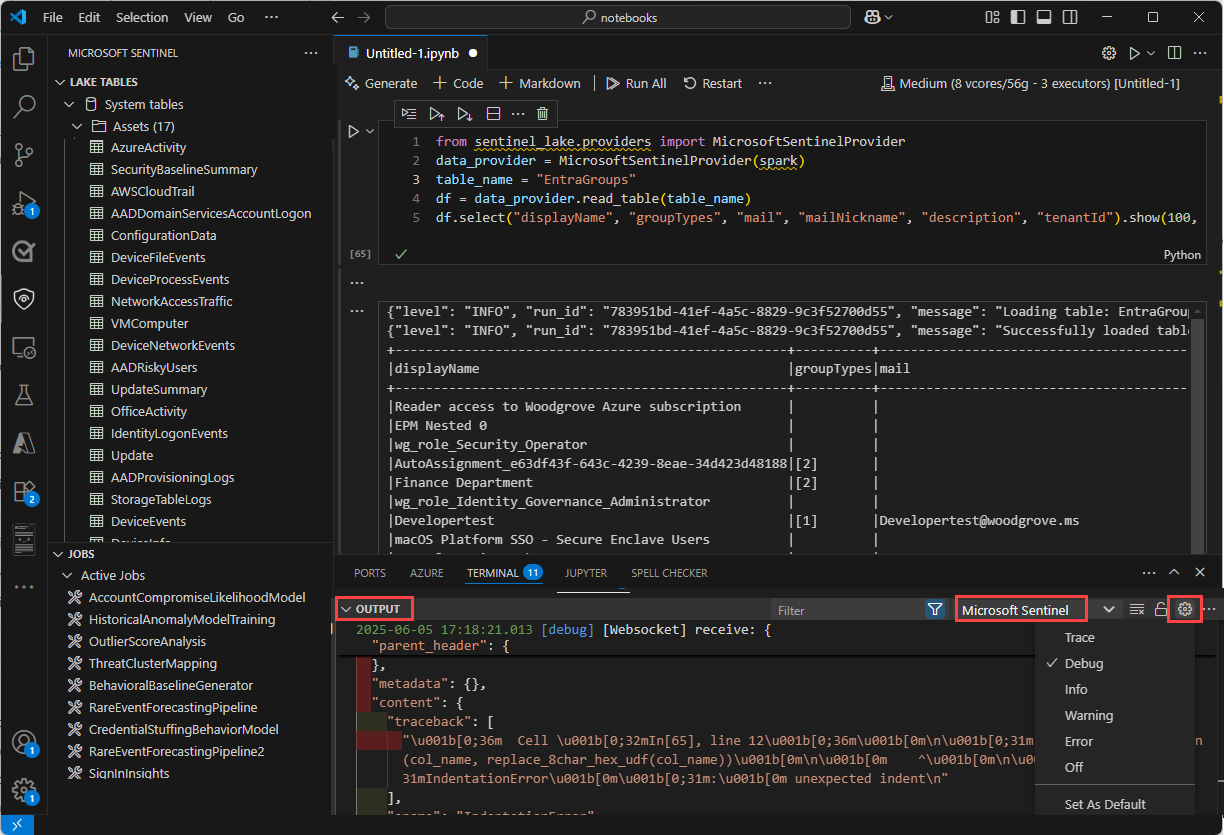
Messages logs and error messages are displayed in three areas in Visual Studio Code.
The Output pane.
- In the Output pane, select Microsoft Sentinel from the drop-down.
- Select Debug to include detailed log entries.
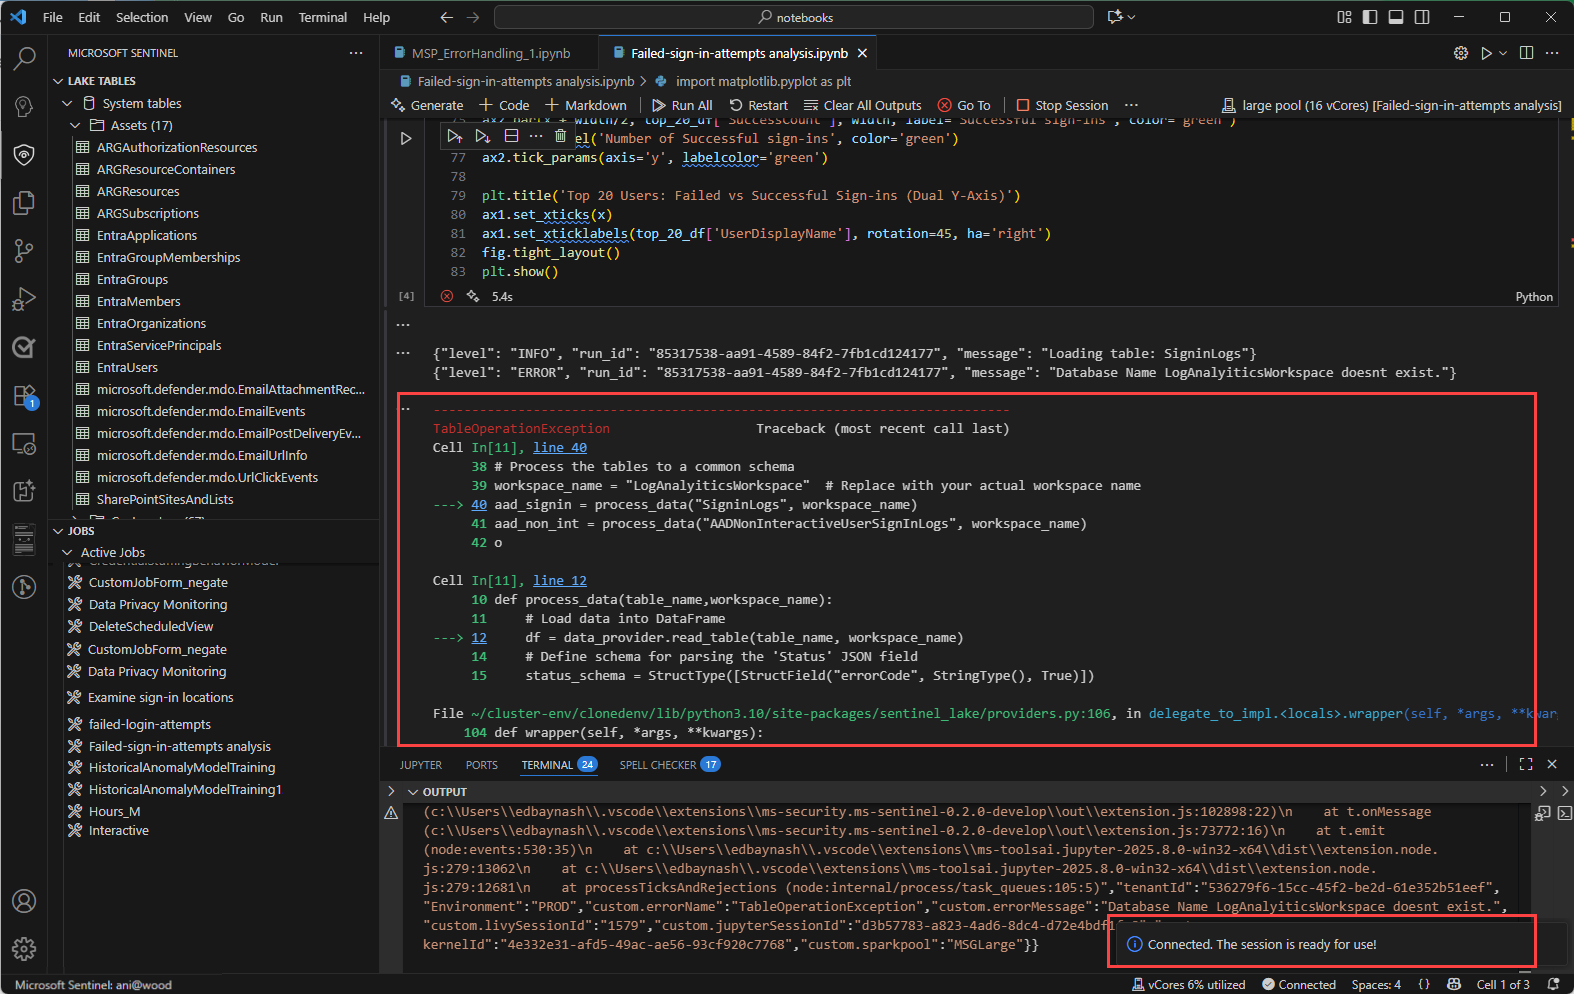
In-line messages in the notebook provide feedback and information about the execution of code cells. These messages include execution status updates, progress indicators, and error notifications related to the code in the preceding cell
A notification pop-up in the bottom right corner of Visual Studio Code, also know as a toast message, provides real-time alerts and updates about the status of operations within the notebook and the spark session. These notifications include messages, warnings, and error alerts such as successful connection to a spark session, and timeout warnings.


Jobs and scheduling
You can schedule jobs to run at specific times or intervals using the Microsoft Sentinel extension for Visual Studio Code. Jobs allow you to automate data processing tasks to summarize, transform, or analyze data in the Microsoft Sentinel data lake. Jobs are also used to process data and write results to custom tables in the data lake tier or analytics tier. For more information on creating and managing jobs, see Create and manage Jupyter notebook jobs.
Service parameters and limits for VS Code Notebooks
The following section lists the service parameters and limits for Microsoft Sentinel data lake when using VS Code Notebooks.
| Category | Parameter/limit |
|---|---|
| Custom table in the analytics tier | Custom tables in analytics tier can't be deleted from a notebook; Use Log Analytics to delete these tables. For more information, see Add or delete tables and columns in Azure Monitor Logs |
| Gateway web socket timeout | 2 hours |
| Interactive query timeout | 2 hours |
| Interactive session inactivity timeout | 20 minutes |
| Language | Python |
| Notebook job timeout | 8 hours |
| Max concurrent notebook jobs | 3, subsequent jobs are queued |
| Max concurrent users on interactive querying | 8-10 on Large pool |
| Session start-up time | Spark compute session takes about 5-6 minutes to start. You can view the status of the session at the bottom of your VS Code Notebook. |
| Supported libraries | Only Azure Synapse libraries 3.4 and the Microsoft Sentinel Provider library for abstracted functions are supported for querying the data lake. Pip installs or custom libraries aren't supported. |
| VS Code UX limit to display records | 100,000 rows |
Troubleshooting
The following table lists common errors you may encounter when working with notebooks, their root causes and suggested actions to resolve them.
| Error Category | Error Name | Error Code | Error Message | Suggested Action |
|---|---|---|---|---|
| DatabaseError | DatabaseNotFound | 2001 | Database {DatabaseName} not found. | Verify that the database exists. If the database is new, wait for a metadata refresh. |
| DatabaseError | AmbiguousDatabaseName | 2002 | Several databases (IDs: {DatabaseID1}, {DatabaseID2}, ...) share the name {DatabaseName}. Provide a specific database ID. | Specify a database ID when multiple databases have the same name. |
| DatabaseError | DatabaseIdMismatch | 2003 | Database ({DatabaseName}, ID {DatabaseID}) not found. | Check both the database name and ID. To obtain database IDs, list all the databases. |
| DatabaseError | ListDatabasesFailure | 2004 | Can't fetch databases. Restart the session and try again. | Restart the session and retry the operation after a few minutes. |
| TableError | TableDoesNotExist | 2100 | Table {TableName} not found in the database {DatabaseName}. | Verify that the table exists in the database. If the table or database is new, wait a few minutes and try again. |
| TableError | ProvisioningIncomplete | 2101 | Table {TableName} is not ready. Wait a few minutes before trying again. | The table is being provisioned. Wait a few minutes before trying again. |
| TableError | DeltaTableMissing | 2102 | Table {TableName} is empty. New tables can take up to a few hours to be ready. | It can take a few hours to fully synchronize an analytics table into the data lake. For tables that are only in the data lake, check if the data needs to be loaded or restored. |
| TableError | TableDoesNotExistForDelete | 2103 | Can't delete table. Table {TableName} not found. | Verify that the table exists in the database. If the table or database is new, wait a few minutes and try again. |
| AuthorizationFailure | MissingSASToken | 2201 | Can't access table. Restart the session and try again. | Authorization failed while trying to fetch the access token for the table. Restart the session and try again. |
| AuthorizationFailure | InvalidSASToken | 2202 | Can't access table. Restart the session and try again. | Authorization failed while trying to fetch the access token for the table. Restart the session and try again. |
| AuthorizationFailure | TokenExpired | 2203 | Can't access table. Restart the session and try again. | Authorization failed while trying to fetch the access token for the table. Restart the session and try again. |
| AuthorizationFailure | TableInsufficientPermissions | 2204 | Access needed for the table {TableName} in the database {DatabaseName}. | Contact an administrator to request access to the table or the database (workspace). |
| AuthorizationFailure | InternalTableAccessDenied | 2205 | Access to the table {TableName} is restricted. | Only system or user-defined tables can be accessed from a notebook. |
| AuthorizationFailure | TableAuthFailure | 2206 | Can't save data to the table. Restart the session and try again. | Authorization failed while trying to save data to the table. Restart the session and try again. |
| ConfigurationError | HadoopConfigFailure | 2301 | Can't update session configuration. Restart the session and try again. | This problem is transient and can be resolved by restarting the session and trying again. If this problem persists, contact support. |
| DataError | JsonParsingFailure | 2302 | Table metadata has been corrupted. Contact support for assistance. | Contact support for assistance. Provide your tenant ID, the table name, and the database name. |
| TableSchemaError | TableSchemaMismatch | 2401 | Column not found in the destination table. Align the DataFrame schema and the destination table or use overwrite mode. | Update the DataFrame schema to match the table in your target database. You can also replace the table entirely in overwrite mode. |
| TableSchemaError | MissingRequiredColumns | 2402 | Column {ColumnName} is missing from the DataFrame. Check the DataFrame schema and align it with the destination table. | Update the DataFrame schema to match the table in your target database. You can also replace the table entirely in overwrite mode. |
| TableSchemaError | ColumnTypeChangeNotAllowed | 2403 | Can't change the data type of the column {ColumnName}. | A data type change is not allowed for the column. Check existing columns in the destination table and align all data types in the DataFrame. |
| TableSchemaError | ColumnNullabilityChangeNotAllowed | 2404 | Can't change nullability of the column {ColumnName}. | Can't update nullability settings of the column. Check the destination table and align the settings with the DataFrame. |
| IngestionError | FolderCreationFailure | 2501 | Can't create storage for the table {TableName}. | This problem is transient and can be resolved by restarting the session and trying again. If this problem persists, contact support. |
| IngestionError | SubJobRequestFailure | 2502 | Can't create ingestion job for the table {TableName}. | This problem is transient and can be resolved by restarting the session and trying again. If this problem persists, contact support. |
| IngestionError | SubJobCreationFailure | 2503 | Can't create ingestion job for the table {TableName}. | This problem is transient and can be resolved by restarting the session and trying again. If this problem persists, contact support. |
| InputError | InvalidWriteMode | 2601 | Invalid write mode. Use append or overwrite. | Specify a valid write mode (append or overwrite) before saving the DataFrame. |
| InputError | PartitioningNotAllowed | 2602 | Can't partition analytics tables. | Remove any partitioning for all columns in analytics tables. |
| InputError | MissingTableSuffixLake | 2603 | Invalid custom table name. All names of custom tables in the data lake must end with _SPRK. | Add _SPRK as a suffix to the table name before writing it to the data lake. |
| InputError | MissingTableSuffixLA | 2604 | Invalid custom table name. All names of custom analytics tables must end with _SPRK_CL. | Add _SPRK_CL as a suffix to the table name before writing it to analytics storage. |
| UnknownError | InternalServerError | 2901 | Something went wrong. Restart the session and try again. | This problem is transient and can be resolved by restarting the session and trying again. If this problem persists, contact support. |