Note
Access to this page requires authorization. You can try signing in or changing directories.
Access to this page requires authorization. You can try changing directories.
Applies to: Azure Logic Apps (Consumption + Standard)
In business to business (B2B) scenarios, partners often exchange messages in groups or batches. When you build a batching solution with Azure Logic Apps, you can send messages to trading partners and process those messages together in batches.
Processing X12 messages in batches works the same way as batching other messages. You use a batch trigger to collect messages into a batch. You use a batch action to send messages to the batch. Before the messages go to the trading partner or other destination, you also include an X12 encoding step. For more information, see Send, receive, and batch process messages.
This guide shows how to build a batching solution that processes Electronic Data Interchange (EDI) messages by creating two logic apps, a batch sender and a batch receiver. As an example, this solution handles X12 messages.
The batch receiver collects messages into a batch until specific criteria are met to release and process these messages. This batch receiver also encodes the messages in the batch by using the specified X12 agreement or partner identities.
You must first create the batch receiver as the batch destination. You can then later select the batch receiver when you create the batch sender.
The batch sender logic app workflow sends messages to the previously created batch receiver.
Your batch receiver and batch sender must use the same Azure subscription and Azure region. If they don't, you can't select the batch receiver when you create the batch sender because they're not visible to each other.
Note
In a Standard logic app, you can create two workflows as the batch receiver and batch sender. Consumption logic app only has a single workflow, so you must create two logic apps.
Prerequisites
An Azure account and subscription. If you don't have a subscription, sign up for a free Azure account.
Basic knowledge about how to create logic app workflows. For more information, see the following documentation:
An integration account that uses the same Azure subscription and is linked to your logic app.
At least two trading partners in your integration account. Each partner must use the X12 (Standard Carrier Alpha Code) qualifier as a business identity in the partner properties.
An existing X12 agreement in your integration account.
Install or use a tool that can send HTTP requests to test your solution, for example:
- Visual Studio Code with an extension from Visual Studio Marketplace
- PowerShell Invoke-RestMethod
- Microsoft Edge - Network Console tool
- Bruno
- curl
Caution
For scenarios where you have sensitive data, such as credentials, secrets, access tokens, API keys, and other similar information, make sure to use a tool that protects your data with the necessary security features. The tool should work offline or locally, and not require sign in to an online account or sync data to the cloud. When you use a tool with these characteristics, you reduce the risk of exposing sensitive data to the public.
Create X12 batch receiver
Before you can send messages to a batch, the batch must first exist as the destination batch. So, create the batch receiver first and start the workflow with the Batch trigger. That way, when you create the batch sender, you can select the batch receiver.
The batch receiver collects messages until the specified criteria are met to release and process these messages. Batch receivers don't have to know about the batch senders, but batch senders must know where to send the messages.
In the Azure portal or Visual Studio Code, create a logic app named BatchX12Messages.
If you didn't previously link logic app to your integration account, link your logic app now.
Follow these general steps to add a Batch Operations trigger named Batch trigger.
On the designer, select Batch trigger to open the trigger information pane.
On the information pane, select the title for Batch trigger. Change the name to *Batch messages.
On the Parameters tab, provide values for the following parameters:
Parameter Value Notes Mode Inline or IntegrationAccount Only available for Consumption workflows. Batch Name <batch-name> The batch name to use. This example uses TestBatch.
- Consumption workflows: Only available when Mode is Inline. This example usesTestBatch.
- Standard workflows: Always available.Release Criteria - Message count based
- Size based
- Schedule basedThe release criteria type to use.
- Consumption workflows: Only available when Mode is Inline.
- Standard workflows: Always available.
This example uses Message count based and Schedule based.Message Count <integer> Only available when Release Criteria is Message count based. Specifies the number of messages to collect and release. This example uses 10as the value.Interval <integer> Only available when Release Criteria is Schedule based. Specifies the number of time intervals for the recurrence. This example uses 10as the value.Frequency <time-unit> Only available when Release Criteria is Schedule based. Specifies the time unit for the recurrence. This example uses Minute as the value. 
Note
This example doesn't set up a partition for the batch. Each batch uses the same partition key. For more information about partitions, see Create batch sender.
Add an action that encodes each batch:
Follow these general steps to add an X12 action named Batch encode <any-version>.
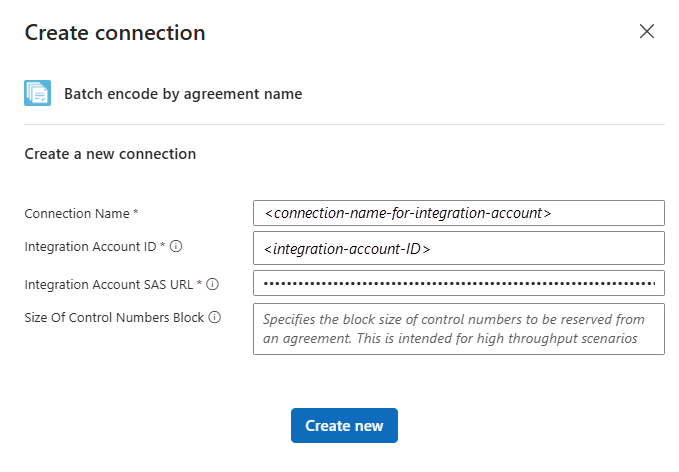
If you didn't previously connect to your integration account, create the connection now.
- Provide a name for your connection.
- Provide values for the Integration Account ID and Integration Account SAS URL parameters.
- Select Create new.
On the designer, select the batch encoder action to open the action information pane. On the Parameters tab, provide values for the following parameters. If necessary, select parameters from Advanced parameters.
Parameter Description Name of X12 agreement From this list, select your agreement.
Note: If the list is empty, make sure you link your logic app to the integration account that has your agreement.BatchName Select inside this box to show the input options. Select the lighting icon to open the dynamic content list. From the list, under Batch messages, select the trigger output named Batch Name. PartitionName Select inside this box to show the input options. Select the lightning icon to open the dynamic content list. From the list, under Batch messages, select Partition Name. Items Select the T icon for Switch to input entire array. Select inside the Items box to show the input options. Select the lightning icon to open the dynamic content list. From this list, under Batch messages, select the trigger output named Batched Items. 
For the Items box:

Save your workflow.
If you use Visual Studio Code, first deploy the batch receiver logic app to Azure. Otherwise, you can't select the batch receiver when you create the batch sender.

Test your workflow
To make sure your batch receiver works as expected, you can add an HTTP action for testing purposes, and send a batched message to the Request Bin service.
Follow these general steps to add the HTTP action named HTTP.
On the designer, select the HTTP action to open the action information pane. On the Parameters tab, provide values for the following parameters:
Parameter Description Method From this list, select POST. URI Generate a URI for your request bin, and then enter that URI in this box. Body Select inside this box to show the input options. Select the lighting icon to open the dynamic content list. From this list, under Batch encode by agreement name, select the action output named Content.
If Content doesn't appear, next to Batch encode by agreement name, select See more.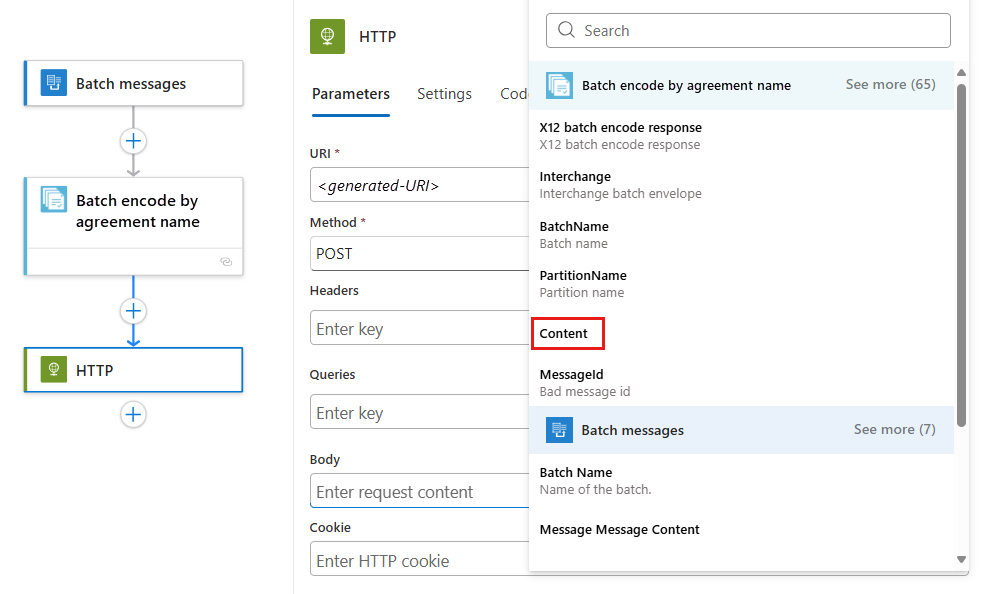
Save your workflow.
Your batch receiver workflow looks like the following example:

Continue to the next section where you create a batch sender to send messages to the batch receiver.

Create X12 batch sender
Now you need one or more logic apps that send messages to the batch receiver. For each batch sender, specify the batch receiver and batch name, message content, and any other settings. You can optionally provide a unique partition key to divide the batch into subsets and collect messages with that key.
Before you start, make sure that you finished the following tasks:
You created your batch receiver. The batch receiver must exist when you create your batch sender. Otherwise, you can't select the batch receiver as the destination batch. Batch receivers don't need to know about batch senders, but batch senders must know where to send messages.
Make sure both the batch receiver and batch sender use the same Azure subscription and Azure region. If they don't, you can't select the batch receiver when you create the batch sender because they're not visible to each other.
Create another logic app named SendX12MessagesToBatch.
Follow these general steps to add the Request trigger named When a HTTP request is received.
Follow these general steps to add the Batch Operations action based on your logic app type:
- Consumption: Send to batch trigger workflow
- Standard: Send to batch
Follow the steps for your logic app type:
- Consumption: Select your previously created BatchX12Messages > Batch_messages > Add action.
- Standard: Skip this step and go to the next step.
On the Parameters tab, provide values for the following parameters:
Parameter Description Batch Name The batch name defined in the batch receiver, which is TestBatchfor this example.
Important: The batch name gets validated at runtime and must match the name specified by the batch receiver. Changing the batch name causes the batch sender to fail.Message Content The message content to send, which is the Body output from the HTTP trigger.
Select inside the Message Content box to show the input options. Select the lightning icon to open the dynamic content list. From the list, under HTTP, select Body.- Consumption: Workflow Id
- Standard: Workflow Name- Consumption workflows: The value is prepopulated.
- Standard: Enter the trigger name in the batch receiver workflow, which is Batch messages in this example.Trigger Name - Consumption workflows: The value is prepopulated.
- Standard: Enter the trigger name from the batch receiver workflow.
Save your workflow.
Your batch sender looks like the following example:


Test your workflows
To test your batching solution, from your HTTP request tool, send HTTP POST requests with X12 messages to your batch sender. If you used the example values, you start getting X12 messages in your request bin, either every 10 minutes or in batches of 10, all with the same partition key.