Note
Access to this page requires authorization. You can try signing in or changing directories.
Access to this page requires authorization. You can try changing directories.
Azure Event Grid enables you to react to events in IoT Hub by triggering actions in your downstream business applications.
This article walks through a sample configuration that uses IoT Hub and Event Grid. At the end, you have an Azure logic app set up to send a notification email every time a device connects or disconnects to your IoT hub. Event Grid can be used to get timely notification about critical devices disconnecting. Metrics and Diagnostics can take several minutes (such as 20 minutes or more) to show up in logs / alerts. Longer processing times might be unacceptable for critical infrastructure.
If you don't have an Azure account, create a free account before you begin.
Prerequisites
- An email account from any email provider supported by Azure Logic Apps, such as Office 365 Outlook or Outlook.com. This email account is used to send the event notifications.
Use the Bash environment in Azure Cloud Shell. For more information, see Get started with Azure Cloud Shell.

If you prefer to run CLI reference commands locally, install the Azure CLI. If you're running on Windows or macOS, consider running Azure CLI in a Docker container. For more information, see How to run the Azure CLI in a Docker container.
If you're using a local installation, sign in to the Azure CLI by using the az login command. To finish the authentication process, follow the steps displayed in your terminal. For other sign-in options, see Authenticate to Azure using Azure CLI.
When you're prompted, install the Azure CLI extension on first use. For more information about extensions, see Use and manage extensions with the Azure CLI.
Run az version to find the version and dependent libraries that are installed. To upgrade to the latest version, run az upgrade.
Create an IoT hub
You can quickly create a new IoT hub using the Azure Cloud Shell terminal in the portal.
Sign in to the Azure portal.
On the upper right of the page, select the Cloud Shell button.

Run the following command to create a new resource group:
az group create --name {your resource group name} --location westusRun the following command to create an IoT hub:
az iot hub create --name {your iot hub name} --resource-group {your resource group name} --sku S1Minimize the Cloud Shell terminal. You return to the shell later in the tutorial.

Create a logic app
Next, create a logic app and add an HTTP Event Grid trigger that processes requests from IoT hub.
Create a logic app resource
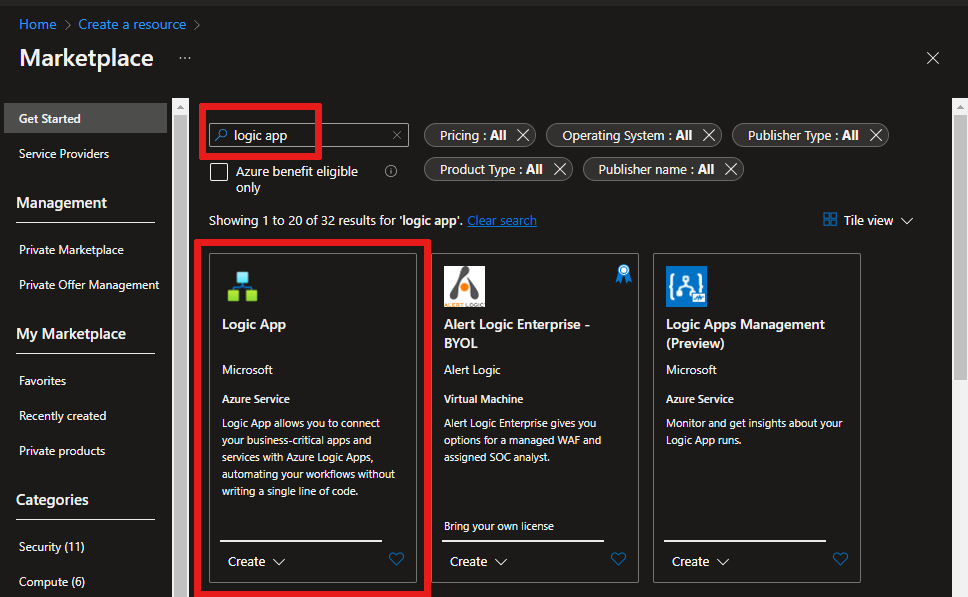
In the Azure portal, select Create a resource, then type "logic app" in the search box and press Enter. Select Logic App from the results.
On the next screen, select Create.
On the Create Logic App page, select Consumption (Multi-tenant), and then select Select.
On the Create Logic App (Multi-tenant) page, give your logic app a unique name in your subscription, then select the same subscription, resource group, and location as your IoT hub.
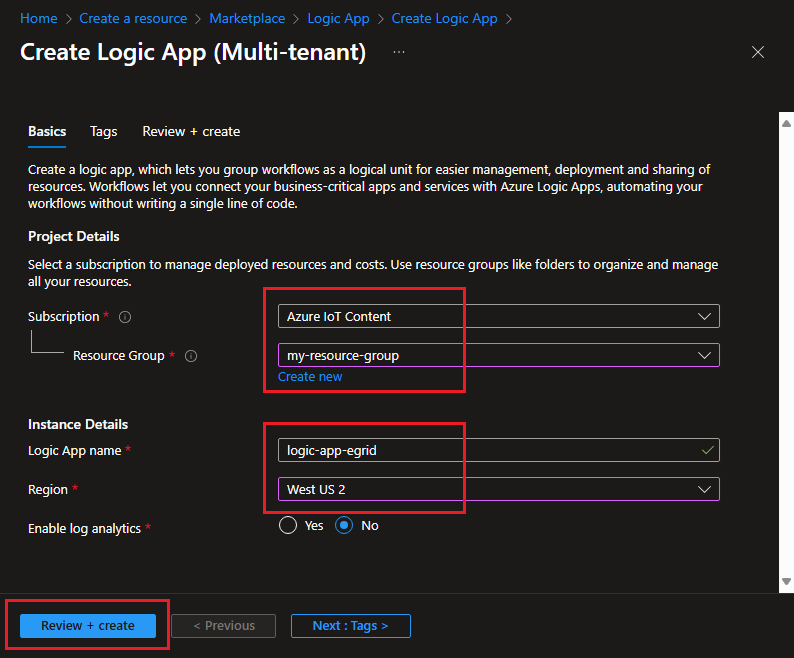
Select Review + create.
Verify your settings and then select Create.
Once the resource is created, select Go to resource.
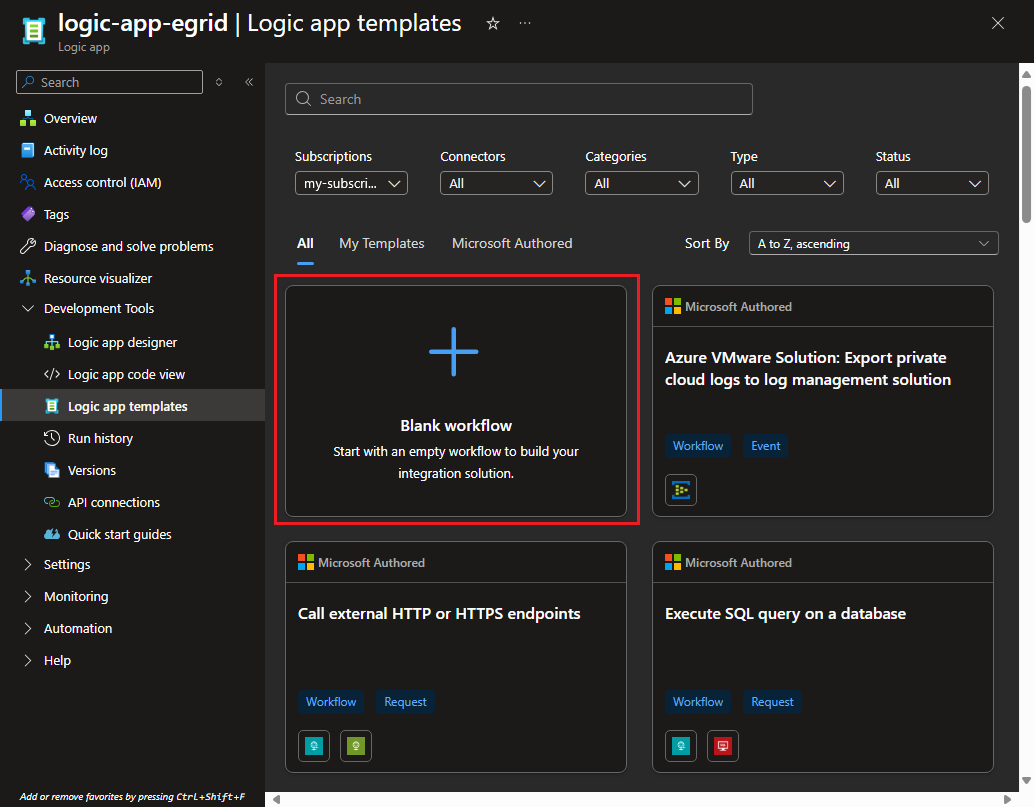
In the resource menu, select Logic app templates under Development Tools.
In the working pane, choose Blank workflow so that you can start from an empty workflow.


Select a trigger
A trigger is a specific event that starts your logic app. For this tutorial, the trigger that sets off the workflow is receiving a request over HTTP.
In the workflow designer, select Add a trigger.
In the connectors and triggers search bar, type HTTP.
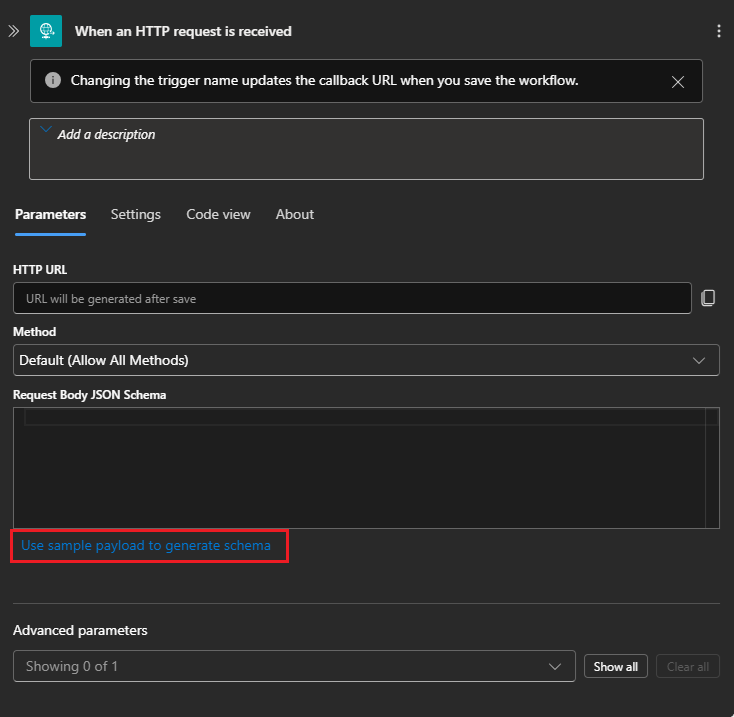
Scroll through the results and select Request - When an HTTP request is received as the trigger.

In the trigger configuration box, select Use sample payload to generate schema.
Copy the following
jsonand replace the placeholder values<>with your own.Paste the Device connected event schema JSON into the Enter or paste a sample JSON payload. text box, then select Done:
  [{
   "id": "f6bbf8f4-d365-520d-a878-17bf7238abd8",
   "topic": "/SUBSCRIPTIONS/<azure subscription ID>/RESOURCEGROUPS/<resource group name>/PROVIDERS/MICROSOFT.DEVICES/IOTHUBS/<hub name>",
   "subject": "devices/LogicAppTestDevice",
   "eventType": "Microsoft.Devices.DeviceConnected",
   "eventTime": "2018-06-02T19:17:44.4383997Z",
   "data": {
       "deviceConnectionStateEventInfo": {
         "sequenceNumber":
           "000000000000000001D4132452F67CE200000002000000000000000000000001"
       },
     "hubName": "<hub name>",
     "deviceId": "LogicAppTestDevice",
     "moduleId" : "DeviceModuleID"
   },
   "dataVersion": "1",
   "metadataVersion": "1"
 }]
Important
Be sure to paste the JSON snippet into the box provided by the Use sample payload to generate schema link and not directly into the Request Body JSON Schema box. The sample payload link provides a way to generate the JSON content based on the JSON snippet. The final JSON that ends up in the request body is different than the JSON snippet.
This event publishes when a device is connected to an IoT hub.
On the designer toolbar, select Save.
Note
You might receive a pop-up notification that says, Remember to include a Content-Type header set to application/json in your request. You can safely ignore this suggestion, and move on to the next section.
Close the trigger information box.


Create an action
Actions are any steps that occur after the trigger starts the logic app workflow. For this tutorial, the action is to send an email notification from your email provider.
On the designer, select the plus sign (+) under the trigger, and then select Add an action.
In the Add an action box, search for Outlook.
Based on your email provider, find and select the matching connector. This tutorial uses Outlook.com as its email provider. To use the corresponding connector, select the Send an email (V2) action under Outlook.com. The steps for other email providers are similar. Alternatively, you can use Office 365 Outlook to skip the sign-in step.

Select Sign in and sign in to your email account. Select Yes to let the app access your info.
Build your email template.
To: Enter the email address to receive the notification emails. For this tutorial, use an email account that you can access for testing.
Subject: Fill in the text for the subject. When you select the Subject text box, you can either select the function icon displayed next to the text box or type the slash (/) character and select the Insert dynamic content list option to include dynamic content. For example, this tutorial uses
IoT Hub alert: {eventType}.
After selecting
eventType, you'll see the email form output so far. Select the Send and email (V2) to edit the body of your email.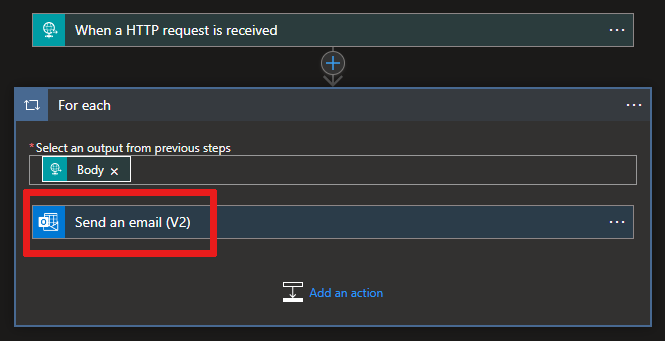
- Body: Write the text for your email. Select JSON properties from the selector tool to include dynamic content based on event data. If you can't see the selector tool, select the Body text box and then select the function icon displayed next to the text box to include expressions and dynamic content. If it doesn't show you the fields you want, select See more in the Dynamic content screen to include the fields from the previous action.
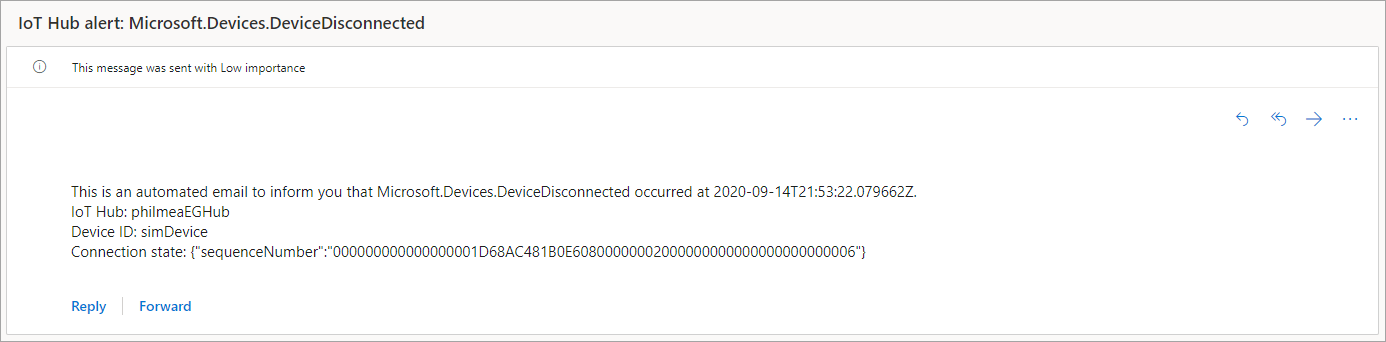
Your email template might look like this example:

Select Save in the workflow designer.


Copy the HTTP URL
Before you leave the workflow designer, copy the URL that your logic app is listening to for a trigger. You use this URL to configure Event Grid.
Expand the When an HTTP request is received trigger configuration box by selecting it.
Copy the value of HTTP URL by selecting the copy button next to it.
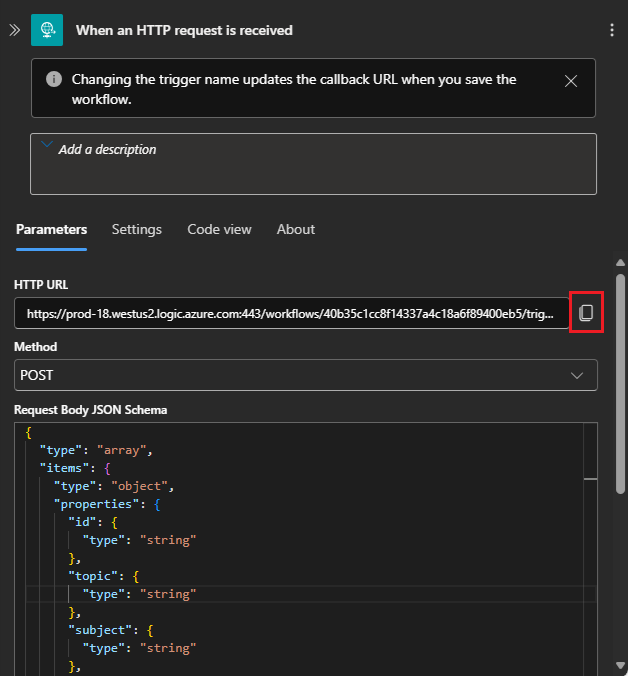
Save this URL so that you can refer to it in the next section.

Configure subscription for IoT Hub events
In this section, you configure your IoT hub to publish events as they occur.
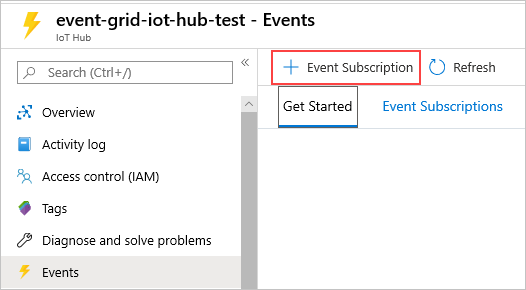
In the Azure portal, navigate to your IoT hub. You can find your IoT hub by selecting IoT Hub from your Azure dashboard, then select your IoT hub instance from the list of resources.
Select Events.

Select Event subscription.
Create the event subscription with the following values:
In the EVENT SUBSCRIPTION DETAILS section:
- Provide a name for the event subscription.
- Select Event Grid Schema for Event Schema.
In the TOPIC DETAILS section:
- Confirm that the Topic type is set to IoT Hub.
- Confirm that the name of the IoT hub is set as the value for the Source Resource field.
- Enter a name for the system topic to be created for you. To learn about system topics, see System topics in Azure Event Grid.
In the EVENT TYPES section:
Select the Filter to Event Types drop-down.
Deselect the Device Created and Device Deleted checkboxes, leaving only the Device Connected and Device Disconnected checkboxes selected.

In the ENDPOINT DETAILS section:
- Select Endpoint Type as Web Hook.
- Select select an endpoint, paste the URL that you copied from your logic app, and confirm selection.
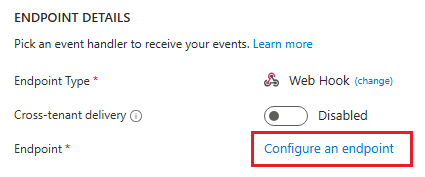
When you're done, the pane should look like the following example:
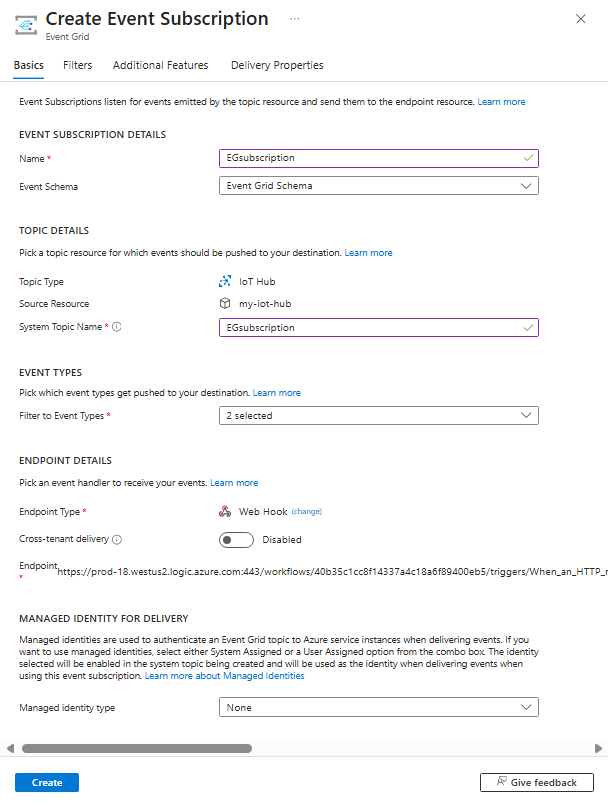
Select Create.


Simulate a new device connecting and sending telemetry
Test your logic app by quickly simulating a device connection using the Azure CLI.
Select the Cloud Shell button to reopen your terminal.
Run the following command to create a simulated device identity:
az iot hub device-identity create --device-id simDevice --hub-name {YourIoTHubName}The processing could take a minute. You see a JSON printout in your console once processing is complete.
Run the following command to simulate connecting your device to IoT Hub and sending telemetry:
az iot device simulate -d simDevice -n {YourIoTHubName}When the simulated device connects to IoT Hub, you receive an email notifying you of a "DeviceConnected" event.
When the simulation completes, you receive an email notifying you of a "DeviceDisconnected" event.

Clean up resources
This tutorial used resources that incur charges on your Azure subscription. When you're finished trying out the tutorial and testing your results, disable or delete resources that you don't want to keep.
To delete all of the resources created in this tutorial, delete the resource group.
Select Resource groups, then select the resource group you created for this tutorial.
On the Resource group pane, select Delete resource group. You're prompted to enter the resource group name, and then you can delete it. All of the resources contained therein are also removed.
Next steps
- Learn more about Reacting to IoT Hub events by using Event Grid to trigger actions.
- Learn how to order device connected and disconnected events
- Learn about what else you can do with Event Grid.
For a complete list of supported Logic App connectors, see: