Note
Access to this page requires authorization. You can try signing in or changing directories.
Access to this page requires authorization. You can try changing directories.
Each dev box in a project incurs compute and storage costs. You can set a limit on the number of dev boxes each developer can create within a project to help control costs. The limits functionality helps you manage project expenses, use resources effectively, and prevent dev box creation for a given project.
In the Microsoft developer portal, users with the DevCenter Dev Box User role can see their existing dev boxes and their total number of allocations for each project. When they reach their allocation limit for a project, they can't create a new dev box for that project.
In this tutorial, you:
- Set a dev box limit for your project in the Azure portal
- View dev box limits in the developer portal
Prerequisites
- A dev box project in your subscription.
Set a dev box limit for your project
The dev box limit is the number of dev boxes each developer can create in a project. For example, if you set the limit to 3, each developer in your team can create up to three dev boxes.
If you set a limit on a project that has existing dev boxes, the current resources remain unaffected. The limit applies to the developer's ability to create more resources. A developer can only create new resources if their overall allocation falls below the project limit.
You can prevent developers from creating more dev boxes in a project by setting the dev box limit to 0. This action doesn't delete existing dev boxes, but it prevents creation of new dev boxes in the project.
Sign in to the Azure portal.
In the search box, enter projects. In the list of results, select Projects.
In the list of projects, select the project for which you want to set limits.
On the Overview page for the selected project, expand Settings in the left menu and select Dev box settings.
On the Dev box settings page, under Cost controls, configure the dev box limits:
Select the Enable option for Dev box limits.
Enter the maximum number of Dev boxes per developer.
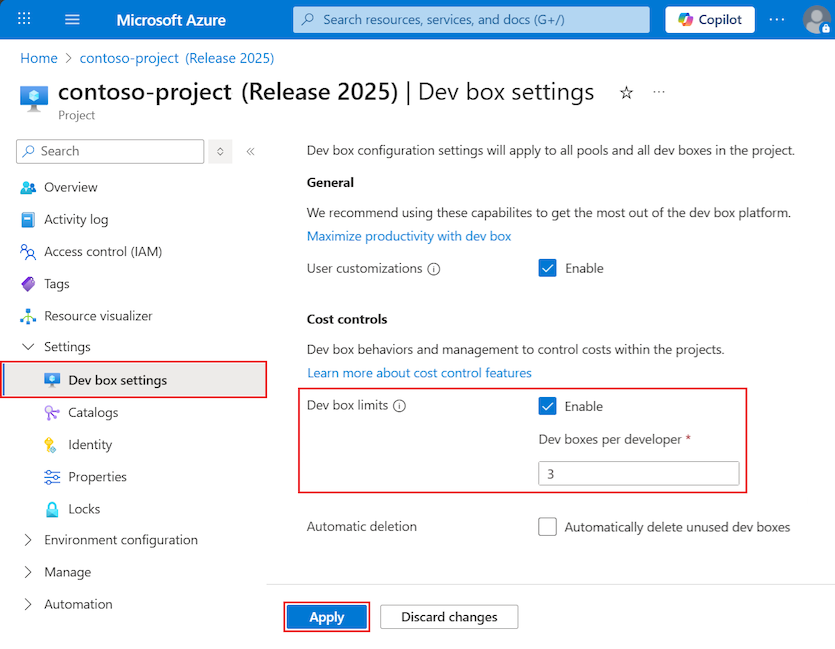
Select Apply.

View dev box limits in the developer portal
In the developer portal, dev box limits are visible when you try to create a new dev box.
In the developer portal, select Add a dev box.
In the Add a dev box pane, select a project. You see your number of allocated dev boxes and the total number of dev boxes you can create in that project:

If all of your available dev boxes in a project are allocated, you see an error message, and you can't create a new dev box:
Your project administrator has set a limit of <number> dev boxes per user in <project name>. Please delete a dev box in this project, or contact your administrator to increase your limit.

Clean up resources
If you're not going to continue to use dev box limits, remove the limit with the following steps:
Sign in to the Azure portal.
In the search box, enter projects. In the list of results, select Projects.
In the list of projects, select the project for which you want to remove limits.
On the Overview page for the selected project, expand Settings in the left menu and select Dev box settings.
On the Dev box settings page, under Cost controls, unselect the Enable option for Dev box limits.