Note
Access to this page requires authorization. You can try signing in or changing directories.
Access to this page requires authorization. You can try changing directories.
This article describes how to configure backup for Azure virtual machines (VMs) with agentless multidisk crash-consistent backup and back up VMs by using the Azure portal.
Azure Backup supports agentless VM backups by using multidisk crash-consistent restore points. The Enhanced VM backup policy now enables you to configure the consistency type of the backups (application-consistent restore points or crash-consistent restore points) for Azure VMs. This feature also enables Azure VM backup to retry the backup operation with crash-consistent snapshots (for supported VMs) if the application-consistent snapshot fails.
Note
The agentless multidisk crash-consistent VM backup feature is generally available. This release includes changes to billing. For more information, see the pricing details.
Before you start
Review the supported scenarios and limitations of agentless multidisk crash-consistent backup. Learn more about supported scenarios.
Configure backup for a new Azure VM with agentless multidisk crash-consistent backup
You need to set crash-consistent backup explicitly in this policy because application/file system-consistent backup is the default setting.
The agentless crash-consistent backup is available with the Enhanced VM backup policy only.
To configure backup for a new Azure VM with agentless multidisk crash-consistent backup enabled, create a Recovery Services vault and follow these steps:
On the Configure backup pane, under Policy sub type, select Enhanced > Create a new policy.
On the Create policy pane, set Consistency type to Only crash consistent snapshot to enable agentless crash-consistent backup.
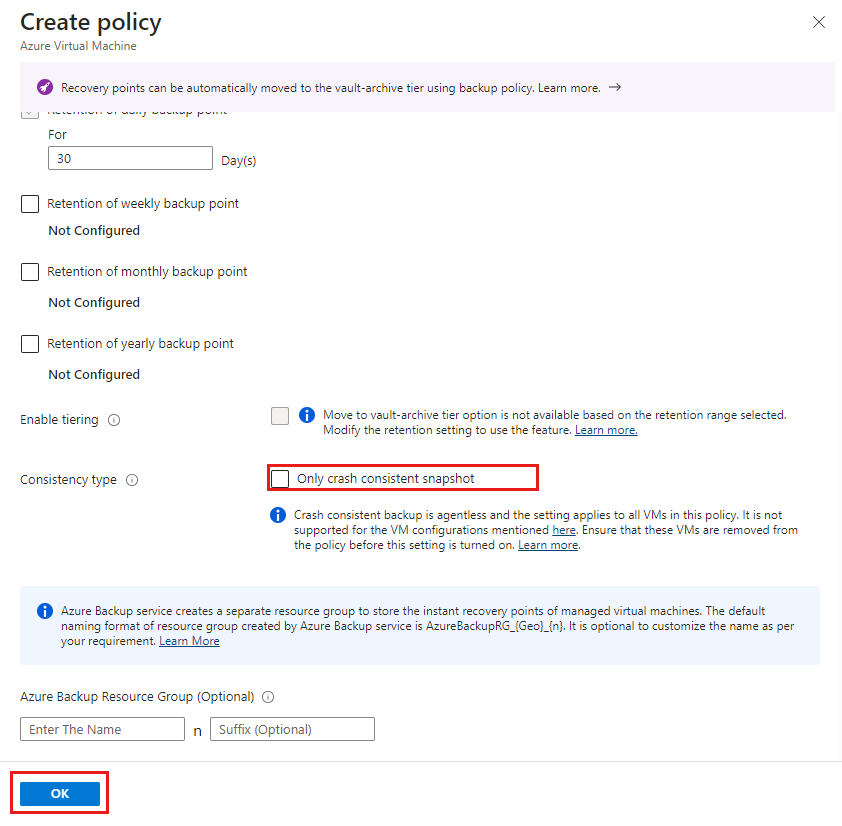
Select OK.

Move a VM from application/file system-consistent to crash-consistent backup
If you have VMs that are backed up with the Enhanced policy, you can move them from agent-based application/file system-consistent backups to agentless crash-consistent backups:
- Change their associated backup policy (recommended).
- Edit the policy setting directly.
Option 1: Change the VM backup policy to switch from application/file system-consistent backup to crash-consistent backup (recommended)
To change the VM backup policy, follow these steps:
Go to a Recovery Services vault, and then select Manage > Backup policies to check the policy for the VMs that you want to move to crash-consistent backup.

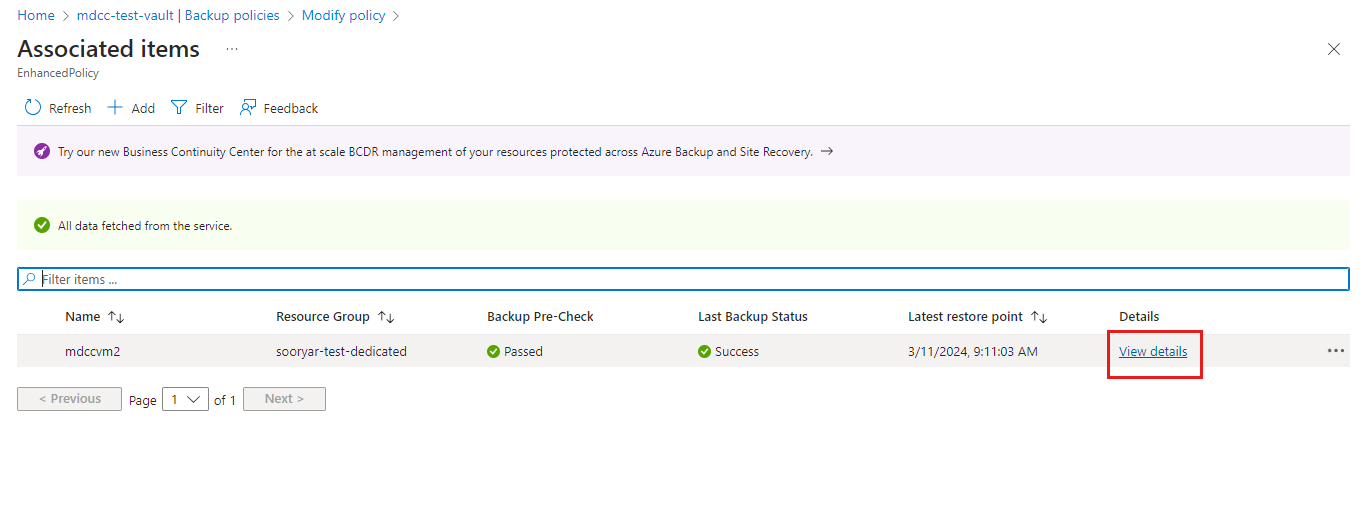
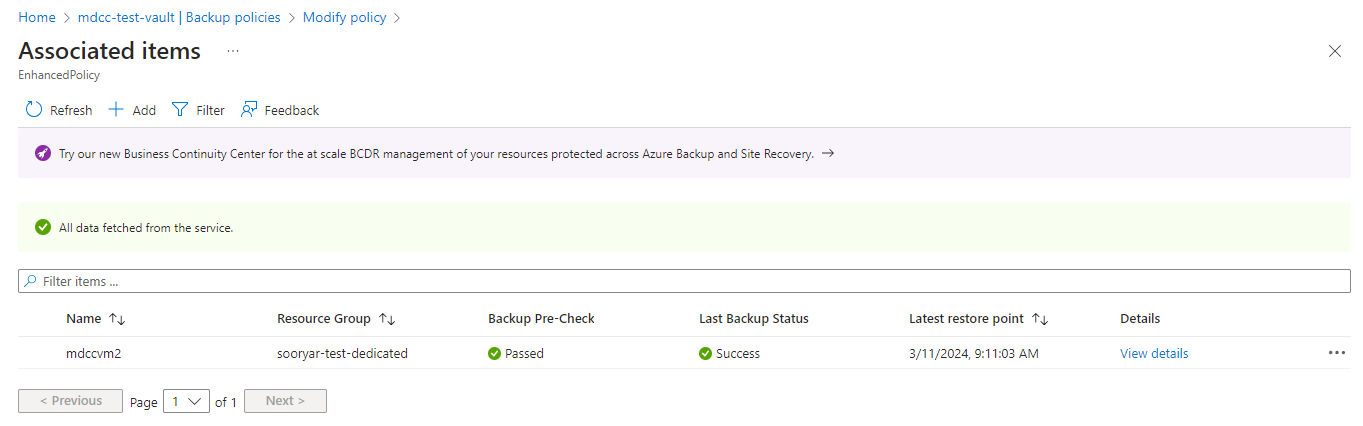
Select the backup policy, and then on the Modify policy pane, select Associated Items to identify the VMs that you want to move to crash-consistent backup.

Ensure that the VMs are supported for crash-consistent backups. Learn about the supported scenarios.
Go to Modify policy, and then make a note of the settings in the policy to use the same in the new backup policy.
Go to the Backup policies pane, and select Add to create a new policy.

On the Select policy type pane, select Azure Virtual Machine.
On the Create policy pane, under Policy sub type, select Enhanced. Then configure the new policy with the same backup frequency and retention as the existing policy.

Set Consistency type to Only crash consistent snapshot, and then select Create.

Go to the existing policy, select Associated Items, and then select View details to see more information about the VM that you want to move to crash-consistent backup.
Select Backup policy to go to the Change Backup Policy pane.

On the Change Backup Policy pane, change the backup policy to the new one that you created. Verify that it has Consistency type set to Crash consistent, and then select Change.
A Modifying protection notification and a Configure backup job in your vault for the VM is triggered. Monitor the notification or job to check if the crash-consistent backup policy is added successfully.


Option 2: Modify the backup policy to change from application/file system-consistent backup to crash-consistent backup
If you don't want to create a new policy and move only specific VMs, edit the Consistency type option in the existing policy.
To change from application/file system-consistent backup to crash-consistent backup, follow these steps:
Go to the Recovery Services vault, select Backup policies, and then choose an existing policy.
On the Modify policy pane, select Associated items.
Ensure that all the VMs in the policy are supported for crash-consistent backups. Learn about the supported scenarios.
Go to the Modify policy pane, set Consistency type to Only crash consistent snapshot, and then select Update.

You can monitor the Modify backup policy job on the Backup Jobs pane. The Configure backup jobs triggered for each VM in the policy appear.


If the job fails for an unsupported VM, revert the policy to opt out of crash-consistent backup and retry the update after you remove all unsupported VMs from the policy.