Note
Access to this page requires authorization. You can try signing in or changing directories.
Access to this page requires authorization. You can try changing directories.
Applies to: Azure Local version 2510 and later
This article describes the steps to deploy Azure Local rack aware clusters using the Azure portal.
Important
This feature is currently in PREVIEW. See the Supplemental Terms of Use for Microsoft Azure Previews for legal terms that apply to Azure features that are in beta, preview, or otherwise not yet released into general availability.
Prerequisites
- Make sure you complete the steps in Prepare for rack aware cluster deployment.
- Make sure that the machines you intend to use for the cluster are not joined to Active Directory before deployment.
Deploy rack aware cluster
To deploy a rack aware cluster, follow the steps to Deploy an Azure Local instance via the Azure portal. In general, the steps are similar to deploying a standard single cluster. The differences are highlighted in the next sections.
Start the wizard and fill out the basics
Go to the Azure portal.
Search for and select Azure Local.
On the Azure Arc > Azure Local page, go to the Get started tab.
On the Deploy Azure Local tile, select Create instance.
Select the Subscription and Resource group to store this system's resources.
All resources in the Azure subscription are billed together.

Select the Subscription and Resource group to store this system's resources.
All resources in the Azure subscription are billed together.
Enter the Instance name to use for this Azure Local instance.
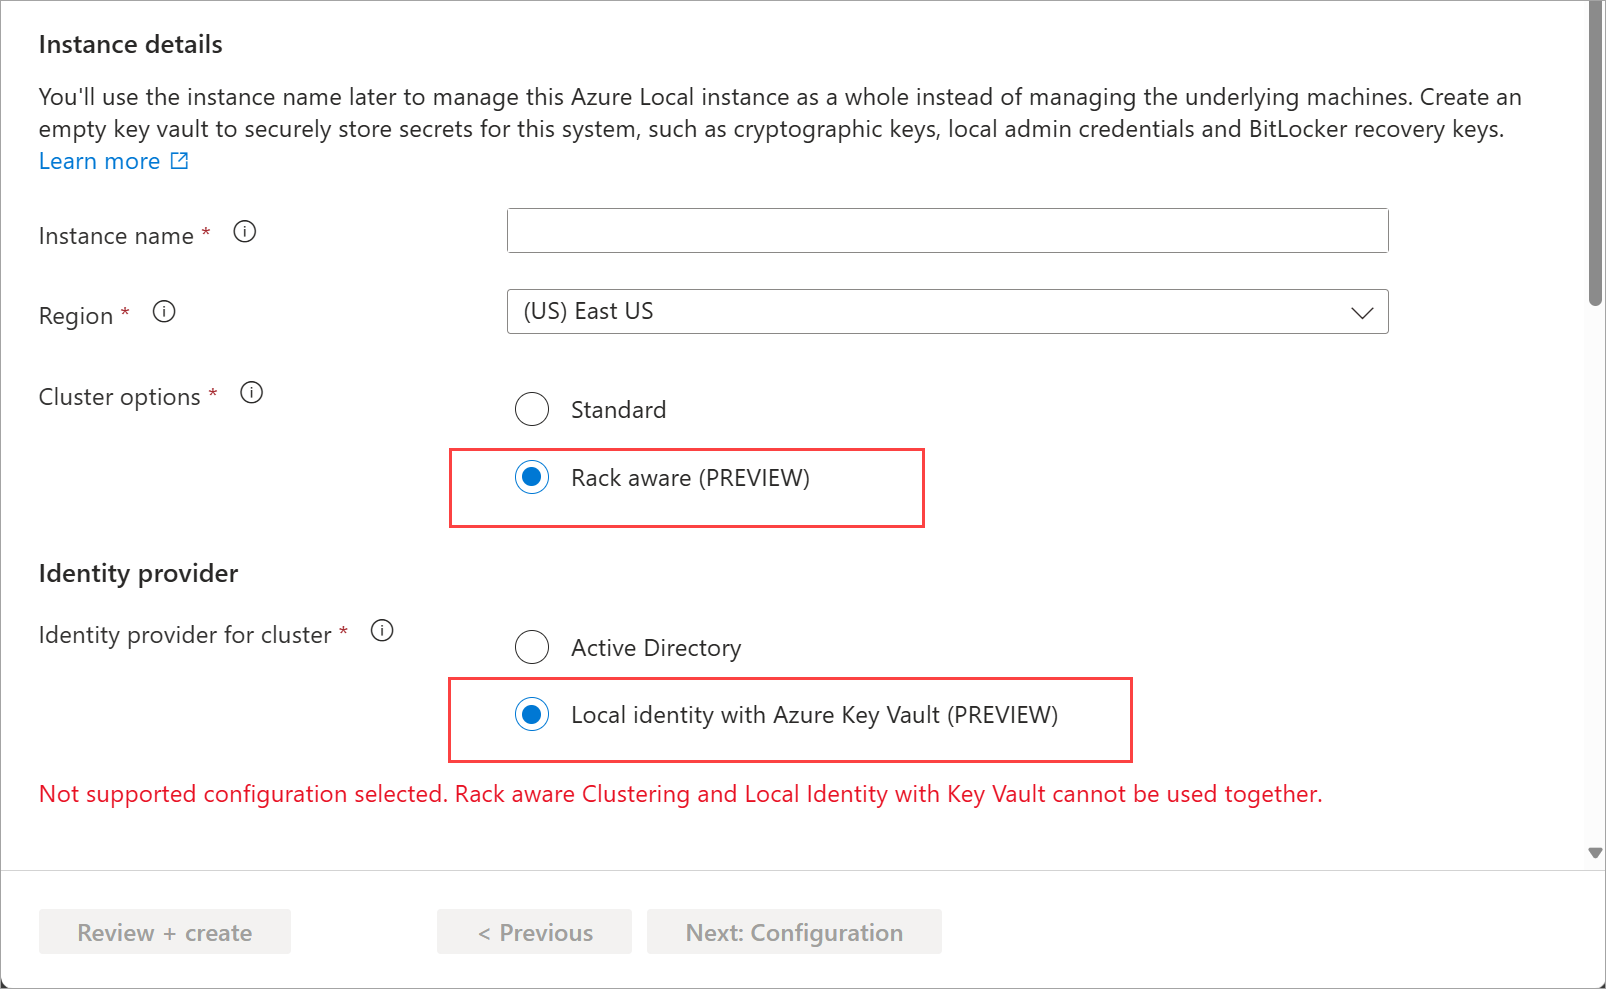
In this step, select Rack aware cluster for the Cluster options. If you select this option, you can only deploy with Active Directory. Local identity with key vault is not supported for rack aware clusters in this release.
If you select Rack aware cluster and Local identity with Azure Key Vault together, you see an error to the effect that the combination is not supported.
Select the Region to store this system's Azure resources. For a list of supported Azure regions, Azure requirements.
If the system doesn't transfer a lot of data, you can select a region that isn't close.
Select + Add machines and choose the machine or machines that make up the Azure Local instance.
Important
Machines must not be joined to Active Directory before deployment.
On + Add machines page:
- The operating system for your Azure Local machines is automatically selected as Azure Stack HCI.
- Select an even number of machines for the cluster. These machines could show as Ready or as Missing Arc extensions.
- Select Add. The machines show up on the Basics tab.
- Once you add the machines, Arc extensions automatically install on the selected machines. This operation takes several minutes. Refresh the page to view the status of the extension installation.
After the extensions are installed successfully, the status of the machine updates to Ready.
Validate selected machines. Wait for the green validation check to show the validation is successful. The validation process checks that each machine runs the same exact version of the OS, has the correct Azure extensions, and has matching (symmetrical) network adapters.
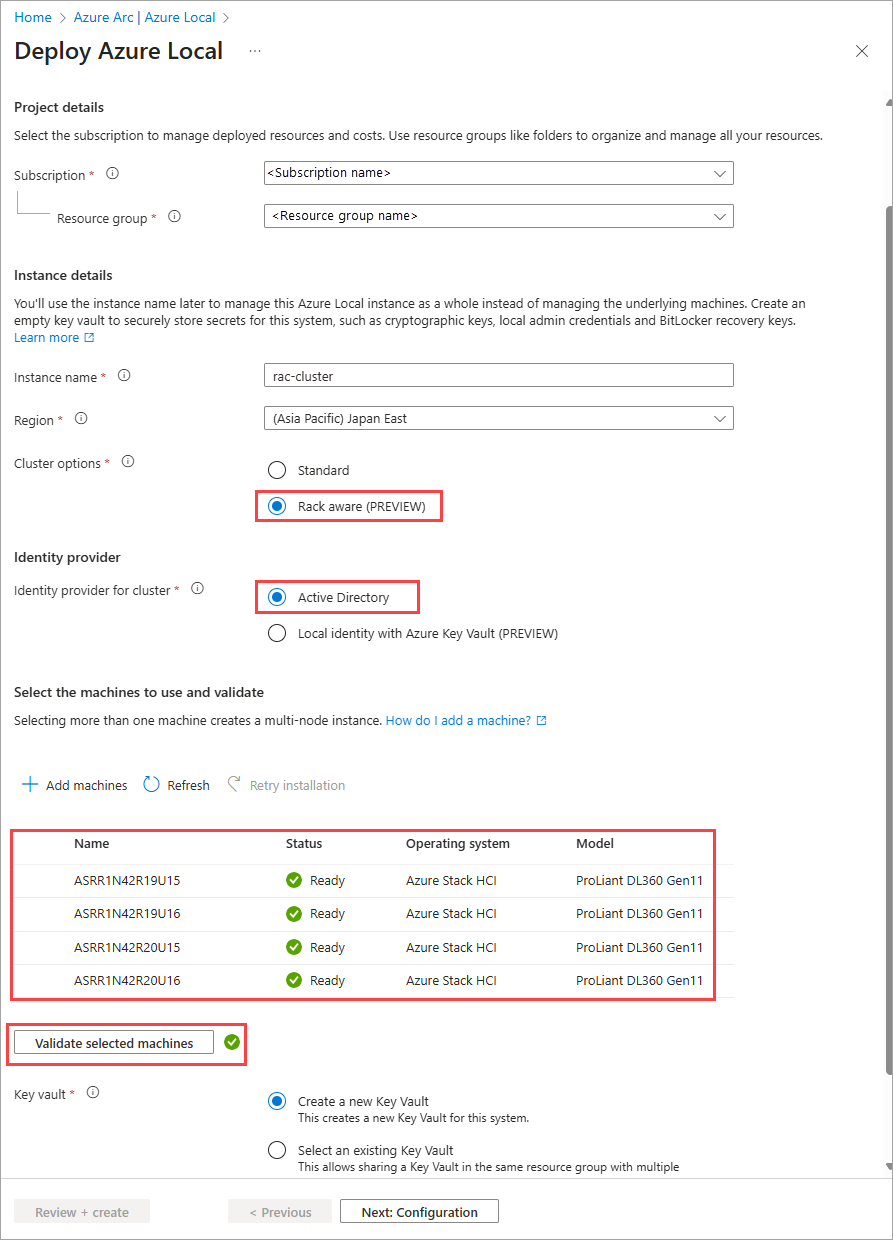
Select an existing Key Vault or select Create a new Key Vault. Create an empty key vault to securely store secrets for this system such as cryptographic keys, local admin credentials, and BitLocker recovery keys.
On the Create a new key vault page, provide information for the specified parameters and select Create:
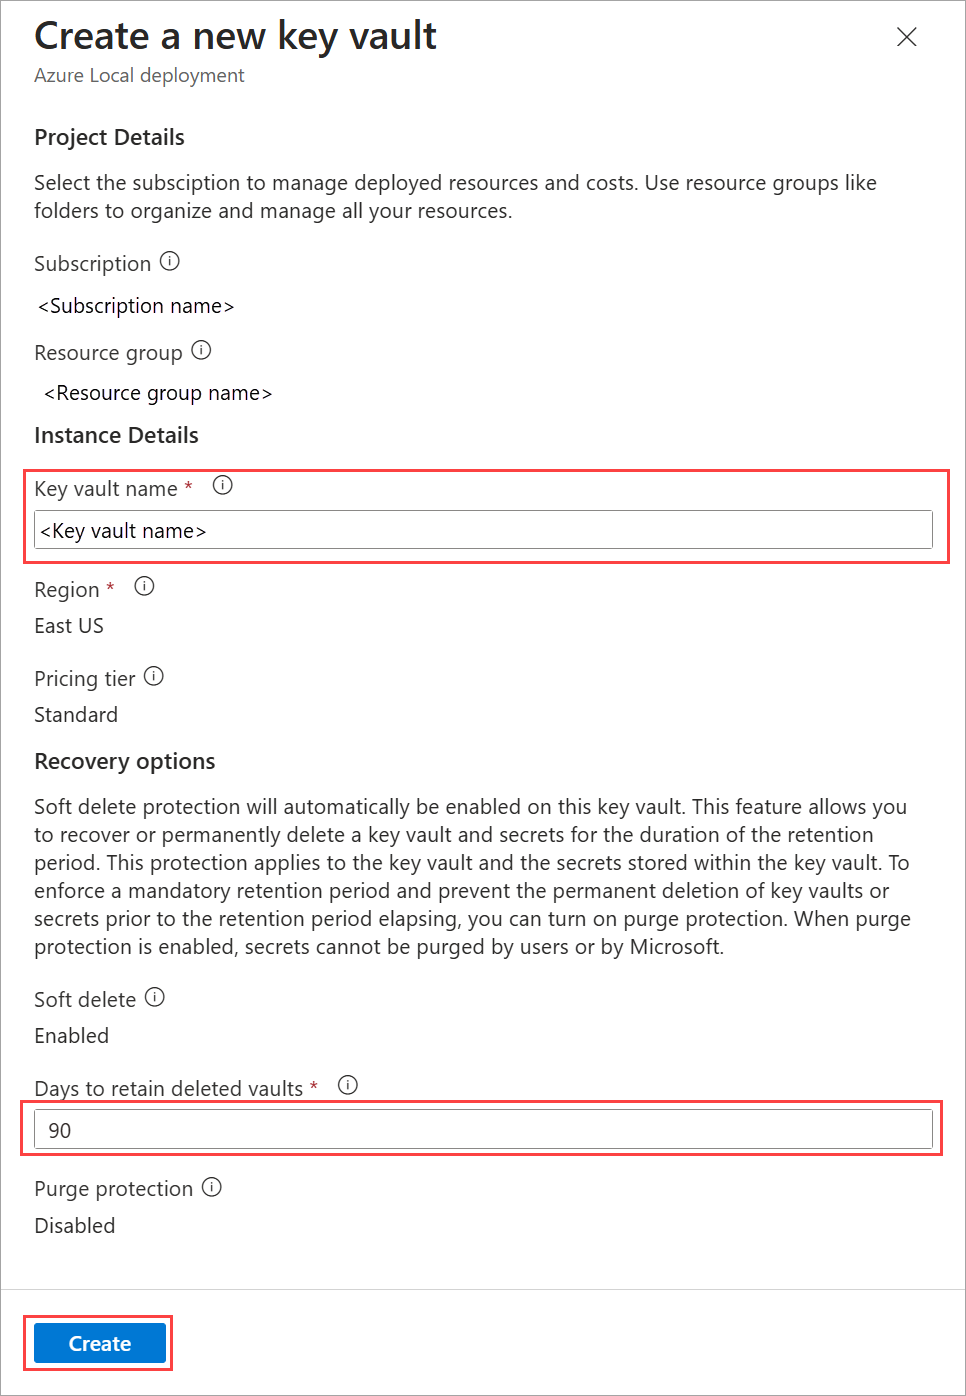
- Accept the suggested name or provide a name for the key vault you create.
- Accept the default number of Days to retain deleted vaults or specify a value between 7 and 90 days. You can’t change the retention period later. The key vault creation takes several minutes.
- If you don’t have permissions to the resource group, you see a message that you have insufficient permissions for the key vault. Select Grant key vault permissions.
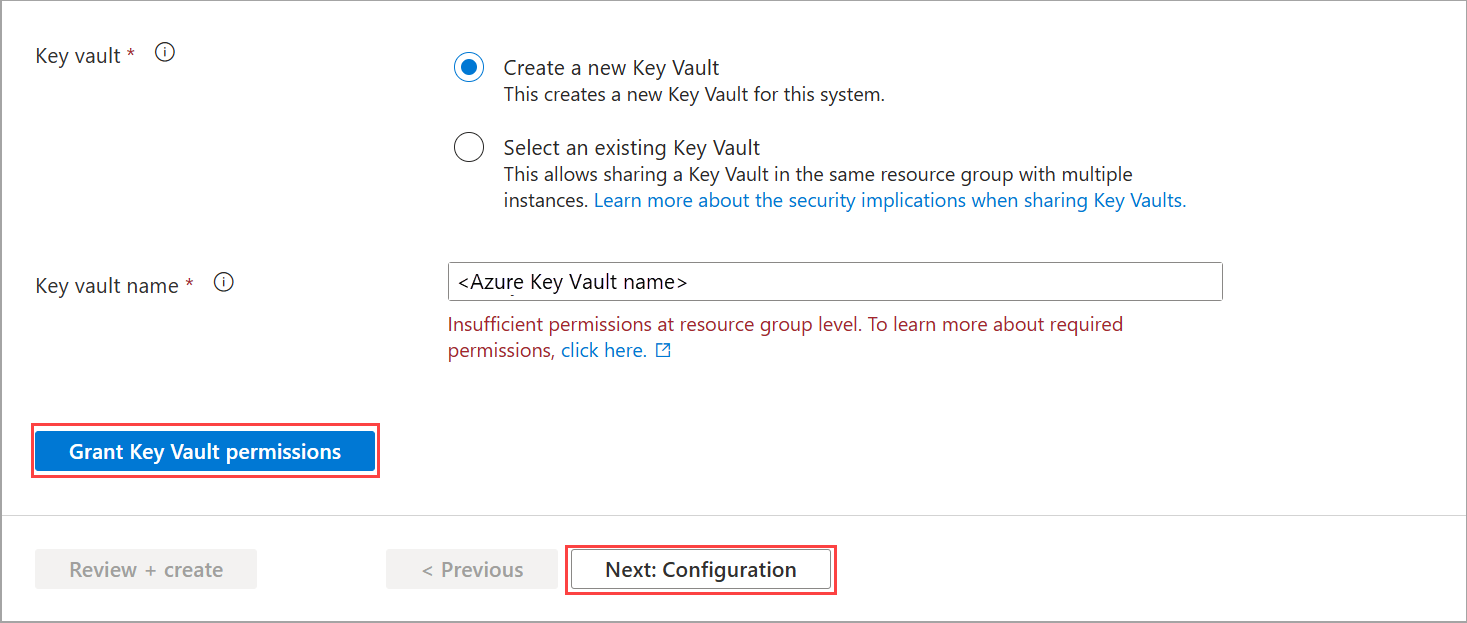
The key vault adds cost in addition to the Azure Local subscription. For details, see Key vault pricing. View security implications when sharing an existing key vault.
Select Next: Configuration.


Specify the deployment settings
On the Configuration tab, choose whether to create a new configuration for your system or to load deployment settings from a template – either way you are able to review the settings before you deploy:
Choose the source of the deployment settings:
- New configuration - Specify all of the settings to deploy this system. In this example, we choose this option.
- Template spec - Load the settings to deploy this system from a template spec stored in your Azure subscription.
- Quickstart template - This setting isn't available in this release.
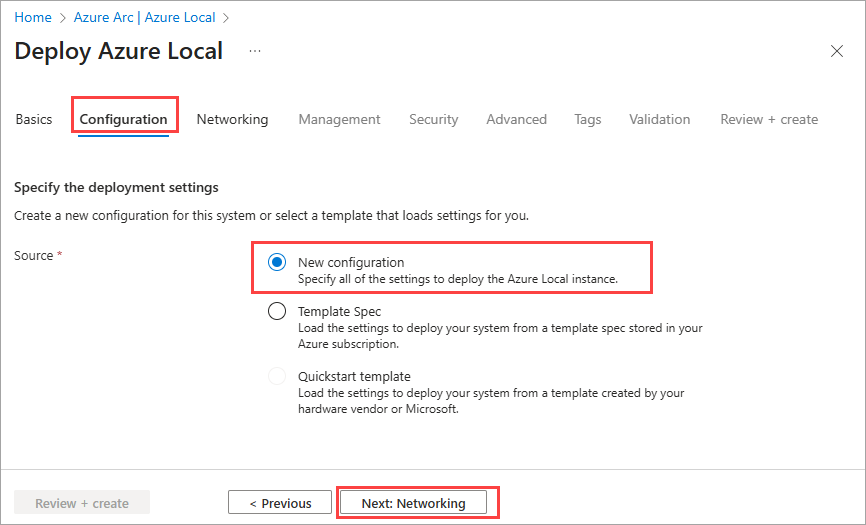
Select Next: Networking.

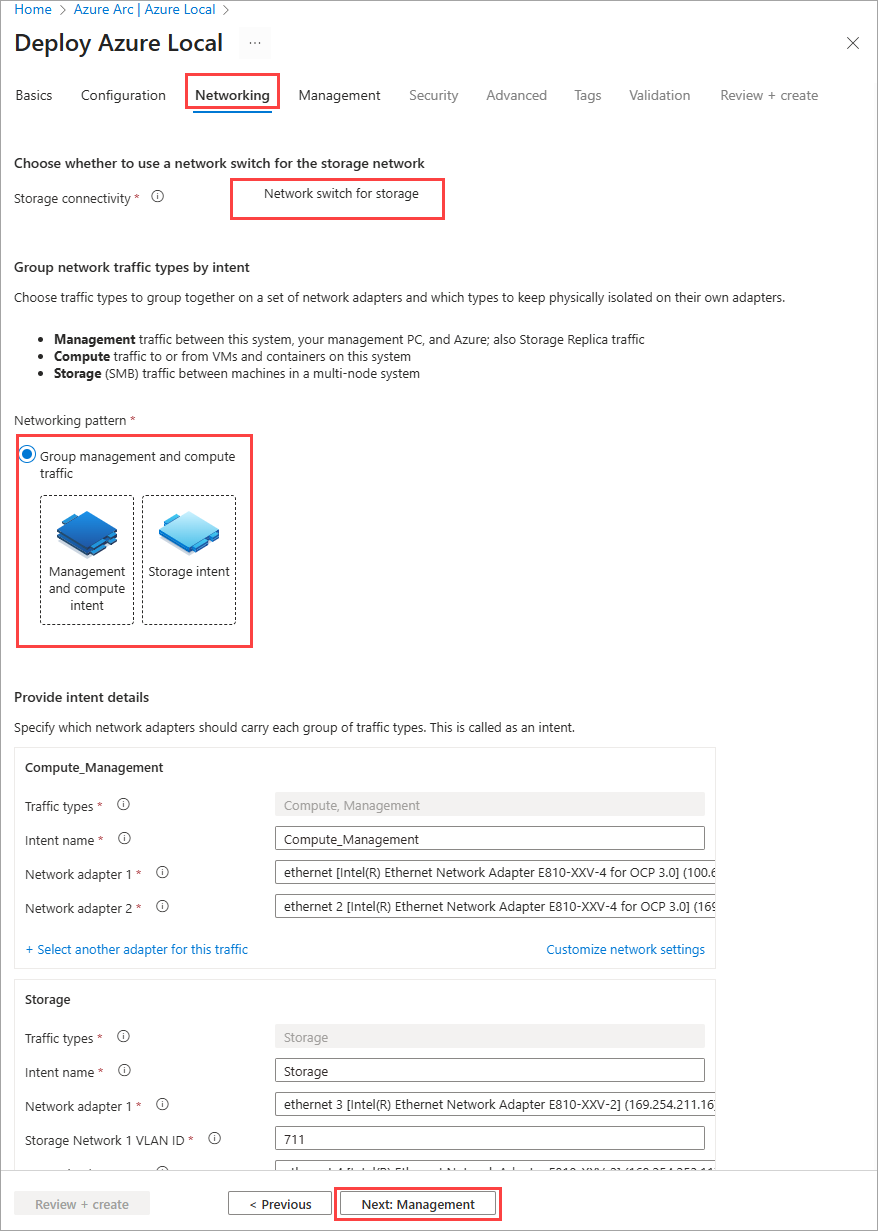
Specify network settings
Choose the only storage connectivity option available for a rack aware cluster as Network switch for storage traffic.
Choose the only networking pattern available for a rack aware cluster as Group management and compute traffic. This groups management and compute traffic together on one set of adapters while keeping storage traffic isolated on dedicated high-speed adapters. You create two network intents:
- Management and compute intent.
- Storage intent.
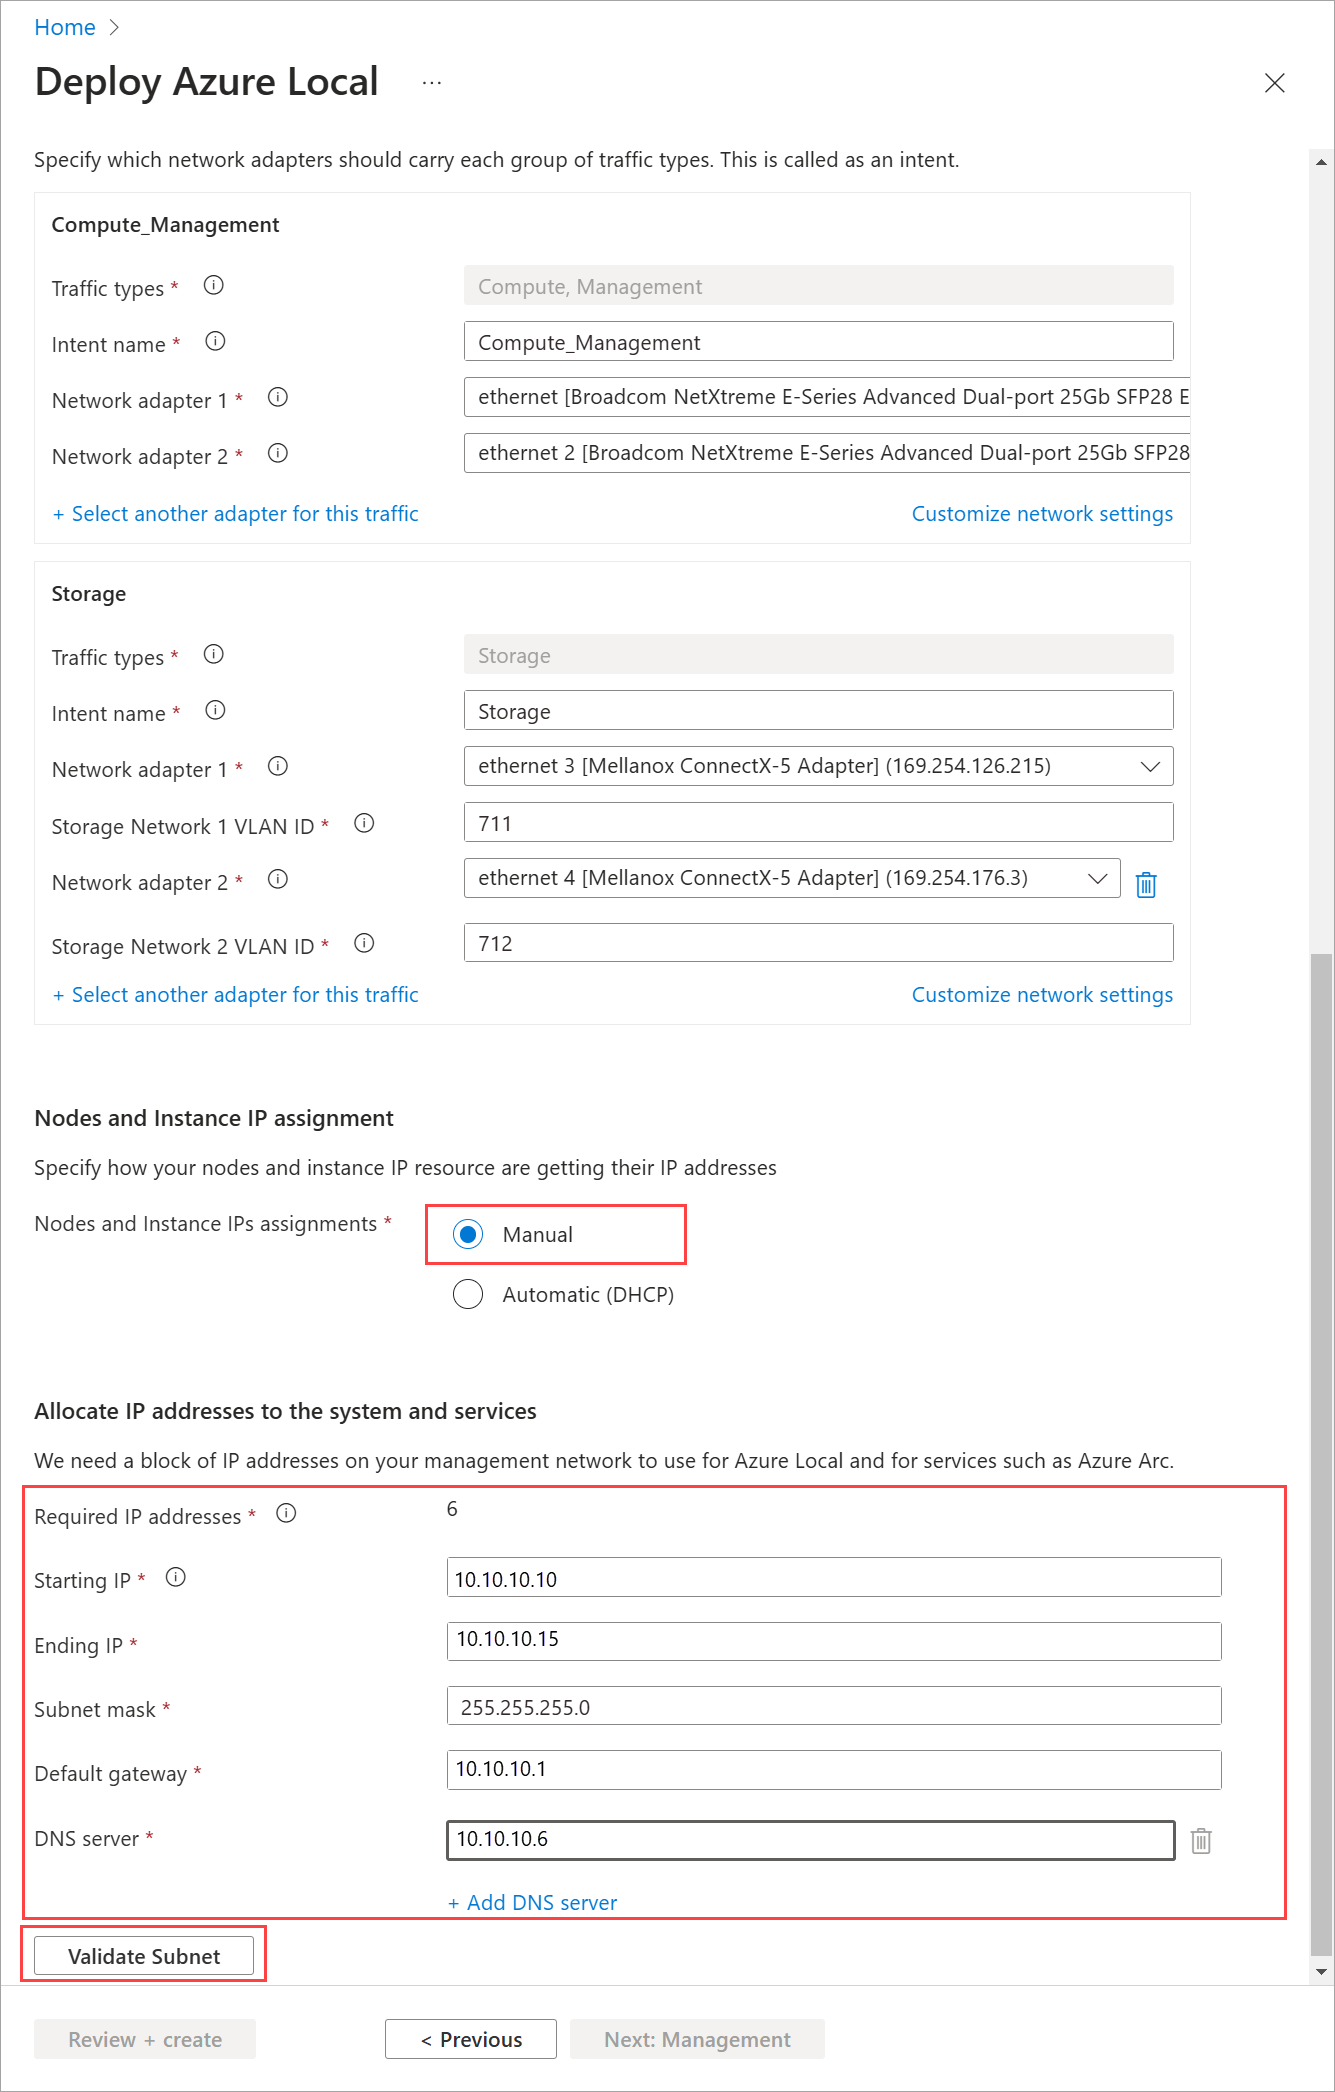
Choose the IP allocation as Manual or Automatic. Use Automatic if you have a DHCP server for IP assignments in your network.
If you chose static IP, provide the following values:
Using the Starting IP and Ending IP (and related) fields, allocate a contiguous block of at least six static IP addresses on your management network's subnet, excluding addresses already used by the machines.
These IPs are used by Azure Local and internal infrastructure (Arc Resource Bridge) that's required for Azure Local VM management and AKS on Azure Local.
Provide the Subnet mask, Default gateway, and one or more DNS servers.
Validate subnet.
Select Next: Management.


Specify management settings
Optionally edit the suggested Custom location name that helps users identify your system when creating resources such as VMs on it.
A cluster witness is required for rack aware cluster. Select an existing Storage account or create a new Storage account to store the cloud witness file.
When selecting an existing account, the dropdown list filters to display only the storage accounts contained in the specified resource group for deployment. You can use the same storage account with multiple clusters; each witness uses less than a kilobyte of storage.
Choose Cloud witness and provide a name for the cloud witness.
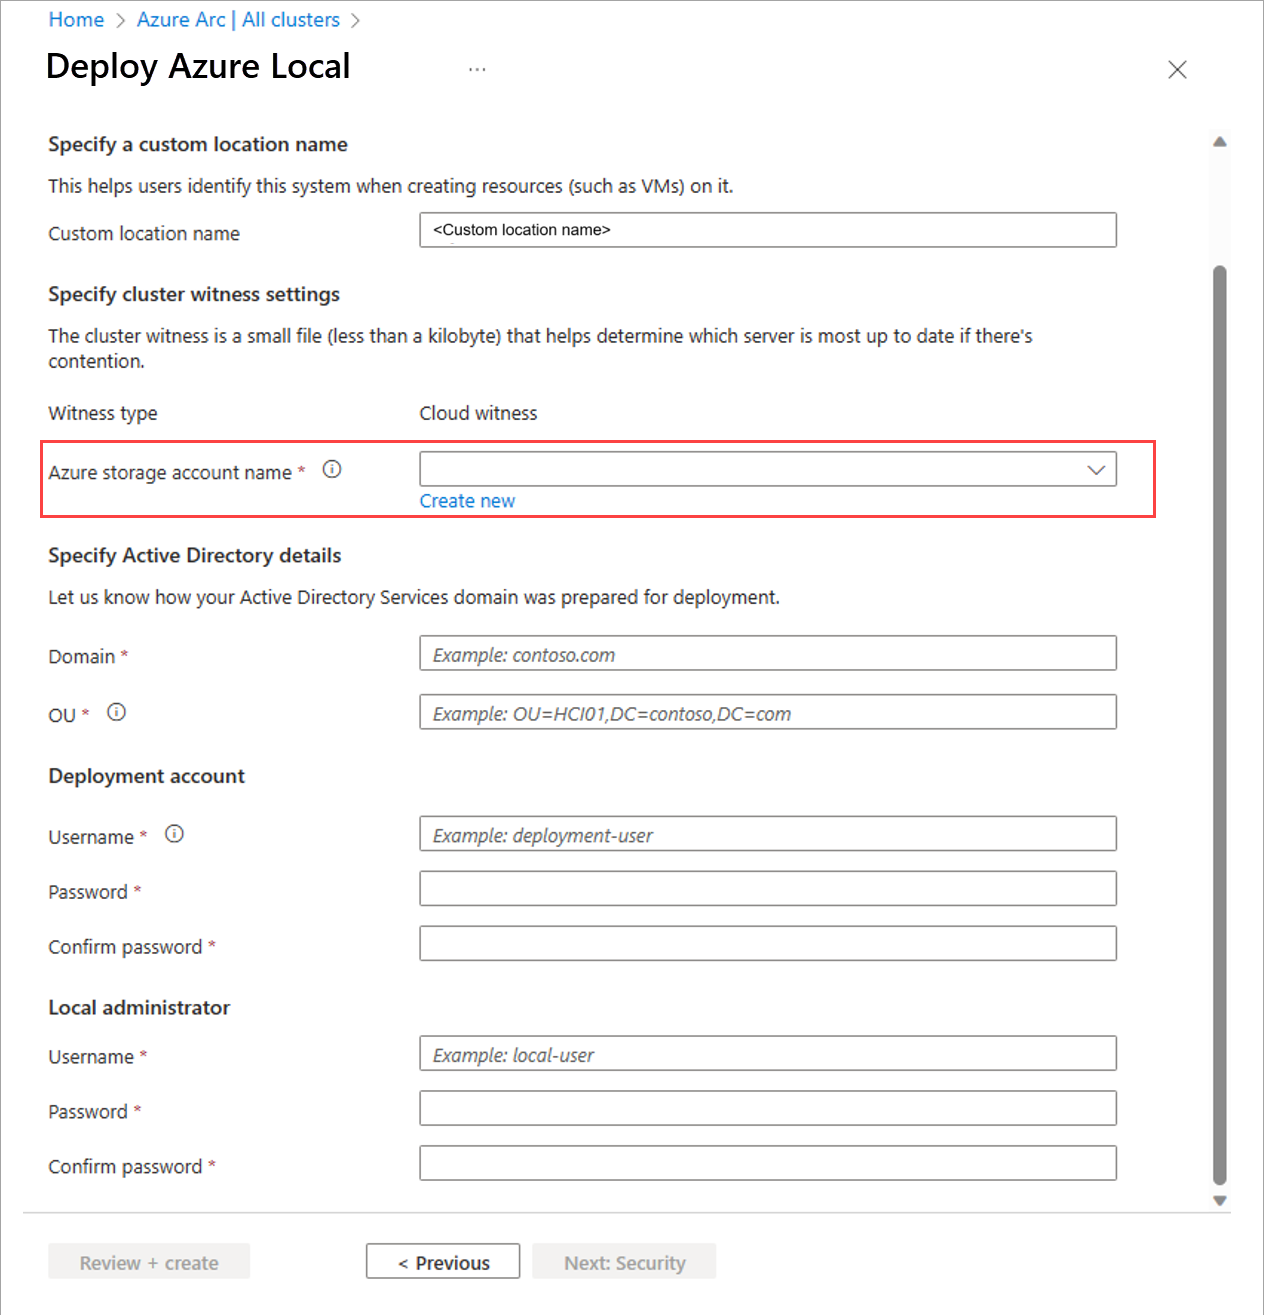
Enter the Active Directory Domain where you deploy your system. This must be the same fully qualified domain name (FQDN) used when the Active Directory Domain Services (AD DS) domain was prepared for deployment.
Enter the OU created for this deployment. The Organizational Unit (OU) can't be at the top level of the domain. For example:
OU=Local001,DC=contoso,DC=com.Enter the Deployment account credentials. This domain user account was created when the domain was prepared for deployment.
Enter the Local administrator credentials for the machines.
The credentials must be identical on all machines in the system. If the current password doesn't meet the complexity requirements (14+ characters long, a lowercase and uppercase character, a numeral, and a special character), you must change it on all machines before proceeding.
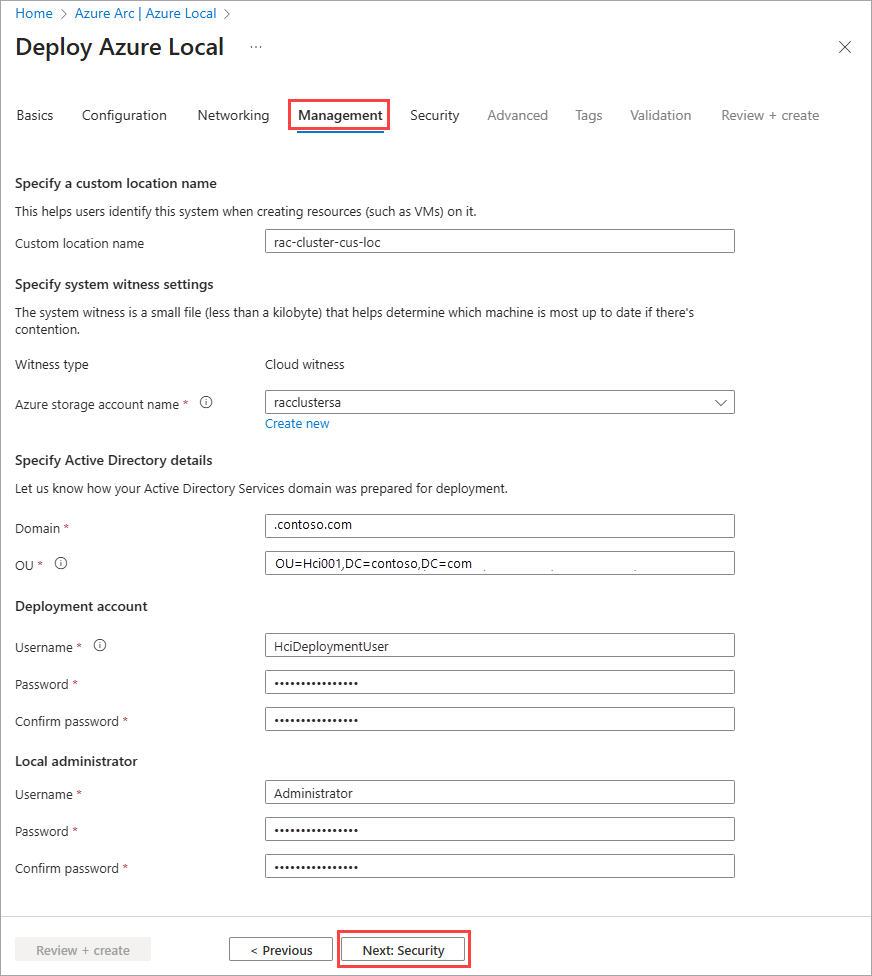
Select Next: Security.


Set the security level
Select the security level for your system's infrastructure:
- Recommended security settings - Sets the highest security settings.
- Customized security settings - Lets you turn off security settings.
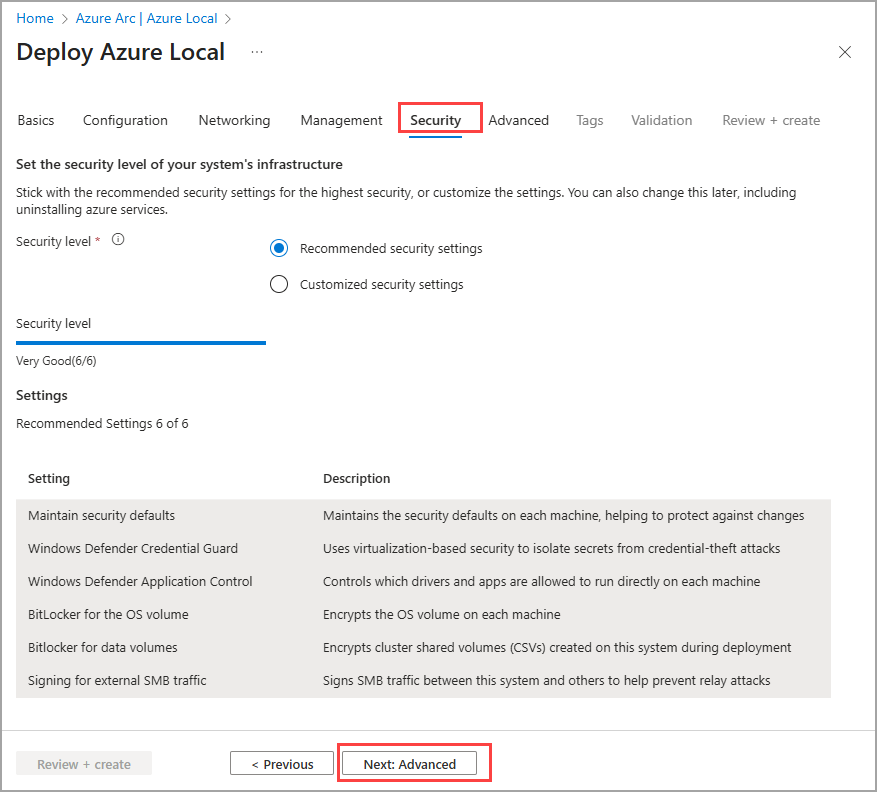
Select Next: Advanced.

Optionally change advanced settings and apply tags
Select the only option available for rack aware cluster, which is for creating workload volumes and required infrastructure volumes (also known as Express mode). This option creates one thinly provisioned volume and storage path per machine for workloads to use. This is in addition to the required one infrastructure volume per cluster.
Important
Don't delete the infrastructure volumes created during deployment.
Here's a summary of the volumes that are created based on the number of machines in your system. To change the resiliency setting of the workload volumes, delete them and re-create them. Be careful not to delete the infrastructure volumes.
# machines Volume resiliency # Infrastructure volumes # Workload volumes Single machine Two-way mirror 1 1 Two machines Two-way mirror 1 2 Three machines + Three-way mirror 1 1 per machine Specify the Local availability zone settings. Ensure servers in the same zone are physically in the same rack. This check isn't validated during the deployment process in this release so the correct configuration is critical. If misconfigured, a single rack failure could take down the entire cluster.
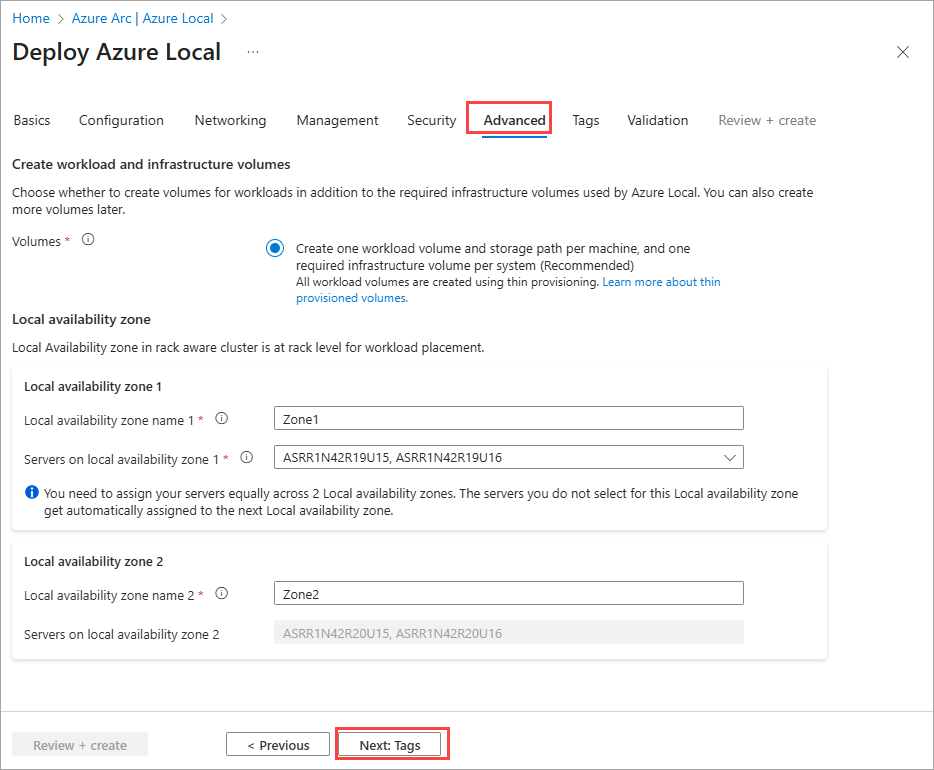
Select Next: Tags.
Optionally add a tag to the Azure Local resource in Azure. Tags are name or value pairs you can use to categorize resources. You can then view consolidated billing for all resources with a specific tag.
Select Next: Validation.
Select Start validation. Validation typically takes about 15 minutes to deploy one to two machines and longer for bigger deployments. Monitor the validation progress.

Validate and deploy the system
After validation completes, review the validation results.
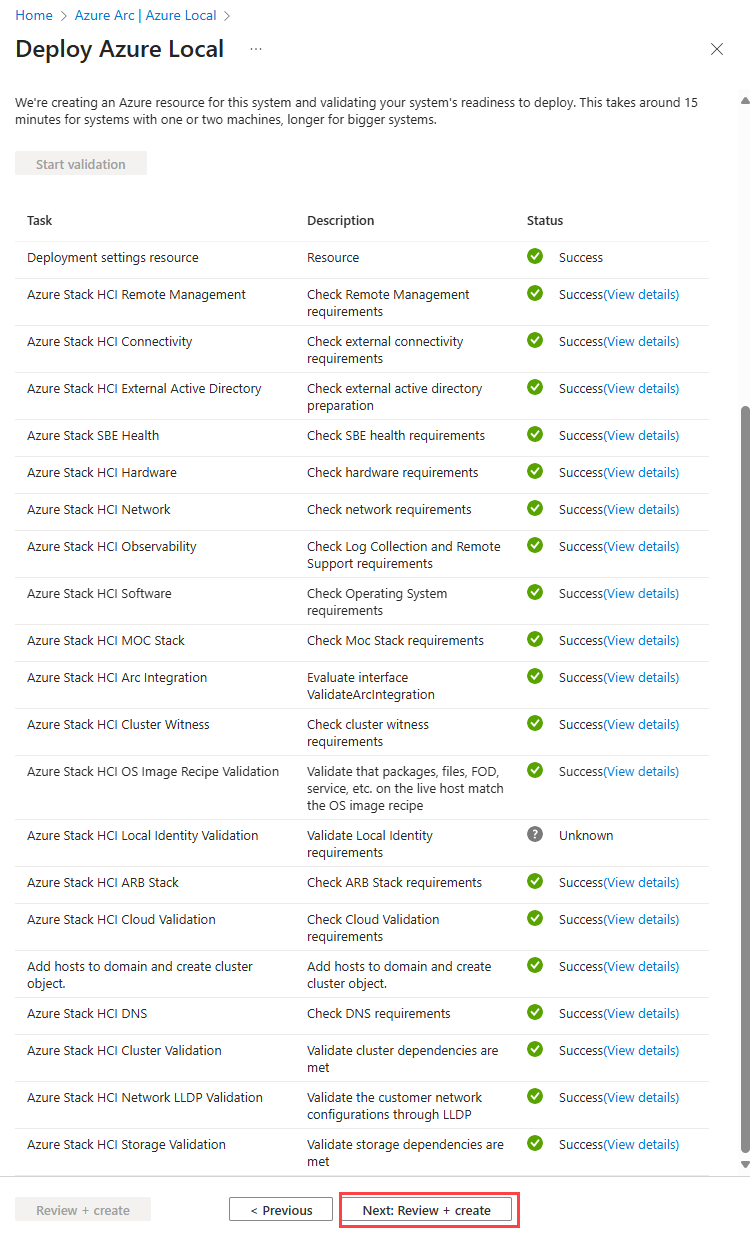
If the validation has any errors, resolve actionable issues.
Select Next: Review + create.
Review the deployment settings and then select Create to deploy the system.
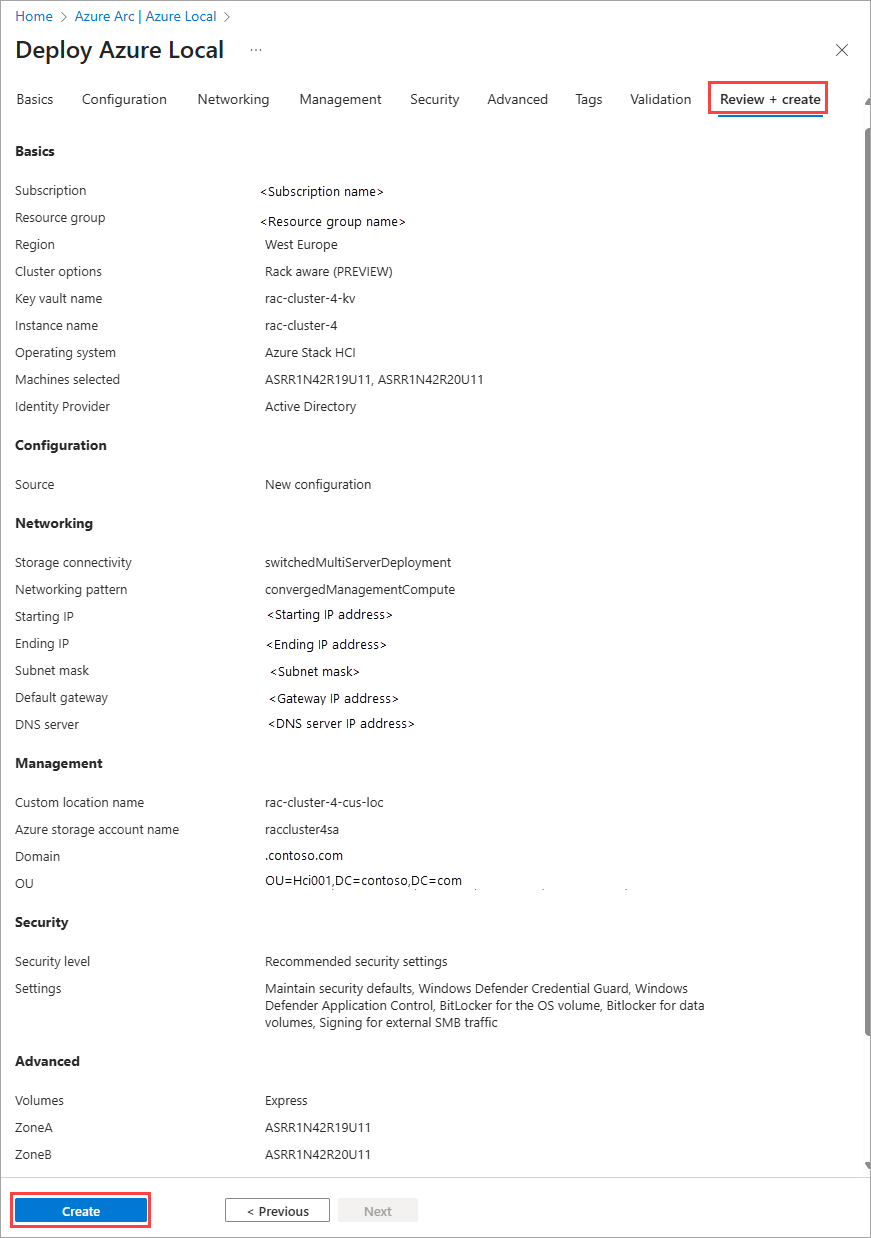
The Deployments page appears.
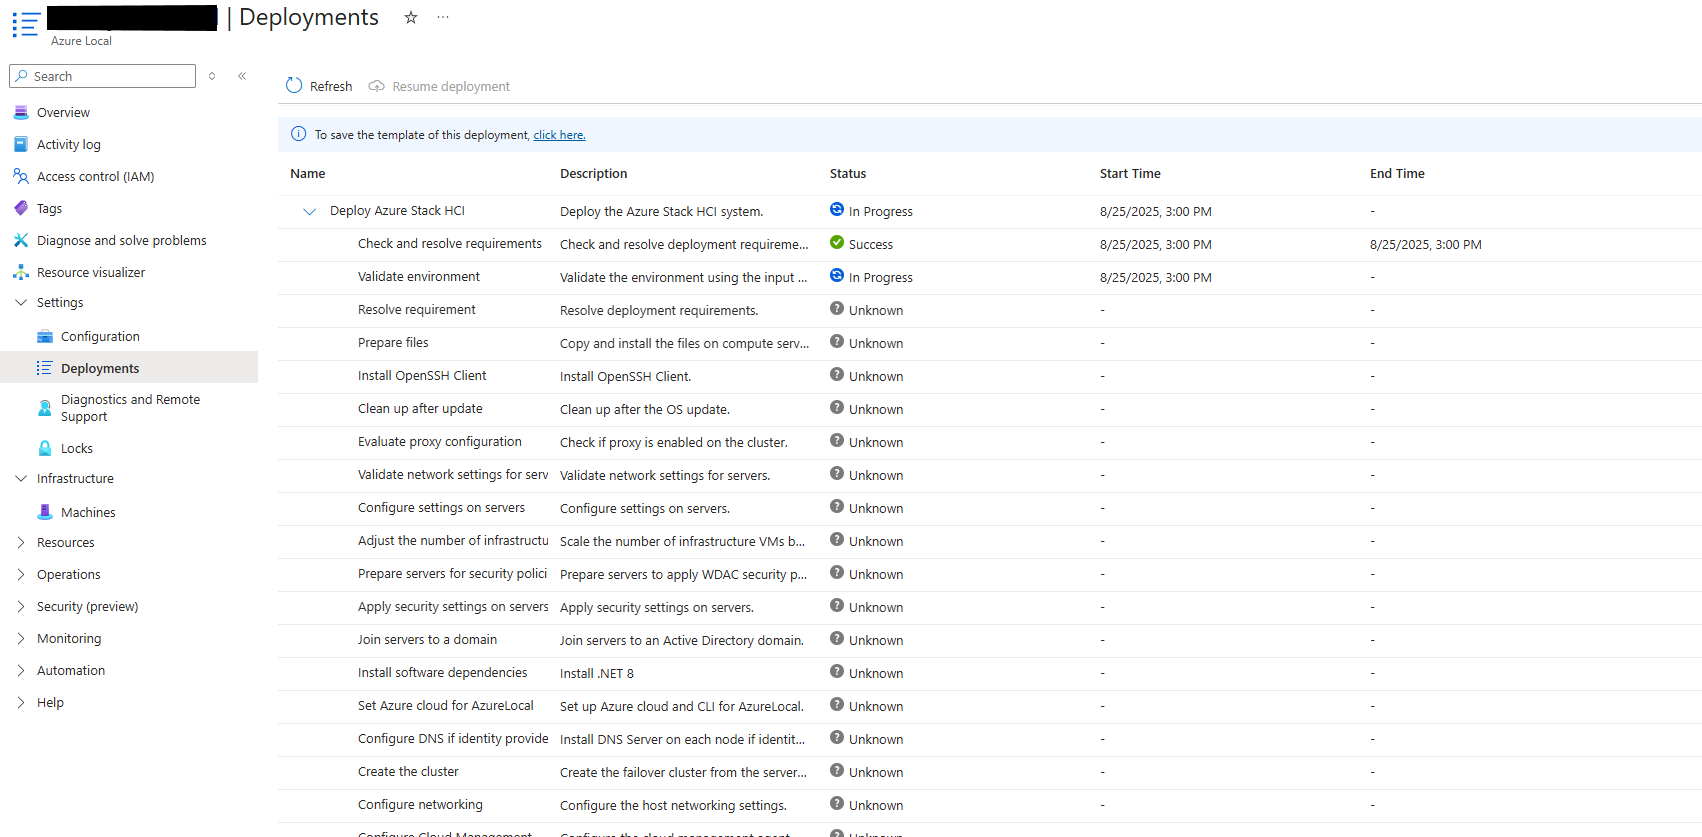
You can monitor the deployment status just like the standard cluster.


Verify a successful deployment
To verify that the system and all associated Azure resources were deployed successfully, follow these steps:
In the Azure portal, go to the resource group where you deployed the system.
On the Overview page, under Resources, confirm that the following items are listed:
Number of resources Resource type 1 per machine Machine - Azure Arc 1 Azure Local 1 Arc Resource Bridge 1 Key vault 1 Custom location 2* Storage account 1 per workload volume Azure Local storage path - Azure Arc * Two storage accounts are created: one for the cloud witness and another for Key Vault audit logs. Both accounts use locally redundant storage (LRS) and have a lock applied.
Next steps
- After the deployment is complete, follow the steps in Post-deployment tasks.
- Get support for Azure Local deployment issues.