Note
Access to this page requires authorization. You can try signing in or changing directories.
Access to this page requires authorization. You can try changing directories.
If you don't set up a Key Vault connection, Azure AI Foundry stores connection details in a Microsoft-managed Key Vault outside your subscription. To manage your own secrets, connect your Azure Key Vault to Azure AI Foundry.
Note
Review limitations before you set up a Key Vault connection.
Limitations
Create Azure Key Vault connections only when you need them.
If you bring your own Azure Key Vault, review these limitations:
Limit Azure Key Vault connections to one per AI Foundry resource. Delete an Azure Key Vault connection only if no other connections exist at the AI Foundry resource or project level.
AI Foundry doesn't support secret migration. Remove and recreate connections yourself.
Deleting the underlying Azure Key Vault breaks the AI Foundry resource. Azure Key Vault stores secrets for connections that don't use Entra ID. Any AI Foundry feature that depends on those connections stops working.
Deleting connection secrets that your AI Foundry resource stores in your bring your own (BYO) Azure Key Vault can break connections to other services.
Create an Azure Key Vault connection
Create a connection to Azure Key Vault.
Go to your project in the Azure AI Foundry portal. If you don't have a project, create one.
Check that there are no connections in the Resource or Project sections. If connections exist, Azure Key Vault isn't available.
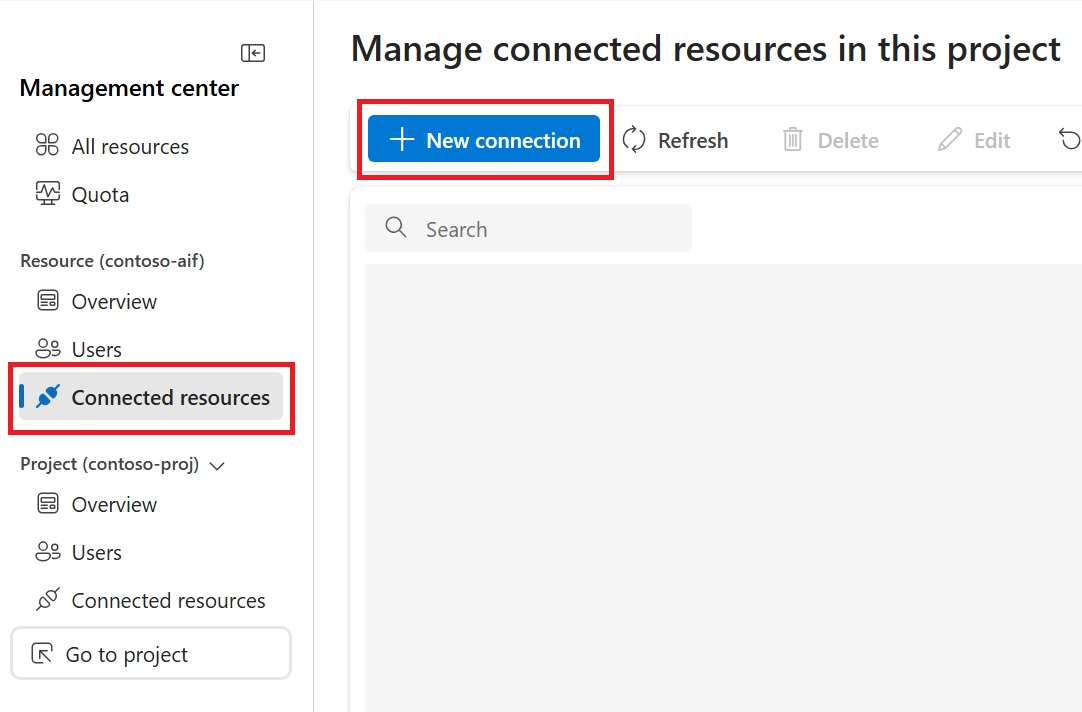
In the Resource section, select Connected resources.
In the Connected resources section, select + New connection.
Select Azure Key Vault.
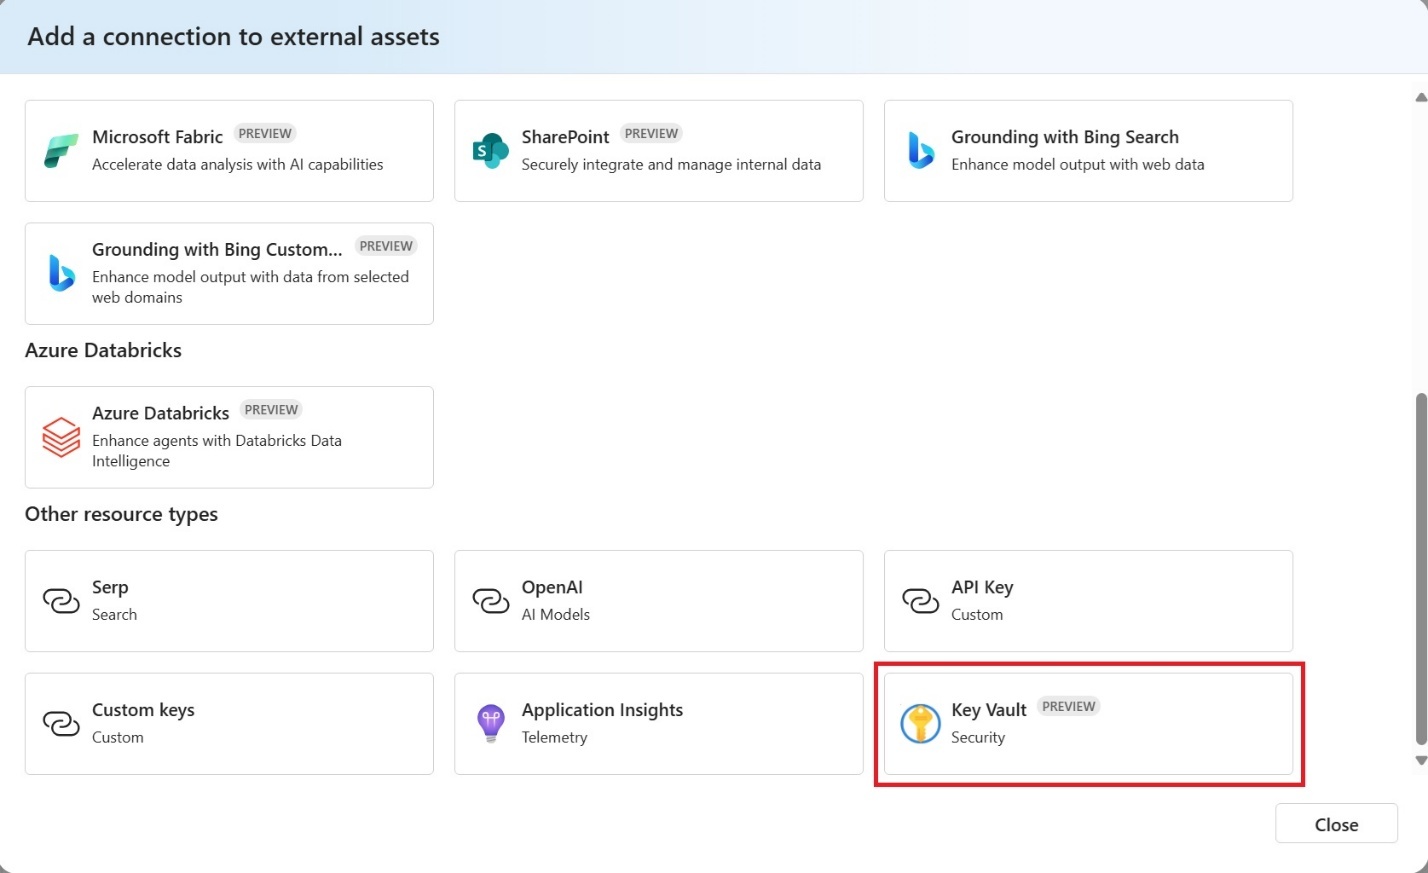
Select your Azure Key Vault, then select Connect.
Create a Key Vault connection
Use this template:
/*

Set up your Key Vault connection

Select which RBAC role to assign:
1. Key Vault Administrator:  00482a5a-887f-4fb3-b363-3b7fe8e74483 - https://free.blessedness.top/en-us/azure/role-based-access-control/built-in-roles/security#key-vault-administrator
2. Key Vault Contributor:    f25e0fa2-a7c8-4377-a976-54943a77a395 - https://free.blessedness.top/en-us/azure/role-based-access-control/built-in-roles/security#key-vault-contributor
3. Key Vault Secret Officer: b86a8fe4-44ce-4948-aee5-eccb2c155cd7 - https://free.blessedness.top/en-us/azure/role-based-access-control/built-in-roles/security#key-vault-secrets-officer
This template defaults to using the Key Vault Secret Officer role.


Run command:
az deployment group create \
  --name AzDeploy \
  --resource-group {RESOURCE-GROUP-NAME} \
  --template-file connection-key-vault.bicep \
  --parameters aiFoundryName={Foundry-resource-name} keyVaultName={KV-resource-name}

az deployment group create --name AzDeploy --resource-group {RESOURCE-GROUP-NAME} --template-file connection-key-vault.bicep --parameters aiFoundryName={Foundry-resource-name} keyVaultName={KV-resource-name}

*/

param aiFoundryName string = '<your-account-name>'
param keyVaultName string
//param resourceGroupName string = '<your-resource-group-name>'


resource aiFoundry 'Microsoft.CognitiveServices/accounts@2025-04-01-preview' existing = {
  name: aiFoundryName
  scope: resourceGroup()
}

// Conditionally refers your existing Azure Key Vault resource
resource existingKeyVault 'Microsoft.KeyVault/vaults@2024-11-01' existing = {
  name: keyVaultName
  scope: resourceGroup()
}

resource connection 'Microsoft.CognitiveServices/accounts/connections@2025-04-01-preview' = {
  name: '${aiFoundryName}-keyvault'
  parent: aiFoundry
  properties: {
    category: 'AzureKeyVault'
    target: existingKeyVault.id
    authType: 'AccountManagedIdentity'
    isSharedToAll: true
    metadata: {
      ApiType: 'Azure'
      ResourceId: existingKeyVault.id
      location: existingKeyVault.location
    }
  }
}

// Include RBAC on Key Vault for Foundry
resource rbacAssignment 'Microsoft.Authorization/roleAssignments@2020-04-01-preview' = {
  name: guid(existingKeyVault.id, 'KeyVaultSecretsOfficer')
  scope: existingKeyVault
  properties: {
    roleDefinitionId: '/providers/Microsoft.Authorization/roleDefinitions/b86a8fe4-44ce-4948-aee5-eccb2c155cd7'
    principalId: aiFoundry.identity.principalId
  }
}

// All following connections should be created with the dependsOn property for both the key vault connection and the role assignment
Key Vault connection management
Creation
Create a Key Vault connection only when it's the only connection. Make sure no other connections exist at the Foundry resource or project level. The service blocks Key Vault connection creation if other connections are present. If the UI doesn't show a Key Vault connection category when you choose a connection, this can be the reason. Delete other connections, and then try again.
When you create a Key Vault connection, the managed Key Vault in Azure isn't used.
Deletion
Before you delete an Azure Key Vault connection from AI Foundry, remove all other connections. After you remove all other connections at the Foundry resource and project levels, delete the Key Vault connection. Foundry doesn't support secret migration.
Update or change
To switch from Azure Key Vault 1 to Azure Key Vault 2, delete the Azure Key Vault 1 connection, and then create the Azure Key Vault 2 connection. Follow the deletion and creation steps, and migrate any connection secrets.
Key Vault secret lifecycle
When you delete connections from your managed Key Vault, the corresponding secrets are deleted. Deleting a Key Vault connection also deletes its secrets.
Granting AI Foundry access to your key vault
Depending on how your key vault is provisioned, you might need to apply additional permissions. Check whether your Azure Key Vault uses role-based access control (RBAC) or access policies, and then continue.
Role-based access control (RBAC)
After you create the Key Vault connection, assign an appropriate RBAC role in the Azure portal. Key Vault Contributor or Key Vault Administrator are two roles that work. For minimal permissions, use the Key Vault Secrets Officer.
Access policies
Similar to RBAC roles, assign the appropriate key vault access policy (if applicable) to the Foundry resource's managed identity.
Infrastructure as code templates
As a best practice, when setting up ARM, Bicep, or Terraform templates to create resources, make sure the Azure Key Vault connection is the first connection you create, and make all other connections depend on the Key Vault connection succeeding. This order helps reduce Key Vault connection failures. If you don't follow this best practice, your templates can encounter race conditions across your connections. As a result, deployments can work sometimes and fail at other times because Foundry doesn't support secret migration.
After you create the Foundry resource and the Key Vault connection, assign the appropriate RBAC roles to the Foundry resource. Make all other connections depend on this role assignment succeeding. The same applies if your Key Vault uses access policies instead of RBAC.
Follow this order in your infrastructure as code templates
- Create the Foundry resource.
- Create a Foundry project.
- Create the Azure Key Vault connection.
- Assign the appropriate RBAC role on the Key Vault for the Foundry resource.
- (Optional) Validate that the RBAC role has taken effect.
- Create any other connections at the resource or project level, and set the
dependsOnfield for steps 3 and 4.
Deletion
For cleanup, if you automate resource deletion by using templates, follow the creation steps in reverse:
- Delete all connections at the Foundry resource or project level.
- Delete the Azure Key Vault connection.
- Delete all Foundry projects.
- Delete the Foundry resource.